

Mastering Subtle Light: A Guide to the Gentle iPhone Flashlight
The iPhone flashlight does not need to be painfully bright to be useful. In most cases, making it less harsh comes down to three small changes: lower the brightness, change the beam angle, and stop using direct light when reflected light would do the job better.
“The real problem is not raw output. It is the midnight combination of dark-adapted eyes and a beam that hits like a tiny spotlight when all you wanted was to find a charger without waking your whole nervous system.”
This guide helps you reduce glare and soften the beam without buying new gear or testing gimmicks. We start with Apple’s built-in controls, then fix the geometry and habits that usually make light sensitivity worse.
Small change, big payoff. The first fix takes under a minute.
Table of Contents
Fast Answer: To make the iPhone flashlight less harsh, start by lowering the flashlight brightness in Control Center, then switch from direct beam to reflected light whenever possible. For many people, the sting comes from sudden intensity plus bad aim, not from a lack of light. A lower setting, a floor or wall bounce, and a repeatable nighttime routine usually make the biggest difference first.
Start Here First: What “Less Harsh” Actually Means on an iPhone
The problem is often glare and sudden intensity, not just brightness
When people say the flashlight is “too bright,” they often mean something more specific. They mean the light arrives too suddenly, reflects too hard, or hits from the wrong angle. That matters because the solution changes with the problem. A beam aimed at glossy tile at midnight behaves differently from a beam aimed under a sofa at noon. Same flashlight. Totally different experience.
I learned this the boring way, which is how most useful household knowledge arrives. I once turned on my phone torch while it was still angled toward my cheek in a dark hallway and got that instant, full-body flinch that makes you feel briefly betrayed by your own pocket. The phone had not become stronger in two seconds. I had simply created the perfect tiny disaster: dark-adapted eyes, close distance, and bad geometry.
Why the default flashlight experience feels more aggressive than people expect
Phone flashlights are built to be effective quickly. That is great when you are finding a dropped key in a parking lot. It is less charming when you are half awake and trying not to feel like a moth caught in a lab. Bright light can trigger discomfort in people with light sensitivity, and the American Academy of Ophthalmology describes light sensitivity as a symptom that can accompany several eye and neurologic issues. That does not mean every unpleasant flashlight moment is a medical problem. It does mean the “just deal with it” school of thought is not especially wise.
“Too bright” and “badly aimed” are not the same problem
This distinction is the hinge for the whole article. If the beam is too intense for the task, dim it. If the beam is fine but the reflection is brutal, change the angle. If the close-up task is causing the shock, increase distance and let the light spread. Good flashlight use is part settings, part choreography. Tiny stage directions, big payoff.
- Dim the beam before changing anything else
- Assume reflections are part of the problem
- Treat nighttime use differently from daytime use
Apply in 60 seconds: Turn the flashlight on at a lower level while the phone is pointed at the floor, not your face.
Quick Fix First: Lower the iPhone Flashlight Brightness Before Anything Else
How to adjust flashlight intensity from Control Center
Apple’s current support guidance says you can change flashlight brightness by opening Control Center, pressing and holding the Flashlight control, and dragging the slider up or down. On iPhones with Face ID, you open Control Center by swiping down from the upper-right corner. On models with a Home button, you swipe up from the bottom edge. It is one of those features that is obvious only after somebody bothers to tell you.
That slider is the most important part of this whole setup because it solves the problem nearest the source. People often tinker with screen brightness, Dark Mode, or Night Shift first because those are familiar. The flashlight, meanwhile, keeps doing its tiny sun impression in the background. If your real issue is display comfort rather than the beam itself, it helps to understand the difference between Reduce White Point and Night Shift on iPhone before you start changing the wrong setting.
Why a lower setting often feels dramatically better at night
At night, your eyes have already settled into darker conditions. That does not make you fragile. It just means sudden bright light feels more aggressive than the same light would feel in daylight. The result is not subtle. One step down on the flashlight can feel like the difference between useful and rude.
In practical terms, most close-range tasks do not need maximum output. Looking in a bag, checking a lock, finding a cable, reading a label, or making sure the cat did not knock something under the table are all jobs where spread and control matter more than raw force. Maximum brightness is often overkill wearing a name tag.
The best default level for comfort is rarely the maximum
If you are light-sensitive, your default should probably not be “full blast unless proven innocent.” It should be the opposite. Start low, then climb only if the task truly needs more reach. I tend to think of it like stove heat. You can always turn a burner up. It is much harder to uncook garlic. Same principle. Less smoke, more control.
Eligibility checklist: Is a simple brightness change likely to help you?
- Yes: The flashlight feels worst during close-up tasks
- Yes: The shock is strongest in dark rooms or right after waking
- Yes: You usually use the flashlight at full power without thinking
- No: The discomfort comes with eye pain, persistent redness, vision changes, or headaches that need medical evaluation
Next step: Test the lowest comfortable brightness for one ordinary task tonight.
Show me the nerdy details
Brightness controls change output, but comfort also depends on beam concentration, reflective surfaces, distance, and your current adaptation to the dark. That is why two people can use the same flashlight at the same setting and have very different reactions.
Angle Changes Everything: Stop Pointing the Beam Like a Spotlight
Direct beam vs reflected light: which one feels easier on the eyes
Direct beam is efficient, but it can be harsh because it sends a concentrated burst exactly where you point it. Reflected light, by contrast, spreads out. When you bounce the beam off a nearby wall, floor, or ceiling, the light softens before it reaches your eyes and the object you are trying to see. You lose some punch. You gain comfort and context. For many indoor tasks, that is a good trade.
Think of the difference between a solo trumpet one foot from your ear and the same note heard from the back of the hall. Same instrument. Entirely different relationship to your nervous system.
Why aiming at the floor, wall, or ceiling can soften the experience
Aiming at the floor often works best for navigation because it lights your path without sending the hotspot straight into mirrors, faces, or door hardware. Aiming at a wall can help when you need broader room awareness. Aiming at the ceiling works in some small spaces, though white ceilings can sometimes punch more light back than you wanted. Floors are often the friendlier first experiment. If you live with bright reflective flooring, the behavior of bounce light can change a lot on white tile floors that throw glare back at your eyes.
One of my quiet household upgrades was learning to turn on the flashlight after lowering the phone and before lifting my gaze. That tiny sequence change took maybe half a second, and it removed a surprising amount of irritation from nightly life.
Here’s what no one tells you: harshness is often a geometry problem
People blame the LED itself, and sometimes fairly. But often the villain is beam geometry: distance too short, angle too direct, reflection too glossy, target too close to eye level. Once you understand that, the flashlight stops feeling like a yes-or-no proposition. It becomes adjustable behavior.
- For walking: point downward and ahead
- For finding objects: bounce off a surface first
- For close work: hold farther back and let the beam spread
- For reflective rooms: use less brightness than you think you need
Night Use Gets Tricky: Why the Same Flashlight Feels Worse in the Dark
Dark adaptation makes bright LED light feel more punishing
At night, your eyes and brain are already tuned to lower light. That is why an ordinary flashlight can feel theatrically rude in a dark bathroom or hallway. You are not becoming dramatic. The contrast is simply higher. The beam arrives against a darker baseline, so the jump feels sharper.
The American Academy of Ophthalmology notes that light sensitivity can show up in many contexts, including dry eye, migraine, corneal problems, and inflammation. Again, this article is not diagnosing anything. It is just acknowledging that for some readers, “that flashlight feels awful” is not laziness or preference. It is a meaningful comfort problem worth solving gently.
Why late-night bathroom and hallway use tends to trigger the biggest discomfort
Bathrooms and hallways are little glare machines. Tile, mirrors, painted walls, chrome fixtures, pale counters, and glossy doors all throw light around with enthusiasm. Add sleepy eyes and short distance, and you have built a tiny optical pinball machine. The flashlight is only one player in that game. The room is the rest. If that sounds familiar, the broader problem of bathroom mirror glare at night is often part of the same story.
A gentler nighttime routine starts before you tap the flashlight icon
The best time to reduce shock is before the light comes on. Lower the phone. Decide where you want the beam to land. Choose a lower brightness first. Then turn it on. This sounds almost comically simple, which is often the sign of a method that actually survives real life.
- Dark rooms magnify the feeling of glare
- Mirrors, tiles, and white surfaces bounce more light back
- Sequence matters: aim first, then switch on
Apply in 60 seconds: Before bed, practice turning the flashlight on while the phone is already angled toward the floor.
Who This Is For, and Who It Is Not For
This is for users who find the iPhone flashlight painfully intense or visually jarring
If the flashlight feels too aggressive during ordinary tasks, this guide is for you. It is also for people who do fine with most indoor light but hate sudden LED exposure at close range. That distinction matters. Some readers are not broadly light-sensitive all day. They are specifically “surprise-bright-light-sensitive,” which is a different little beast.
This is for people trying to reduce glare during nighttime navigation or quick tasks
The strategies here fit real-life moments: checking the bathroom without waking your whole visual system, finding something in a drawer, making your way across a dark room, reading a switch label, or locating a charger cable that has slithered behind a nightstand like it pays rent there. If nighttime movement itself feels risky or stressful, a more complete nighttime bathroom safety routine for low vision may help beyond flashlight technique alone.
This is not a fix for every cause of light sensitivity or eye discomfort
If you have significant eye pain, new vision changes, redness, one-sided symptoms, flashes, severe headache, or symptoms that keep escalating, a phone-light strategy is not the main event. It is reasonable to seek medical advice. AAO and other eye-health authorities describe light sensitivity as a symptom with a wide range of causes, not a standalone diagnosis.
Decision card: When is the iPhone flashlight enough, and when is it the wrong tool?
Use the iPhone flashlight when the task is short, close-range, and you can dim or bounce the beam.
Use another light source when you need warmer light, hands-free use, wide room lighting, or long-duration comfort.
Neutral action: Match the tool to the task, not to habit.
Common Mistakes: The Tiny Habits That Make the Flashlight Feel Brutal
Using full brightness every time, even for close-up tasks
This is the biggest one. People use the brightest setting because it feels safer or more certain. But for close work, excessive brightness can create more glare than information. You do not need stadium lighting to check a zipper.
Turning it on while the phone is pointed near your face
This habit produces the classic pocket-sun ambush. It is especially common when people swipe into Control Center while holding the phone upright near the chest or chin. Change the order. Lower first. Tap second.
Using the flashlight as a searchlight when a softer bounce would work better
The flashlight is not obliged to perform every task by brute force. When readers tell me a light feels hostile, the answer is often not “less flashlight forever.” It is “less direct beam, more indirect light.” That nuance saves a lot of frustration.
Let’s be honest: most people are not using too little control, but too little intention
The small irony here is that the iPhone flashlight is already more adjustable than many users realize. The roughness often comes from rushing, not from the hardware being incapable of subtlety. In other words, this is not a morality tale about discipline. It is a choreography fix. We are editing motion, not character.
- Bad habit: full brightness by reflex
- Better habit: low start, raise only if needed
- Bad habit: beam near face
- Better habit: beam toward floor before activation
- Bad habit: direct hit on glossy surfaces
- Better habit: indirect bounce or wider distance
Don’t Do This: “More Light” Can Quietly Make Visibility Worse
Why overpowering reflective surfaces can create more glare, not more clarity
There is a point where brightness stops helping and starts flattening. On reflective surfaces, the hotspot can overwhelm the details you were trying to see. You get a bright patch and less useful information. It is the visual version of someone shouting directions three inches from your ear.
When white walls, mirrors, tiles, and glossy counters become the real problem
Some rooms are basically accomplices. White bathroom walls, polished counters, shiny cabinet paint, mirrors, metal fixtures, glossy phone cases, even certain laminated labels can all amplify the beam. In those spaces, lower brightness is not a compromise. It is better technique. The same principle shows up in glare from under-cabinet lighting on glossy surfaces, where more output can quietly make visibility worse.
How excessive brightness can flatten detail in the very thing you are trying to see
If you have ever blasted a label, receipt, or lock with the flashlight and somehow made it harder to see, you have met this problem already. Too much light can wipe out contrast at close range. More is not always more. Sometimes it is just louder. For small printed text, pairing gentler light with better camera setup often works better, especially if you already use iPhone receipt reading settings that make close-up text easier to capture.
Mini calculator: How much light do you really need?
Ask three questions:
- Is the task within arm’s length?
- Is the room full of reflective surfaces?
- Do you only need the light for under 30 seconds?
If you answered “yes” to 2 or more, start at a low flashlight level and try reflected light first.
Neutral action: Reduce intensity before blaming your eyes or the phone.
Softer in Practice: Better Ways to Use the Flashlight for Real-Life Tasks
Finding something under the bed without blasting your eyes
Lower the brightness first. Kneel or squat so you are not looking straight down the beam. Aim the light at the floor in front of the bed or at a nearby wall to create spill light. This usually reveals shapes well enough without the shock of a direct hit. It is not glamorous, but neither is being personally offended by your own furniture at 1 a.m.
Walking through a dark room without lighting the whole space like a stage
Point the phone downward at a shallow angle so the light lands several feet ahead. That gives you path information without turning every object into a bright-edged opinion. For navigation, broad and soft usually beats narrow and intense.
Checking a bag, drawer, or lock with less visual shock
For bags and drawers, hold the phone slightly farther back than you first want to. A bit more distance lets the beam spread. For locks or keyholes, aim beside the hardware first, then edge inward until you have enough detail. Tiny adjustments outperform force here. If locating the right key is part of the struggle, a separate low-vision key identification system can reduce how often you need harsh close-range lighting in the first place.
Reading labels or switches without turning a close task into glare
Use the flashlight from off-axis rather than head-on. Side lighting often preserves texture and lettering better than direct front lighting. I use this trick for labels on medicine bottles, appliance switches, and cables. It is the flashlight equivalent of better handwriting margins. Small discipline, much less chaos. When the real issue is magnification more than brightness, some readers do better by setting up iPhone Back Tap to launch Magnifier quickly instead of relying on the flashlight alone.
Short Story: A reader once told me she thought she needed a totally different phone because the flashlight felt unbearable during nighttime wake-ups. Instead, she changed three things. She dropped the flashlight one brightness step, aimed at the hallway floor before turning it on, and stopped using it head-on in the bathroom mirror zone. The first night felt odd only because the old routine had been automatic.
By the third night, the new sequence had become normal. Nothing magical happened. The room did not become warmer. The LED did not become smarter. But the shock disappeared enough that she stopped dreading the moment. That is the sort of improvement I trust most. Quiet, repeatable, and boring in the best possible way.
Infographic: The 3-Step Low-Glare Flashlight Routine
1. Dim First
Open Control Center, press and hold the flashlight, and start at a lower level.
2. Aim Away
Point toward the floor or wall before turning the beam on.
3. Bounce If Possible
Use reflected light for short indoor tasks, then go direct only if needed.
Accessories and Workarounds: What Helps, What Backfires
When a diffuser trick helps, and when it just makes the light clumsy or unsafe
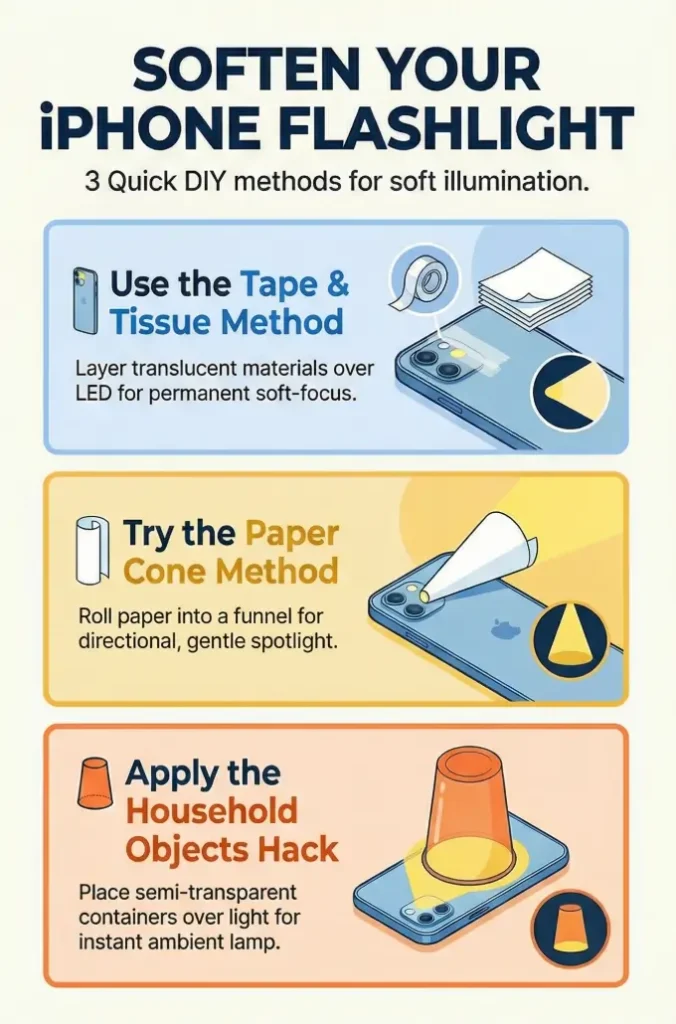
Some people experiment with makeshift diffusion, such as a thin layer of tissue or another translucent material. In very controlled situations, diffusion can soften the beam. But it can also cut output unpredictably, shift the beam shape, trap heat against the light source, or make the phone fussy to handle. For quick household use, I usually think settings and angle beat improvised attachments.
Why screen brightness settings do not solve flashlight harshness
This is the great category error. Apple’s display settings affect the screen. The flashlight is a separate LED light source. Reducing screen brightness can make the phone itself more comfortable to look at, but it does not make the flashlight beam warmer or gentler. Apple documents flashlight brightness control separately from display brightness and Night Shift, which is your clue that they are doing different jobs. If the screen still feels too bright at night, that is a different problem from flashlight harshness and may call for techniques like making the iPhone screen dimmer than the normal minimum.
Red or warm light alternatives: when another device may be the better tool
Sometimes the right answer is not to keep negotiating with the wrong light source. A small warm bedside lamp, a dim rechargeable book light, a red-light task light, or a soft night light may simply suit your use case better. If the task happens nightly and predictably, another device can be more comfortable than wrestling with a bright white LED every time. In rooms where placement matters as much as bulb choice, good reading lamp positioning for sensitive eyes can teach the same lesson in a calmer form.
Quote-prep list: If you are considering a separate low-glare light, gather this first.
- Where you use light most often: bed, bathroom, hallway, closet, car
- How long each use lasts: under 30 seconds or several minutes
- Whether hands-free lighting matters
- Whether warm or red light feels better than cool white light
Neutral action: Choose the light source based on the task that annoys you most often.
Don’t Confuse These Settings: Flashlight Brightness Is Not the Same as Display Comfort
Reduce White Point, Night Shift, and Dark Mode do different jobs
These settings are useful, but they are screen tools. Reduce White Point can lower the intensity of bright display colors. Night Shift warms screen color temperature. Dark Mode changes the appearance of app interfaces. All of that can improve how the display feels to your eyes. None of it changes the flashlight LED itself. Apple’s support documentation treats flashlight brightness separately from display color and brightness controls, which is the cleanest way to understand the boundary.
Why your screen can feel comfortable while the flashlight still feels awful
This confuses a lot of people because both experiences happen on the same device. But one is emitted from the screen you look at directly, and the other is an external beam projected into the room. Your phone can be wonderfully dim and warm in your hand while the flashlight is still preparing a tiny revolt.
Here’s what no one tells you: display tweaks do not retrain a bright LED beam
Comfort with a display does not automatically transfer to comfort with a flashlight. The jobs are different, the light path is different, and the fixes are different. Once you stop asking the screen settings to solve a flashlight problem, the whole setup becomes more rational. That is why articles about screen comfort settings like Reduce White Point versus Night Shift belong in a separate mental drawer from flashlight technique.
Show me the nerdy details
Display comfort settings alter luminance, color balance, and interface presentation on the screen you view directly. A flashlight is a separate point light source whose harshness depends heavily on beam intensity, environmental reflectance, and viewing angle.
Build a Low-Glare Routine: The Goal Is Predictable Light, Not Emergency Light
Choose one lower default level and stick with it
Habits matter most when you are tired. Pick one lower flashlight setting that works for most indoor tasks and treat it as your personal default. This reduces decision-making and prevents the all-too-human tendency to go straight to maximum because you are sleepy, rushed, or mildly annoyed at a charger cable.
Turn the flashlight on only after aiming away from your eyes
This is the single best behavior change for many readers. Not the fanciest. Not the most technological. Just the most consistently helpful. Phone down. Beam away. Light on. Then move. Those four words do more work than a lot of gadget shopping.
Use reflected light first, direct beam second
Reflected light is not a compromise for many indoor tasks. It is often the better first option. Direct beam should be the escalation, not the opening move. Once you adopt that order, the flashlight stops feeling like a jump scare and starts behaving like a tool.
Small routine, big payoff: comfort improves when surprise disappears
Much of what feels unbearable about harsh light is surprise. When the shock disappears, comfort often improves more than expected. That is why routine matters. Predictability is not glamorous, but it is deeply merciful to a sensitive nervous system.
- Pick a lower default brightness
- Aim away before activation
- Use bounce-lighting whenever the task allows
Apply in 60 seconds: Rehearse your four-word sequence once now: phone down, beam away, light on, then move.
Next Step: Change One Habit Tonight, Not Ten
Lower the flashlight one step and test bounce-lighting off a wall or floor
If you change everything at once, you will not know what actually helped. So do less. Lower the flashlight one step. Then try aiming it at the floor or wall for one routine task. That is enough to produce a clear before-and-after.
Use that setup for one common nighttime task and compare the difference
Choose a task you already do often: hallway walk, bag check, bathroom trip, drawer search, label read, lock check. Repetition is your friend here because it lets you compare the feeling honestly instead of guessing from memory. If you routinely use your phone camera for close-up tasks in dim light, it may also be worth comparing this method with iPhone scan settings for low vision so you are not forcing the flashlight to do a document-reading job.
Keep the version that reduces shock without making the task harder
The goal is not dimness for its own sake. The goal is usable light without the shock. That phrase from the beginning matters because it closes the loop. We are not trying to win a purity contest about low light. We are trying to make the task easier on your eyes while still getting it done in under a minute.
And that is the quietly useful truth: most people do not need a heroic fix. They need a calmer sequence, a lower setting, and the humility to let a wall help. Technology, occasionally, becomes kinder when we stop asking it to perform like a sword and let it behave like a lamp.
FAQ
How do I dim the flashlight on an iPhone?
Open Control Center, press and hold the Flashlight control, then drag the brightness slider down. Apple documents this as the built-in way to change flashlight intensity.
Can I make the iPhone flashlight warmer instead of cooler?
Not with standard iPhone flashlight controls. Apple lets you adjust flashlight brightness, but the usual user-facing controls do not offer a warm-color setting for the flashlight beam. If warm light helps you more, a separate lamp or warm task light may be the better tool.
Why does the flashlight feel worse at night than during the day?
Because the contrast jump is bigger in the dark, and reflective surfaces often amplify the beam. If you are also generally light-sensitive, that jump can feel especially unpleasant.
Is there a way to set a permanent default flashlight brightness on iPhone?
Apple’s official flashlight guidance explains how to change brightness when you use the flashlight, but it does not describe a dedicated permanent default setting for all future activations. In practice, many users get the best results by treating one lower level as their personal routine starting point.
Does Reduce White Point make the flashlight less harsh?
No. Reduce White Point affects the display, not the flashlight LED. It may make the screen more comfortable, but it does not soften the flashlight beam itself.
Why does reflected light feel easier on sensitive eyes?
Because it spreads the light out and usually reduces the feeling of a concentrated hotspot. Indoors, bounce-lighting often gives enough visibility with less visual shock.
Should I use a diffuser or cover the flashlight with something?
For occasional experimentation, maybe. For daily use, I would be cautious. Improvised diffusion can make the beam awkward, reduce visibility too much, and add fuss right when you want simplicity. Usually, dimming and angle changes are the cleaner first fixes.
When is the iPhone flashlight the wrong tool for the job?
When you need long-duration comfort, warmer light, hands-free lighting, broader room illumination, or a light source that does not feel harsh even at low levels. In those cases, a small lamp or dedicated task light may serve you better.
Last reviewed: 2026-04.
If you want a useful test you can finish tonight in under 15 minutes, do this: set the flashlight one step lower, point it at the floor before turning it on, and use reflected light for one ordinary task. Keep the version that lets you see clearly without that little jolt of visual shock. The kindest setup is rarely the brightest one. It is the one that lets you move through the dark without your own phone feeling like an argument.