

Stop Guessing, Start Scanning: Mastering QR Accessibility
Most QR code failures have nothing to do with intelligence, effort, or “being bad with phones.” They fail because the camera never gets a clean shot. For people trying to improve accessible QR code scanning for low vision, the real problem is usually glare, distance, shaky framing, or a code placed on some glossy little menace of a surface.
That is why the task so often feels random in public. One code works at home; another fails in a clinic or a café under bright overhead light. Suddenly, a simple scan starts behaving like a social performance. Keep guessing, and you lose time, energy, and confidence on a task that should have taken seconds.
This guide helps you build a scanning routine that is calmer, faster, and easier on the eyes by focusing on camera guidance, not endless app hunting.
Learn how to reduce reflections, frame the whole code, use spoken or haptic feedback, and know when the problem is the code itself, not you. Our advice is grounded in real-world friction: laminated menus, reflective packaging, and awkward posters.
Not more features. Better conditions.
A routine you can actually reuse.
Fast Answer: Accessible QR code scanning for low vision works best when the process is treated as camera guidance, not just app choice. The real win usually comes from reducing glare, stabilizing distance, improving contrast, and using spoken or haptic feedback so the code can be found without guesswork. This guide helps readers set up a repeatable scanning routine that is faster, less frustrating, and easier on the eyes.
Table of Contents
Start Here First: What “Accessible QR Code Scanning” Really Means for Low Vision
It is not only about the scanner app
Most people begin in the wrong place. They assume accessible scanning means finding a better app, as if one more download will descend from the heavens wearing a cape. Sometimes an app does help, but for many readers the harder part is not decoding the QR code. It is locating it, centering it, and holding the camera steady long enough for the phone to recognize what is there.
I have watched people blame themselves for “being bad with phones” when the real issue was a glossy menu under a pendant light. That is not a skill failure. That is a setup failure. The distinction matters because it turns frustration into a problem you can actually solve.
The real friction is often framing, glare, and distance
Low-vision users often do not need more features first. They need a calmer visual task. Framing, glare, distance, and angle decide whether the scan feels easy or absurd. A phone camera can detect a code quickly, but only when the code is visible enough, flat enough, and stable enough for autofocus and recognition to do their job.
Think of the task in three layers:
- Find the code without visual overload.
- Present it to the camera cleanly.
- Get confirmation without guesswork.
Why camera guidance matters more than people expect
Camera guidance is the missing middle. It sits between “I can see something” and “the phone actually reads it.” Apple’s own support notes that you can use Camera or Code Scanner without taking a photo, while Google’s Pixel guidance says the whole code should appear on screen for the camera to scan it reliably. That sounds obvious until you are tired, under bright lighting, and a waiter is hovering nearby with the social energy of a stopwatch.
- Find the code first
- Reduce glare before aiming
- Let the camera read, not your eyes alone
Apply in 60 seconds: Before your next scan, step slightly sideways to kill reflections, then hold the phone parallel and pause for one full second.
Who This Is For, and Who It Is Not For
Best for people who can use a phone camera but struggle to center or detect QR codes
This guide is for readers who can operate a smartphone camera but find QR tasks erratic. Maybe the code swims inside visual clutter. Maybe the camera catches it only after a dozen awkward micro-lunges. Maybe the process works at home and falls apart in public. That is a classic sign that the friction is operational, not personal.
Useful for caregivers, teachers, librarians, and support staff setting up easier scanning routines
Helpers matter here. A caregiver who knows how to adjust lighting and give precise verbal cues can save minutes of stress. A librarian who says, “I’ll tilt the sign to reduce glare, then I’ll tell you when the code is centered,” is offering access. A helper who chirps “just scan it here” is offering poetry, not assistance.
Not a full substitute when the code itself is poorly printed, badly placed, or inaccessible by design
Some QR codes are simply terrible. Too small. Too glossy. Too low-contrast. Wrapped around curved packaging like a punishment from a design department with trust issues. No technique can fully rescue bad source material.
Eligibility checklist
- Yes/No: You can open the camera app without help.
- Yes/No: You can usually spot the general area where the QR code is placed.
- Yes/No: The main problem is centering, glare, distance, or inconsistent detection.
- Yes/No: You sometimes succeed when conditions are good.
If you answered “yes” to at least 2, a technique-first routine is likely worth trying. Neutral next step: test the 30-second routine at the end of this article before installing anything new.
Before You Scan: Fix the Environment, Not Just the Phone
Reduce glare before you do anything else
Glare is the elegant liar of QR scanning. It makes a code look visible enough to the human eye while quietly destroying camera readability. A bright reflection across even part of the pattern can make the code act dead. If you remember one environmental fix, make it this one: move the light, move your body, or move the object before you move the phone ten more times.
That lesson arrived for me beside a laminated café menu. I kept nudging the camera closer, blaming focus, when one small step to the left solved the whole thing. The code had not changed. The reflection had. Readers dealing with this kind of harsh shine may also find useful patterns in broader glare-management guides like window film for glare, bathroom mirror glare fixes, and TV glare reduction, because the same light behavior keeps showing up on menus, posters, and plastic sleeves.
Use contrast and background separation to make the code easier to find
Sometimes the code is readable once centered, but locating it is the exhausting part. Busy backgrounds make that worse. If you can, isolate the target. Put a hand behind a small card. Lay a flyer on a plain table. Move the item away from patterned fabric or cluttered shelves. Low vision often turns “find the square” into “decode a visual argument,” and background simplification cuts that argument short.
Steady the target or steady the hands, whichever is easier
You do not need perfect hands. You need less motion. Bracing elbows against a table, using a wall for support, or setting a menu flat can help more than toggling three settings you will forget tomorrow. When the object is portable, stabilize it first. When it is fixed, stabilize yourself.
Let’s be honest… most failed scans begin with lighting, not user error
That is not a motivational poster. It is operational truth. Reflections have long been recognized as a visibility problem in display work, and the same basic principle applies here: reflections steal usable visual information even when the target technically remains visible. For people who notice the room itself is the enemy, even guides on reading lamp position for central vision loss or 2700K vs 3000K for glare-sensitive eyes can sharpen your instincts about why one corner works and another turns the code into fog.
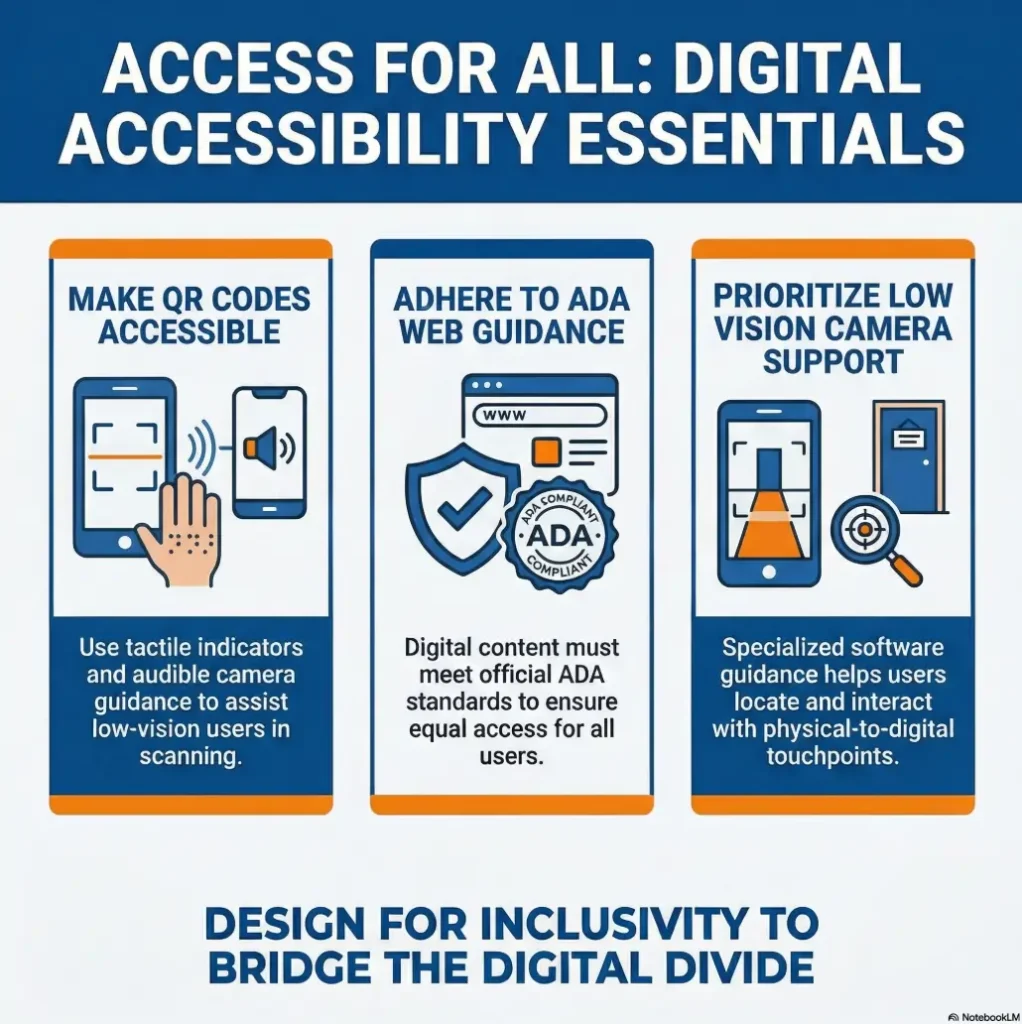
Infographic: The 3-layer setup that makes QR scanning easier
Layer 1: Light
Turn the object away from glare. Side light beats reflected light.
Layer 2: Position
Keep phone and code parallel. Start farther back than feels intuitive.
Layer 3: Feedback
Use speech, haptics, or audible cues so success does not rely on sight alone.
Show me the nerdy details
QR recognition depends on the camera receiving a stable, high-enough-contrast view of the code with enough visible pattern information to decode orientation and data. Glare, angle, motion blur, and early over-zoom reduce the quality of that input even when the code seems “close enough” to the user.

Distance First, Then Aim: The Camera Guidance Sequence That Feels Less Chaotic
Start farther back than you think
The instinct to move close immediately is understandable and usually wrong. Starting farther back gives the camera a better chance to frame the whole code and settle focus. If you begin too close, you may crop the edges, trigger blur, and force yourself into a frantic dance of retreat and re-approach.
Move in slowly until the code fills enough of the frame
Once the code is visible, creep inward. Slowly. QR scanning works best when the code is large enough to read but still fully contained in the frame. Google’s guidance for Pixel phones is explicit here: make sure the entire code shows on screen. That one sentence quietly solves a lot of failure.
Keep the phone parallel instead of “hunting” at angles
Parallel alignment matters because angle adds distortion and often pulls in reflections. If the code is on a wall, keep the phone front-facing to the wall. If the code is on a table, hover as squarely above it as comfort allows. When people “hunt” for the scan, they often tilt, waggle, and inch forward all at once. It feels active. It performs badly.
Pause before tapping anything
A surprising number of failed scans are interrupted scans. The user sees a flicker of detection, taps too early, loses alignment, and has to begin again. Give the phone a quiet beat. Built-in scanners are designed to recognize the code without taking a photo. The pause is not wasted time. It is the moment the camera catches up.
- Distance comes first
- Angle control beats frantic movement
- A one-second pause improves success
Apply in 60 seconds: Practice on any household QR code by starting about an arm’s length away, then moving inward only after you see the whole square on screen.
Don’t Chase the Square: Why Overcorrecting Makes Scanning Harder
Fast, repeated repositioning confuses the process
There is a very specific kind of desperation move familiar to almost everyone: rapid tiny corrections, each one meant to help, all of them together making things worse. The camera loses focus. The framing changes too quickly. Your own visual system gets overloaded. Overcorrection is the QR version of trying to thread a needle while riding a shopping cart downhill.
Tilting the phone can add blur and reflections
Even a decent camera hates unnecessary tilt. Tilt changes the geometry of the code and can sweep light streaks across it. Readers sometimes think, “Maybe this angle is more visible to me,” while the phone is quietly thinking, “Respectfully, absolutely not.”
Moving too close too early can make the code unreadable
Going too close too soon causes two common problems: edge cropping and focus hunting. The code may look bigger, but bigger is not always better. Bigger and incomplete is worse than smaller and stable.
What calm alignment looks like in real life
Calm alignment looks boring. That is why it works. It is one steady hold, one small reposition, one pause. In a grocery aisle once, I watched a person finally get a nutrition-label QR code to scan only after they stopped trying to “nail it” and instead held the item against the cart handle for support. The solution was not brilliance. It was less drama.
Useful rule: If your body is making more than one correction per second, the phone is probably getting worse information, not better.
Camera Feedback That Helps: Spoken Cues, Haptics, and Magnification
When voice guidance reduces visual strain
For low-vision users, voice feedback can do something precious: it lets the eyes stop carrying the whole burden. Spoken confirmation, screen reader announcements, or a helper’s clear cues can reduce the need to keep checking the screen. That matters because visual fatigue is not just tiring. It changes performance in real time.
Apple’s accessibility guidance emphasizes that vision features can be customized on iPhone, and Google’s Pixel Camera accessibility features include Guided Frame for camera use, with verbal cues and vibrations for framing supported subjects. That feature is not a QR tool by itself, but it shows the broader accessibility design pattern: feedback is often more useful than raw magnification. Readers who prefer audio support in everyday phone tasks may also like related workflows for Android Select to Speak for menus or hands-free texting for low vision, where speech reduces the need to keep chasing the screen visually.
How haptic confirmation can prevent unnecessary rescanning
Haptics matter because they arrive faster than self-doubt. When the phone gives a vibration or clear confirmation, many users can stop scanning immediately instead of hovering in uncertainty and accidentally breaking the successful frame. A tiny buzz can save 20 seconds and a surprising amount of irritation.
Where magnification helps, and where it quietly gets in the way
Magnification helps most before the scan, not during the most delicate moment. It can help you find the code, identify its boundaries, or confirm you are in the right area. But aggressive zoom during live scanning can shrink your margin for framing error. A zoomed-in view makes the code look larger while making the “whole code in frame” rule harder to satisfy.
Here’s what no one tells you… more zoom is not always more accessible
That feels backward until you live it. For many people, the best sequence is: use magnification to locate, return to a cleaner camera view to scan, then rely on spoken or haptic feedback for confirmation. Google’s ML Kit documentation also notes that auto-zoom is available in Google Code Scanner, which is revealing for the wider topic: software zoom can help when it is controlled and detection-aware, but manual over-zoom often creates more work than it saves. On iPhone, that “locate first, then scan” rhythm pairs naturally with tools like Back Tap for Magnifier and more general iPhone scan settings for low vision.
Decision card: When to use magnification vs a plain camera view
| Use this | Best when | Trade-off |
|---|---|---|
| Magnification first | You cannot easily locate the code | May slow live scanning if left on |
| Plain camera view | You already know where the code is | Requires calmer hand control |
| Speech or haptics | You want confirmation without staring | Depends on device setup |
Neutral next step: try one scan using magnification only to locate the code, then switch back to the regular camera before decoding.
When the Code Is the Problem: Tiny Print, Bad Placement, and Awkward Surfaces
Curved bottles, glossy menus, and poster walls create different scanning problems
Not all bad QR codes fail in the same way. Curved bottles bend the pattern and change reflections as you move. Glossy menus throw bright streaks across the code. Large posters on walls create distance and angle problems. One reason scanning feels inconsistent is that each surface invents its own little sabotage.
Why reflective packaging defeats even a good camera
Reflective packaging is especially annoying because it defeats both sight and capture. The code may be technically there, but the camera gets a wash of light instead of pattern detail. If the code is on shiny packaging, try rotating the object slightly while keeping the phone itself as parallel as possible. Change one variable at a time. This is the same family of problem people run into when reading labels on containers, which is why articles on iPhone Magnifier filters for pill bottles or how to read expiration dates with low vision can be surprisingly relevant to QR frustration on packaging.
How to reposition the body, not just the phone
This is a big one. Users often treat the phone as the only moving part, when moving your own body can be easier and steadier. Step sideways. Lower your shoulder. Turn the object toward softer light. I learned this in a clinic waiting room where the code was posted behind a plastic sleeve. Tilting the sign would have been ideal, but since I could not, shifting my stance finally turned the glare from a silver blade into a faint smudge.
When asking for an alternative is the smartest move
Independence includes knowing when the environment is the obstacle. If a code is badly printed or access depends on an impossible viewing angle, asking for a short link, printed URL, or staff assistance is not failure. It is good operational judgment.
Short Story: The scan that failed until the room changed
A friend once tried to scan a check-in code taped to a glass door at sunset. Everything about it looked workable from ten feet away. The square was large. The phone was modern. The app was not the problem. But every attempt produced the same strange half-success: the camera noticed something, then lost it. People behind us started stacking up, which added the special pressure only public technology can produce.
We stopped moving the phone and looked at the door itself. The glass was reflecting orange light from the street and a bright bar of sky from behind us. So we changed the room, in the smallest possible way. We stepped to the side, used a hand to shade the upper edge of the code, and kept the phone flat. It scanned in one second. That moment cured me of a common myth. Many “hard scans” are not hard because the person is failing. They are hard because the environment is arguing with the camera.
Common Mistakes That Make Accessible QR Scanning Harder
Using overhead light that washes out the code
Bright top-down lighting seems helpful until it lands right on laminated paper or plastic. Then it becomes a glossy fog machine. Side lighting is often better than direct overhead glare. If this happens often in the kitchen or at a counter, the logic overlaps with under-cabinet lighting glare on glossy surfaces and glare-free under-cabinet lighting, where the fix is rarely “more light” and usually “better light placement.”
Holding the phone too close from the first second
This is probably the most common avoidable mistake. Starting close feels efficient. It usually creates cropping, blur, and needless frustration.
Treating blur as a focus problem when it is really a motion problem
Blur is not always about a weak camera or bad autofocus. Often it is micro-motion. If the image keeps pulsing or swimming, try bracing your wrists or resting elbows instead of changing apps or fiddling with settings.
Assuming every accessibility setting improves scanning
Accessibility features are tools, not holy relics. Some help with locating the code. Some help with confirmation. Some increase visual clutter in the moment you most need simplicity. The goal is not maximum features. It is the right features at the right stage.
Forgetting that the code may be damaged, low contrast, or badly designed
Sometimes the code is the villain. Damaged print, muddy contrast, tiny sizing, poor quiet zone around the code, or awkward placement can sabotage recognition. If one code consistently fails while others scan easily, that pattern tells you something useful.
- Red flag 1: You only fail on glossy or curved surfaces.
- Red flag 2: You succeed at home but struggle in public lighting.
- Red flag 3: The same code fails for multiple people.
- Red flag 4: The phone almost detects it, then drops repeatedly.
Setup Choices That Matter More Than Fancy Features
Screen brightness versus camera visibility
There is a slightly comic tension here. A brighter screen may help you inspect what the camera sees, but it can also increase discomfort or reflections on your own side of the glass. Readers with glare sensitivity often do better by adjusting ambient light and object angle first, then using only enough screen brightness to confirm position. For some people, this also sits alongside broader comfort tweaks such as Reduce White Point vs Night Shift or learning how to make an iPhone screen dimmer than minimum.
Autofocus, flashlight, and accessibility settings that change the experience
Built-in tools matter most when used simply. Flashlight can help in genuinely dim conditions, but indoors it may also create hot spots on glossy surfaces. Autofocus usually works best when you stop forcing the phone to perform while moving it constantly. On Pixel devices, scan suggestions need to be enabled for QR reading through the camera, and on iPhone you can use either Camera or the Code Scanner tool.
Case grip, wrist support, and simple physical aids
Do not underestimate physical ergonomics. A grippy case, a wrist strap, a pop grip, or simply leaning against a counter can outperform a parade of “smart” features. Good technique loves humble hardware.
Why a repeatable routine beats constant experimentation
Consistency reduces cognitive load. If every scan begins with the same setup sequence, your brain stops renegotiating the task each time. That matters in restaurants, clinics, ticket lines, and school hallways where time pressure tends to turn minor friction into a full opera.
Mini calculator: Is your setup problem mostly visual or motion-based?
Add 1 point for each that happens often:
- Glare or reflections
- You lose the code while moving in
- The image sharpens when you brace your hands
0 to 1: Try code-quality and placement fixes first. 2 to 3: Technique and stabilization are probably your main win.
Neutral next step: change one variable only on the next scan and notice whether success improves.
If Scanning Still Fails: Accessible Backup Paths Readers Should Expect
Asking for a short link, NFC option, or printed URL
A QR code should not be a locked gate. If the scan fails because the code is tiny, reflective, or badly placed, it is reasonable to ask for an alternative. A short link, NFC tap option, printed URL, or emailed form can preserve independence better than forcing repeated failure.
Using staff assistance without losing independence
Accessible help is specific, not patronizing. Useful help sounds like, “I can read the short URL aloud,” or “I can hold the menu at a better angle while you scan.” Bad help grabs the phone and turns the user into luggage. Independence is not only about doing every motion yourself. It is about staying in control of the task.
When businesses create avoidable barriers with QR-only access
The Americans with Disabilities Act guidance on web accessibility is a reminder of the broader principle here: digital access should not quietly exclude disabled users from goods, services, or information. A QR-only workflow can become an unnecessary barrier when no practical alternative is offered.
A small design choice can become a big access problem
What looks like a tiny design shortcut can create a large access tax in real life. A restaurant menu with no printed alternative. A clinic intake form behind reflective plastic. A museum placard with a code placed chest-high on a shiny pillar. These are not minor inconveniences when they repeatedly block access.
- Ask for a short link or printed URL
- Keep control of the task even when receiving help
- Notice when the barrier is design, not ability
Apply in 60 seconds: Save a note on your phone that says, “Could you provide the short link or printed URL?” so you do not have to improvise under pressure.
Don’t Do This: Mistakes Businesses and Caregivers Make When “Helping”
Placing codes under reflective plastic or behind glass
This single choice causes an absurd amount of trouble. It looks tidy. It behaves like a mirror. If the code must be posted publicly, matte printing and glare-aware placement are kinder than elegance-by-lamination.
Printing codes too small for real-world use
Technically scannable is not the same as functionally accessible. A tiny code may work for a sharp-eyed user in perfect light. That is not the same as working in a busy clinic, a dim restaurant, or a school corridor at pickup time.
Giving vague verbal directions like “just scan it here”
Vague directions create shame because they imply the task is obvious. Better instructions are physical and specific: “The code is in the bottom right corner, under the blue line. I can tilt the page to cut glare.” Clear directions restore agency.
Confusing speed with accessibility
Fast for the helper is not always accessible for the user. A staff member who snatches the phone and completes the task in three seconds may believe they helped. Sometimes they did. Sometimes they merely erased autonomy to save time. The better question is: did the person stay informed and in control?
For digital access more broadly, WCAG 2.2 remains the current W3C web accessibility standard, and the Department of Justice has tied public-sector digital accessibility requirements to WCAG conformance in its newer rulemaking context. That does not magically solve every QR problem in the wild, but it does underline the direction of travel: access should be designed in, not added later when someone struggles in public.
Quote-prep list for businesses or institutions reviewing QR access
- Where are codes physically placed?
- Are matte and larger-print options possible?
- Is there always a non-QR alternative?
- Can staff explain the alternative in one sentence?
Neutral next step: audit one location this week and note whether a low-vision user could complete the task independently.
FAQ
Why does my phone detect some QR codes instantly but ignore others?
Usually because the conditions changed, not because your phone suddenly became temperamental for sport. Code size, contrast, glare, surface texture, angle, and motion all affect detection. A good code on matte paper can scan instantly. A glossy code under bright light can behave like a ghost.
Is magnification helpful for scanning QR codes with low vision?
Yes, especially for finding the code in the first place. It is less reliable when left on during the final live scan if it causes you to crop the edges or overcorrect. Many readers do best by using magnification to locate, then returning to a plain camera view to decode.
Should I turn on the flashlight when scanning a code indoors?
Only if the area is genuinely dim and the surface is not reflective. Flashlight can improve visibility on matte surfaces, but on glossy plastic or laminated paper it often creates the very glare that blocks the scan.
Why does glare make QR codes so much harder to scan?
Because the camera needs pattern detail, not just brightness. Reflections wipe out parts of the code or lower usable contrast. To your eye the code may still seem visible, but to the camera it can become patchy and unreadable.
What is the best distance for scanning a QR code with a phone camera?
There is no perfect universal number, but the best starting point is usually farther back than feels natural. Begin far enough away that the whole code is visible on screen, then move inward slowly until it fills more of the frame without clipping the edges.
Can voice feedback or screen reader features help with QR scanning?
Yes. Voice feedback, haptics, and spoken confirmation reduce the need to keep visually checking the screen. That can lower fatigue and stop the common habit of rescanning something that already worked.
What should I do when a restaurant or clinic offers only a QR code?
Ask for an alternative directly. A short link, printed URL, staff-read option, or non-QR paper version is a reasonable request. If the QR code is the only path, the access problem is not yours alone.
Are larger QR codes always easier to scan?
Often, but not always. Large codes can still fail if they are reflective, badly printed, curved, or placed too far away. Size helps most when contrast, lighting, and placement are also good.
Next Step: Build a 30-Second Scanning Routine You Can Reuse Anywhere
Step 1: Check glare and light direction
Before you even lift the phone into full scanning mode, look for reflections. If there is glare, move yourself or the object first. This one habit saves more time than heroic troubleshooting later.
Step 2: Start farther back and align the phone parallel
Let the whole code enter the frame. Keep the phone square to the surface when possible. Resist the urge to lunge in close like you are inspecting a rare coin through a storm.
Step 3: Move in slowly and pause
One slow approach. One steady hold. One brief pause. The pause is part of the technique, not dead air.
Step 4: Use feedback, not guesswork
Rely on speech, haptics, or other confirmation when available. Your eyes do not need to do every job at once. That is the whole point of accessible technique.
Step 5: Ask for an alternative when the code itself is inaccessible
If the code is glossy, tiny, curved, damaged, or behind reflective plastic, ask for the short link or printed URL. Good access includes a backup path. It should not require a performance.
- Glare first
- Distance before close-up
- Confirmation before rescanning
Apply in 60 seconds: Save these 5 steps as a note titled “QR routine” so you can pull them up the next time public technology starts acting theatrical.
The curiosity loop from the beginning closes here: the phone was never the whole story. The lock was not broken. The room was crooked, the light was loud, and the key needed a steadier hand. In the next 15 minutes, test this routine on 2 or 3 different codes: one on matte paper, one on glossy packaging, and one posted on a wall. You will learn more from those three scans than from another hour of app browsing.
Last reviewed: 2026-04.