

Senior-friendly TV setup
HDMI Input Labeling Tips for Older Adults
with Aging Eyes
A confusing TV input menu can turn a quiet evening into a tiny household drama. One person wants the news, the remote says “Source,” the screen says “HDMI 2,” and suddenly the living room feels less like a place to relax and more like a control room with bad lighting.
Good HDMI labels do more than identify cables. They reduce guessing, prevent repeat troubleshooting calls, and give older adults a cleaner path from “I want to watch my show” to actually watching the show. The best system uses plain names, large readable text, matching cable labels, and a simple map that makes the TV setup tell one consistent story.
This guide walks through a practical labeling method for older adults, adult children, family caregivers, and anyone trying to make a TV less fussy. No fancy tools required. Just clearer words, better placement, and a few small choices that make the remote feel less like a riddle box.
Less input confusion
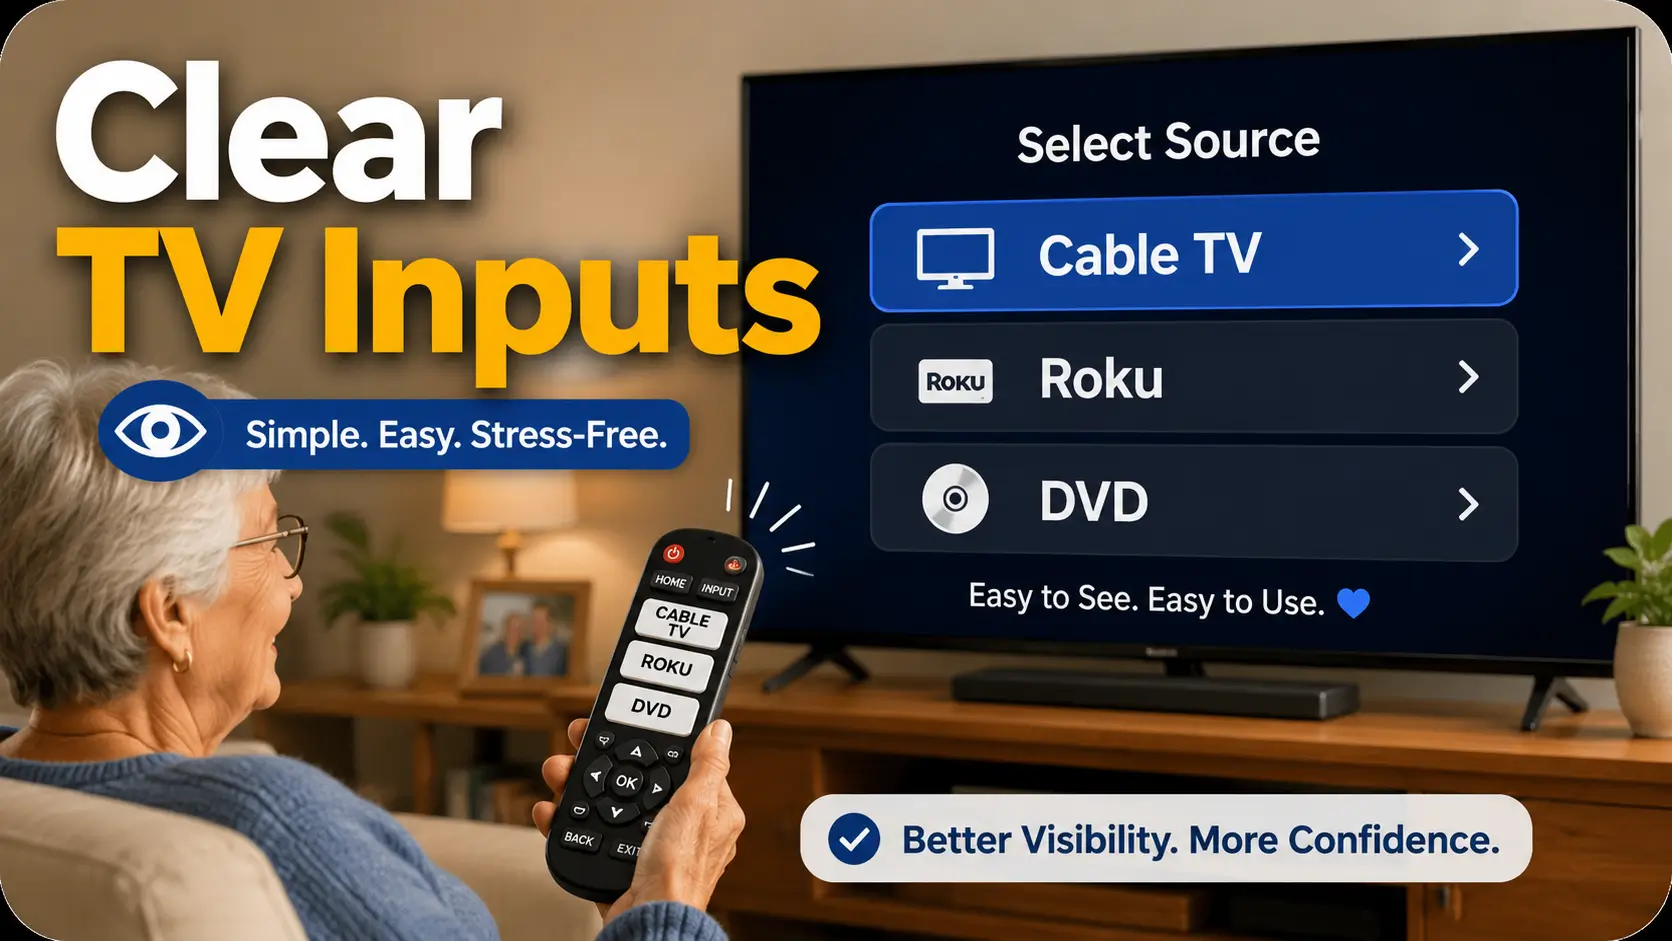
Replace “HDMI 1” guessing with real names like Cable TV, Roku, DVD, and Game System.
Better visibility
Use larger labels, stronger contrast, and smarter placement so labels work in real living-room light.
Caregiver-friendly setup
Create a one-page port map so helpers can fix input problems without pulling the TV apart.
📺 Tiny labels create big friction. Clear labels give the evening back.
Snapshot
This article is for older adults, family caregivers, and adult children who want to make TV inputs easier to recognize. You will learn how to rename HDMI inputs, label cables and remotes, reduce menu confusion, make a simple port map, and test the setup from the couch before calling the job done.
Table of Contents
Start With the Real Problem: Which Thing Do I Want to Watch?
The real problem is rarely the HDMI cable itself. The problem is the moment of translation. The person knows what they want: cable news, a movie, a church livestream, the grandkids’ game console, or the old DVD player with the holiday concerts. The TV, however, may answer in a language nobody speaks at dinner: HDMI 1, HDMI 2, HDMI ARC, AV, Component, or Media Player.
For a younger tech-comfortable person, that may be a mild annoyance. For an older adult with aging eyes, glare sensitivity, reduced contrast, or slower menu navigation, it can feel like the TV is moving the furniture every time it turns on. The job of HDMI input labeling is to remove that translation step.
Think of each label as a small sign on a familiar door. “HDMI 2” is a door number in a hotel hallway. “Cable TV” is a room with a lamp already on.
Device names beat port numbers
Port numbers are useful during setup. They help you remember which cable is plugged into which socket on the back of the TV. They are not usually useful for everyday viewing.
Most people do not wake up thinking, “I would like to enjoy HDMI 3 this evening.” They think, “I want Netflix,” “I want the cable box,” or “I want to play a DVD.” A good label should match that natural thought.
Use the name the older adult already uses. If they call the Roku “the purple remote,” consider naming the input “Roku Streaming” and putting a small matching note on the remote. If they call the cable box “regular TV,” then “Regular TV” may be more helpful than “Xfinity Box.” The perfect label is not always the most technically correct label. It is the label that works at 8:15 p.m. when the room is dim and patience is wearing slippers.
Label by activity, not technology
For some homes, device names work best: Cable Box, Roku, DVD Player, Apple TV, Blu-ray, Nintendo. For other homes, activity names are easier: Watch TV, Streaming, Movies, Games, Music.
Choose based on how the person describes the task. If they say “I want to watch my shows,” then “Streaming” may help. If they say “I want the Roku,” then “Roku” is better. If they never use the phrase “streaming device,” do not make that the main label. A label should feel like a familiar word, not a vocabulary quiz.
Adult children often make the mistake of labeling the setup according to the equipment. Older adults often use the setup according to routines. The label system should honor the routine.
Key takeaway
The best HDMI input label is the name the viewer would naturally say out loud. “Cable TV” usually beats “HDMI 1,” and “DVD Player” usually beats “Sony.”
The tiny panic moment no one talks about
Input confusion has an emotional side. It can make a capable person feel foolish in their own living room. Nobody wants to call a son, daughter, neighbor, or caregiver because the screen says “No Signal.” Nobody wants to press the wrong option and worry they broke something.
This is why good labeling should feel respectful. The goal is not to “senior-proof” the TV in a patronizing way. The goal is to make the system clearer for the person who uses it most.
A helpful setup says, quietly, “You are not the problem. The labels were.”
Safety and common-sense note
This guide is about home usability, not medical advice. If vision changes are sudden, worsening, or making daily tasks unsafe, it is worth speaking with an eye care professional. For home setup, avoid climbing, bending behind heavy furniture, or moving a large TV alone. Ask for help before a simple labeling project turns into a living-room wrestling match.
Rename HDMI Inputs Before You Touch a Label Maker
Physical labels help, but the on-screen input menu is where many older adults get lost. If the TV still displays HDMI 1, HDMI 2, and HDMI 3, the cable label behind the stand may not help much. The first win is to rename the HDMI inputs inside the TV menu whenever the TV allows it.
Most modern smart TVs offer some version of input renaming. The exact words vary by brand, but the idea is similar: open the input or source menu, choose the HDMI port, then edit the name or icon. Some TVs call it “Edit,” “Rename,” “Device Name,” “Universal Control,” “External Device Manager,” or “Home Dashboard.”
Do this while each device is turned on. That way you can confirm what appears on the screen before naming it. If the Roku home screen appears when HDMI 2 is selected, name HDMI 2 “Roku.” If the cable guide appears, name it “Cable TV.” Simple, visible, done.
Where to look on most smart TVs
Start with the remote’s Input, Source, Home, or Menu control. On many TVs, the input list appears as a row of tiles. Highlight the HDMI input, then look for an edit option. It may appear as a pencil icon, three dots, a gear, or a small settings menu.
If you cannot find it quickly, search the TV brand name with “rename HDMI input” in the support section of the manufacturer’s site. But before doing that, try the obvious route: input list, select the HDMI port, press up or down, then look for Edit. TV menus are often shy about their useful features.
For homes with older TVs, renaming may not be available. That is not a failure. It simply means the physical labels and printed port map become more important.
Plain names that match everyday speech
Use short names. Long names may be cut off in the TV menu, especially on smaller screens or older interfaces. A name that looks clear on a phone may look cramped on a TV from across the room.
Good input names include Cable TV, Roku, DVD, Apple TV, Fire TV, Blu-ray, Nintendo, Game System, Sound Bar, and Computer. If the TV allows icons, choose an icon only if it adds clarity. A tiny game controller icon may help some people, but words should still do the main work.
When in doubt, use two-word labels. They are usually clearer than one-word labels and less cluttered than full sentences.
| Less helpful label | Better label | Why it works |
|---|---|---|
| HDMI 1 | Cable TV | Tied to the viewing task, not the port number. |
| Samsung | DVD Player | Describes the device’s purpose instead of the brand. |
| Streaming 1 | Roku | Avoids confusion when there are several streaming devices. |
| Game | Grandkids’ Games | Matches the household story and makes the device less mysterious. |
Don’t name everything after brands
Brand names are not always wrong. Roku and Apple TV may be familiar names in the home. But “Samsung,” “Sony,” “LG,” and “Xfinity” can create confusion because the TV, remote, cable box, and DVD player may all have different brand names on them.
When a brand name and a task name compete, choose the task name. “TV Box” is often clearer than “Xfinity.” “DVD Player” is often clearer than “Sony.” “Sound Bar” is clearer than “Bose” if the person does not think of the device by brand.
The label should answer the viewer’s question: “Which thing do I pick so the picture comes back?”
Bigger Is Kinder: Make Labels Readable From the Couch
A label that cannot be read from the normal viewing position is not a label. It is decoration with ambition.
For older adults with aging eyes, label size and contrast matter more than neatness. A perfectly printed tiny label may look tidy on the cable, but if the viewer has to bend, squint, or find reading glasses to use it, the label has missed the assignment.
Start by asking one practical question: where will this label be read? A label on the remote must work in the hand. A label on the TV stand must work from standing distance. A label on a port map should work from arm’s length. A label behind the TV should be large enough for the person doing setup, but it does not need to be visible from the sofa.
Choose large type, not decorative type
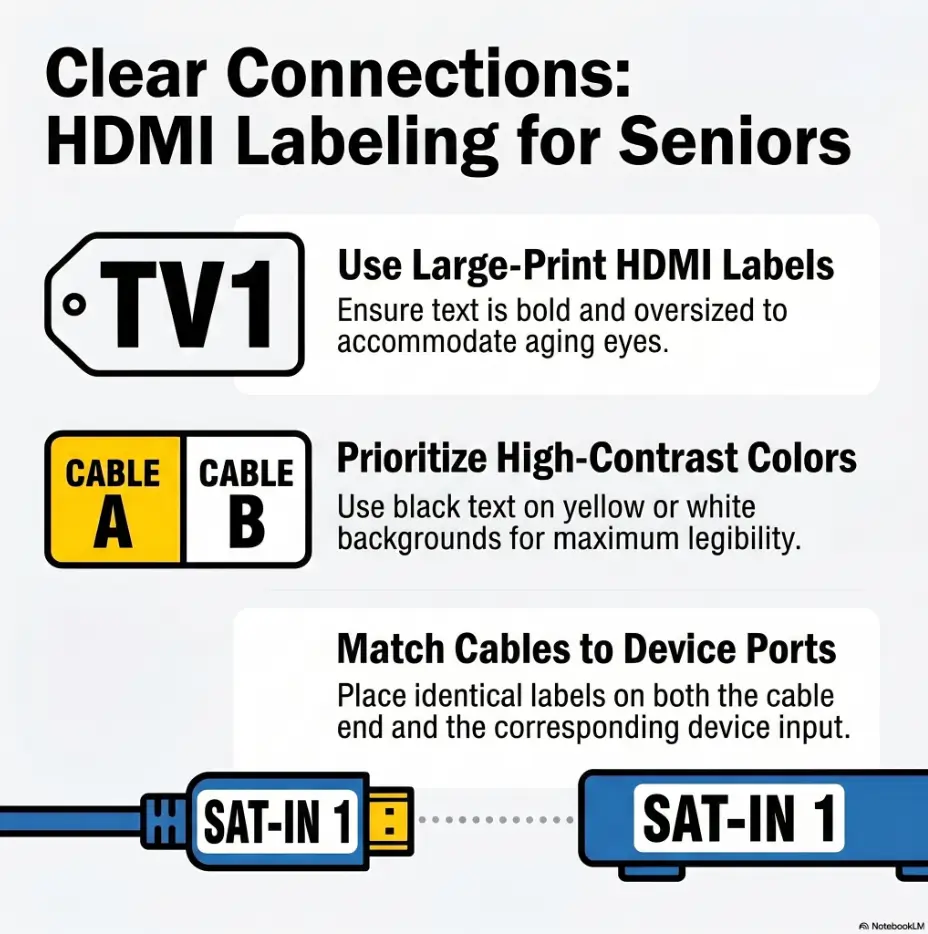
Use bold, plain lettering. Avoid cursive, narrow fonts, thin marker strokes, tiny all-caps labels, or pale gray text. A label maker can be useful, but only if the text size is large enough. A thick black marker on white painter’s tape often beats a tiny elegant printed label.
If you are printing a cheat sheet, use a large readable font and generous spacing. The goal is not to fit every possible instruction on one card. The goal is to make the next step obvious.
For a related accessibility habit, the same principle applies to phones. If you are also helping an older parent with screen readability, this guide to phone font size for seniors may help you keep the whole tech environment consistent.
High contrast beats pretty colors
Strong contrast makes labels easier to find. Black text on white or yellow labels often works well. White text on a dark label can also work if the material is not glossy and the lettering is large.
Avoid light gray on white, gold on cream, blue on black, or red on dark brown. Those combinations may look polished in a design sample, but they can disappear in a dim room.
Contrast is especially important near TVs because living rooms often have mixed lighting: window glare in the afternoon, low lamps in the evening, and bright TV light changing every few seconds. The label has to survive all of that.
Key takeaway
Do not choose labels by how neat they look up close. Choose labels by whether they can be read in the actual room, at the actual distance, under the actual lighting.
Test labels before you trust them
After labeling, sit where the older adult normally watches TV. Look at the remote label, the cheat sheet, and any front-facing device labels. Can you read them without leaning forward? Can you tell which instruction comes first?
Then test from the person’s normal routine. Turn the TV off. Wait a moment. Turn it back on. Ask, “What would I press if I wanted regular TV?” This tiny rehearsal will reveal weak spots faster than any perfect-looking setup photo.
If the label works only when you already know what it means, rewrite it. Good labeling should support memory, not require it.
Color Coding Helps, But Only If You Pair It With Words
Color coding can be helpful. It creates a quick visual shortcut. Red tape for Cable TV, blue tape for Roku, green tape for DVD. But color alone is not enough, especially for aging eyes.
Color perception can shift with age. Glare, cataracts, low lighting, and similar-looking tape shades can make a color-only system unreliable. The better rule is simple: every color gets a word.
So the red label should not just be red. It should say “Cable TV.” The blue label should say “Roku.” The yellow label should say “DVD.” The color helps the eye find the label. The word confirms the choice.
Pair every color with words
Think of color as the highlighter, not the sentence. It can guide attention, but it should not carry the whole meaning.
A good color label might look like this: a yellow tape flag wrapped around the HDMI cable with “DVD” written in thick black letters. The remote cheat sheet then uses the same yellow dot next to “DVD Player.” If the TV menu cannot show colors, the port map can.
Try to avoid color combinations that are easy to mix up in low light, such as navy and black, red and brown, or pale blue and pale green. Use fewer colors rather than many. Three clear colors are better than seven cousins from the same tape drawer.
Use the same color in three places
Color coding works best when it repeats. Use the same color on the cable, the device, and the cheat sheet. If possible, also use the same name in the TV input list.
For example, if Cable TV is red, place a red “Cable TV” label near the cable box, a red “Cable TV” flag on the HDMI cable, and a red dot beside “Cable TV” on the printed instruction card. This creates a little trail of breadcrumbs.
The trick is consistency. If red means Cable TV in one place and power cord in another, the system becomes confetti. Pretty, but not helpful.
Mini checklist: color coding that actually helps
- Use no more than three or four colors for the main devices.
- Write the device name on every colored label.
- Use the same color for the same device everywhere.
- Choose matte tape when glare is a problem.
- Test the colors in daytime and evening light.
Avoid color-only systems for aging eyes
A color-only system can fail quietly. The person may not say, “I cannot distinguish these colors.” They may simply stop using the device, choose the wrong input, or call for help more often.
This is especially true if the TV area has glare. If glare is a recurring problem, it may be worth improving the viewing area itself. You may find this guide on TV glare reduction useful for making the whole setup easier to see.
Color is a helper. Words are the anchor.
The Port Map: A One-Page Fix That Prevents Repeat Confusion
A port map is a simple note that explains which HDMI port connects to which device. It does not need to be fancy. In fact, fancy can be the enemy. The best port map is plain, large, and placed where someone will actually look during a TV problem.
For older adults, a port map reduces anxiety. For adult children and caregivers, it reduces detective work. For visitors, it prevents the classic mistake of unplugging three things to fix one thing.
The map should answer two questions: what is plugged in, and what should the TV input say?
Draw the back of the TV in plain language
Do not overthink the drawing. A rectangle labeled “Back of TV” is enough. Add the HDMI ports in order, then write what each one connects to.
Example: HDMI 1 equals Cable TV. HDMI 2 equals Roku. HDMI 3 equals DVD Player. HDMI 4 equals Game System. If one port is empty, write “Empty” so nobody wonders whether something is missing.
Include the name that appears on the TV screen. If the screen says “Roku,” the map should say “Roku,” not “Streaming stick in side port.” The goal is one vocabulary across the whole setup.
Simple TV port map template
| TV port | Device plugged in | Name on TV screen | Remote instruction |
|---|---|---|---|
| HDMI 1 | Cable box | Cable TV | Input → Cable TV → OK |
| HDMI 2 | Roku | Roku | Input → Roku → OK |
| HDMI 3 | DVD player | DVD Player | Input → DVD Player → OK |
Tape the map where it is useful
Do not hide the port map in a junk drawer. Place it where input problems happen. Good spots include inside the TV cabinet door, beside the remote basket, on the back of the TV stand, or in a clear sleeve near the cable box.
If the older adult does not want visible notes in the living room, use a discreet placement. Inside a cabinet door often works well. It keeps the room tidy while still making the information available when needed.
For a low-vision household, consider using a larger sheet rather than an index card. A one-page map with big lettering is easier to read than a tiny card with perfect handwriting.
Make an emergency version for visitors
Visitors and caregivers need a slightly different map. They may be fixing the setup while standing behind the TV, holding a flashlight, and trying not to say unhelpful things about cable design.
For them, add one extra line: “Do not unplug anything unless the TV is off and you are sure which cable you are moving.” This one sentence can prevent accidental swaps.
If multiple family members help, take a photo of the port map and share it in a family text thread. That way the next helper has the same information before arriving.
Key takeaway
A port map is the bridge between the hidden back of the TV and the visible input menu. It helps older adults, caregivers, and visitors speak the same setup language.
Common Mistakes That Make HDMI Labels Harder to Use
Most HDMI labeling mistakes come from good intentions. Someone tries to help, labels a few cables, and leaves feeling productive. Then the older adult still gets stuck because the TV screen, remote, and cable labels do not match.
A good system is not just labeled. It is coordinated. The names, colors, instructions, and physical placement should all point in the same direction.
Here are the mistakes that cause the most repeat confusion.
Mistake 1: Using HDMI 1 as the main label
“HDMI 1” may be accurate, but it is not meaningful to many viewers. It tells someone where the cable goes, not what they will watch.
Use HDMI numbers as secondary information. The main label should be the device or activity. A good label might say “Cable TV, HDMI 1.” That gives everyday users the friendly name and setup helpers the port number.
This is especially helpful when several devices are similar. “Streaming” and “Streaming 2” are vague. “Roku, HDMI 2” and “Fire TV, HDMI 3” are clearer.
Mistake 2: Labeling only the cable, not the screen menu
Labeling only the cable helps the person behind the TV. It may not help the person holding the remote. The on-screen menu is the decision point, so the on-screen name matters.
If the cable says “Roku” but the TV menu says “HDMI 2,” there is still a translation step. Rename the input when possible. If the TV cannot rename inputs, make the cheat sheet very direct: “For Roku, choose HDMI 2.”
The cable, TV menu, remote note, and printed map should use the same words wherever possible.
Mistake 3: Making labels too small to read
Small labels are one of the most common failures. They look nice during setup, then vanish during real use.
Use the largest text that fits. If you need more room, use a tag-style label, tape flag, or printed card rather than forcing tiny text onto a narrow strip. For low-vision homes, a slightly oversized label is not ugly. It is gracious.
When you test the label, do not test it under perfect lighting with young eyes and fresh coffee. Test it in the evening, from the couch, with the lamp the person actually uses.
Mistake 4: Using similar names for different devices
“Streaming 1” and “Streaming 2” look organized, but they can be frustrating. The viewer has to remember which number means which device. That is exactly the kind of memory burden labeling should remove.
Use distinct names. Roku. Fire TV. Apple TV. Cable TV. DVD Player. Game System. If two devices do the same thing, consider whether both are still needed.
When two labels look too similar, the person may stop trusting both. Clarity needs contrast in meaning, not just contrast in color.
Mistake checklist
- The TV menu still says HDMI 1, HDMI 2, and HDMI 3.
- The remote has no clear mark for changing inputs.
- The cable label uses a different name from the screen label.
- The labels are too small to read without glasses or a flashlight.
- Unused inputs remain visible and invite wrong turns.
- The cheat sheet has too many steps and not enough white space.
Remote-Control Labels: The Forgotten Half of the System
Many input problems start on the remote. The TV may be labeled perfectly, the cables may be tagged like library books, and the port map may be worthy of a small museum. But if the person cannot find the Input or Source control, the system still breaks at the first step.
Remote-control labels should be simple, tactile if useful, and placed with care. Do not cover important controls. Do not create a sticker snowstorm. One or two well-placed marks can do more than a dozen tiny labels.
If the remote itself is already hard to use, a larger remote may be the bigger win. You can compare options in this guide to choosing a large-button TV remote.
Mark the Input or Source control clearly
Find the control that opens the input list. It may say Input, Source, TV/Input, or have a small rectangle-with-arrow icon. If the label is tiny, add a small sticker nearby that says “Change TV Input.”
Use a bright, high-contrast sticker if the person can see it. If touch helps more than sight, consider a raised tactile dot near the control, not directly on top of it. The dot should guide the finger without preventing the control from being pressed.
If you use tactile markers elsewhere in the home, keep the meaning consistent. This article on bump dots versus tactile tape can help you choose a marking method that fits the person’s vision, touch, and comfort level.
Add a short remote cheat sheet
A remote cheat sheet should be short enough to use during a mild annoyance. If it reads like a tax form, it will be ignored.
Use one instruction per line. For example: “To watch Cable TV: press Input, choose Cable TV, press OK.” Then add a second line for Roku and a third line for DVD Player. Keep the wording exactly the same as the TV menu.
Place the cheat sheet where the remote lives. If the remote sits in a basket, tape the card inside the basket or place it under a clear sleeve nearby. The best instruction is the one that appears right when the person needs it.
Remote cheat sheet example
- To watch regular TV: Press Input → choose Cable TV → press OK.
- To watch Roku: Press Input → choose Roku → press OK.
- To watch a DVD: Press Input → choose DVD Player → press OK.
- If the screen says No Signal: Check that the device is turned on first.
Don’t cover important remote controls
Stickers can help, but they can also create trouble. Do not cover power, volume, channel, arrows, OK or Select, Back, Home, accessibility controls, or microphone controls. A sticker should clarify the remote, not turn it into a padded mystery slab.
If the remote is small or crowded, place a label on the back of the remote or on a nearby card instead. You can also use a single tactile marker near the correct control rather than a full word label.
After labeling the remote, watch the older adult use it once. Do not hover like a nervous stage manager. Just observe where their finger goes, where they pause, and which words make sense. Then adjust.
Short Story: When the Input Button Became the Whole Problem
Marion’s son had labeled every cable behind her TV. He used neat white tags, wrote carefully, and even took a photo of the back panel. The setup looked beautiful, in the way only a freshly organized cable nest can look beautiful.
Two nights later, Marion called again. The screen was blue, the cable box was on, and she was certain the TV had “lost the station.”
The fix was not behind the TV. It was in her hand. The tiny Source control on the remote looked like a little doorway icon, not a word. Her son added a bright label beside it: “Change TV Input.” Then he taped a three-line card near the remote basket.
The next week, she called to say she had fixed it herself. Not proudly in a loud way. Just casually, as if the TV had finally learned its manners.
The One Remote, One Path Rule
The cleanest HDMI label system can still fail if the person has too many remotes and too many possible routes. Cable remote. TV remote. Roku remote. Sound bar remote. DVD remote. Game controller. Suddenly the coffee table looks like a tiny airport terminal.
The one remote, one path rule means you simplify the route before adding more instructions. The fewer choices the person has to sort through, the less labeling has to rescue.
This does not mean removing devices someone loves. It means removing unnecessary friction. If a device is never used, disconnect it. If a remote is no longer needed, put it away. If the TV can hide unused inputs, hide them.
Reduce the number of choices first
Before labeling, list every device connected to the TV. Then ask which ones are actually used. Cable box? Yes. Roku? Yes. DVD player? Once a month, maybe. Old game console? Only when the grandkids visit. VCR? Decorative archaeology.
If a device is rarely used but still wanted, label it clearly and place it lower in the cheat sheet. If a device is never used, unplug it and remove it from the setup. Every unused device is another wrong turn waiting to happen.
For caregivers simplifying several parts of a parent’s tech life, this same principle applies beyond the TV. A cleaner phone, clearer home screen, and fewer duplicate apps can make daily tech less tiring. This guide on how to simplify an older parent’s phone pairs well with the TV setup approach here.
Hide unused inputs when possible
Some TVs let you hide inactive or unused inputs from the source menu. This is worth doing. A shorter input list is easier to scan, especially when the text is small or the menu disappears quickly.
If the TV shows only three choices instead of eight, the viewer has fewer ways to get lost. That can feel less like restriction and more like relief.
If the TV cannot hide inputs, rename unused ports as “Empty” or leave them alone but keep the cheat sheet focused only on the active choices. Do not teach someone to sort through every possible menu item if they only need two.
Key takeaway
A clear label helps. A shorter menu helps even more. Remove unused devices and hidden traps before asking someone to memorize a new TV routine.
Make fewer options feel respectful
Simplifying a setup should not feel like taking control away. Explain the change in terms of ease: “I’m going to hide the inputs you never use so the menu is easier to read.” That sounds very different from, “You don’t need all these choices.”
Invite the older adult into the decision. Ask which devices matter. Keep what they value. Remove what only creates confusion. The result should feel like a cleaned-up desk, not a locked cabinet.
When the system is simpler, the labels can be simpler too.
HDMI Clarity Flow
1. Name it
Use Cable TV, Roku, DVD, or Games.
2. Match it
Make the TV menu and cable labels agree.
3. Label it
Use large words and strong contrast.
4. Map it
Create a one-page port map.
5. Test it
Try the system from the couch.
Label the Cables, Then Fix the Lighting Around Them
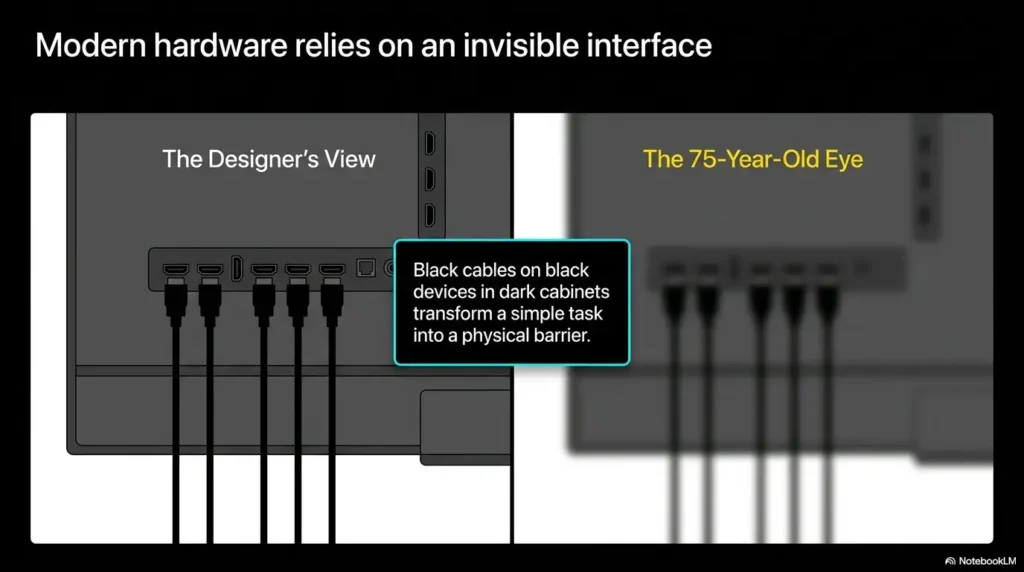
Cable labels matter most when something gets unplugged, moved, replaced, or dusted with too much confidence. The back of a TV is not a friendly place. Ports are cramped, labels are tiny, and everything seems designed for the hands of a watchmaker.
A good cable label system should help two people: the older adult using the TV and the helper who may need to troubleshoot later. The older adult needs clear front-facing instructions. The helper needs cable labels near both ends so nothing gets swapped by accident.
Lighting and placement are part of the same system. If the label is hidden in shadow or printed on glossy tape near a bright window, it may fail even if the wording is perfect.
Put labels near both ends of each HDMI cable
Label one end near the TV port and the other end near the device. This prevents guesswork when a cable is accidentally unplugged. A cable that says “Roku” at both ends is much easier to trace than a plain black cable among six plain black cables pretending to be identical snakes.
Use wraparound labels, tape flags, or tag labels that stick securely without damaging the cable. If you use painter’s tape, check it occasionally. It is easy to write on and easy to remove, but it may loosen over time.
If the setup is crowded, add arrows. “To TV” and “To Roku” can prevent a helper from moving the wrong end.
Place front-facing labels where eyes naturally land
Labels behind the TV help troubleshooters. Front-facing labels help everyday users. If the cable box, DVD player, and streaming device are visible on a shelf, place clear labels on or near the front edge of the shelf.
For example, a label on the shelf under the device may be easier to read than a label on the device itself, especially if the device is glossy black. Put the label where the eye naturally lands when someone looks toward the TV stand.
Avoid placing labels on hot vents or over sensor windows. Some devices need a clear line of sight for the remote. A helpful label should not sabotage the signal.
Manage glare before blaming the label
Glare can make good labels look bad. Glossy tape, shiny device fronts, bright windows, and reflective TV stands can all reduce readability.
Use matte labels when possible. Place labels slightly below or beside reflective surfaces. If a window throws bright light across the TV stand, test the label at that time of day. The afternoon sun has a talent for exposing weak design decisions.
If glare is a problem across several screens or surfaces, related fixes may help too. For portable screens, this guide to choosing an anti-glare screen protector may offer useful principles even beyond phones and tablets.
Setup supply list
- Thick black marker or large-print label maker.
- White, yellow, or another high-contrast matte tape.
- Small tactile dots if touch cues help.
- Blank index card or large paper for the port map.
- Clear tape or a clear sleeve for the cheat sheet.
- Small flashlight stored near the TV area.
Show me the nerdy details
HDMI ports carry digital audio and video signals from a source device to a display. The TV input menu is simply asking which incoming signal you want to show. The confusing part is that the TV usually names the physical port, not the human task.
HDMI ARC or eARC can add another wrinkle because it may connect to a sound bar or receiver instead of a picture source. If one HDMI port is used for sound, label it “Sound Bar, Do Not Move” rather than treating it like another viewing option.
Some TVs can detect devices automatically through HDMI-CEC, but automatic names can still be odd or inconsistent. Manual labels are often clearer because they use the household’s language.
When to Simplify Further or Get Help
HDMI labeling is helpful when the main barrier is visibility, naming, or input confusion. It is not a cure-all. Sometimes the setup itself is too complex. Sometimes the person’s vision, memory, hearing, dexterity, or comfort with menus has changed enough that labels alone are not enough.
That does not mean failure. It means the next solution should be simpler and more supportive. The best TV setup is the one the person can actually use, not the one with the most features.
Watch for signs that the current system still asks too much.
Good fit: the TV works once the input is clear
HDMI labeling is a good fit when the older adult can use the TV after the right input is selected. They understand the remote basics, can follow a short cheat sheet, and only get stuck when the source menu appears or the screen says “No Signal.”
In this case, the fix is usually a combination of input renaming, remote marking, cable labels, and a port map. The person does not need a new entertainment system. They need a clearer path through the one they already have.
This is the sweet spot for the 15-minute HDMI clarity kit at the end of this guide.
Not enough: repeated menu confusion or unsafe troubleshooting
If the person keeps getting lost even with large labels and a short cheat sheet, simplify further. Consider using one main streaming device, one remote, and fewer connected devices. Remove anything that is not used regularly.
If the person tries to move heavy furniture, climb, tug cables, or reach behind the TV alone, stop and redesign the setup. Safety matters more than perfect cable access.
For significant vision loss, daily task frustration, or safety issues around the home, a low-vision occupational therapist, vision rehabilitation service, or trained home-tech helper may offer more complete support.
Consider accessibility features, voice control, or a simpler remote
Some TVs and set-top boxes offer accessibility features such as screen readers, voice guidance, larger text, high contrast menus, and remote shortcuts. These can be helpful, but they should be tested in the home. A feature that sounds helpful in a settings menu may be annoying if it speaks too fast or adds too many prompts.
Voice control can help some older adults bypass menu navigation. It can also frustrate people if it misunderstands names or requires exact phrases. If using voice control, write the exact commands on the cheat sheet: “Say: Open Roku” or “Say: Watch Cable TV,” depending on the device.
The best accessibility feature is the one the person will use without dread.
Key takeaway
If labels help but do not fully solve the problem, reduce the number of devices and remotes. A simpler path often works better than a more detailed instruction card.

FAQ: HDMI Input Labeling for Older Adults
What should I label HDMI 1 as for an older parent?
Use the device or activity name first, such as Cable TV, Roku, DVD Player, Streaming, or Game System. If needed, add the port number second: “Cable TV, HDMI 1.”
Can I rename HDMI inputs on a smart TV?
Many smart TVs allow input renaming through the input, source, home dashboard, device manager, or external device settings menu. The exact steps depend on the brand and model.
What is the easiest HDMI label system for seniors?
The easiest system uses large plain words, strong contrast, matching cable labels, a clearly marked Input control on the remote, and a one-page port map.
Are color-coded HDMI labels enough?
Color coding helps, but colors should always be paired with words. Aging eyes, glare, and dim light can make color-only systems unreliable.
How do I help someone stop choosing the wrong TV input?
Rename the on-screen inputs, hide unused inputs if possible, label the remote’s Input control, and create a short cheat sheet using the exact same names shown on the TV.
What font size should HDMI labels be?
Use the largest lettering that fits comfortably. Readability from the real viewing or troubleshooting position matters more than a specific font size.
Should I label the remote too?
Yes. Labeling or marking the Input or Source control often solves half the problem because that is where many input mistakes begin.
What if the TV menu is still too confusing?
Simplify the setup further. Remove unused devices, use one main remote, consider voice control, or ask a home-tech helper or low-vision professional for support.
Make a 15-Minute HDMI Clarity Kit
The best next step is not buying a complicated gadget. It is making the current TV setup easier to understand in one short session. Give yourself 15 minutes, gather a few supplies, and fix the labels that create the most confusion.
Start with the screen. Rename the active HDMI inputs if the TV allows it. Then label the remote. Then label both ends of each HDMI cable. Finally, write a one-page port map and place it where the next confused person will actually find it.
Do not aim for perfection. Aim for fewer wrong turns.
The 15-minute plan
HDMI clarity kit steps
- Turn on each device and confirm what appears on each HDMI input.
- Rename the TV inputs using plain names like Cable TV, Roku, and DVD Player.
- Mark the Input control on the remote without covering nearby controls.
- Label both ends of each HDMI cable with the same device name.
- Write a port map showing HDMI port, device, and TV menu name.
- Test from the couch using the older adult’s normal routine.
Test it like a real evening
After you label everything, do one final test. Turn the TV off. Put the remote where it normally lives. Sit in the usual seat. Turn the TV back on and follow the cheat sheet as if you had not created it.
If you hesitate, the label needs work. If you have to explain the instruction out loud, rewrite the instruction. If the person has to lean forward to read it, make it larger.
A TV setup should not require bravery. It should offer a clear path to the show, the movie, the game, or the evening news. That is the quiet gift of good HDMI input labeling: the technology steps back, and the living room becomes a living room again.
Key takeaway
Within 15 minutes, you can rename the inputs, mark the remote, label the cables, and create a port map. That small kit can prevent many future “No Signal” evenings.
Last reviewed: 2026-05