

Senior home safety guide
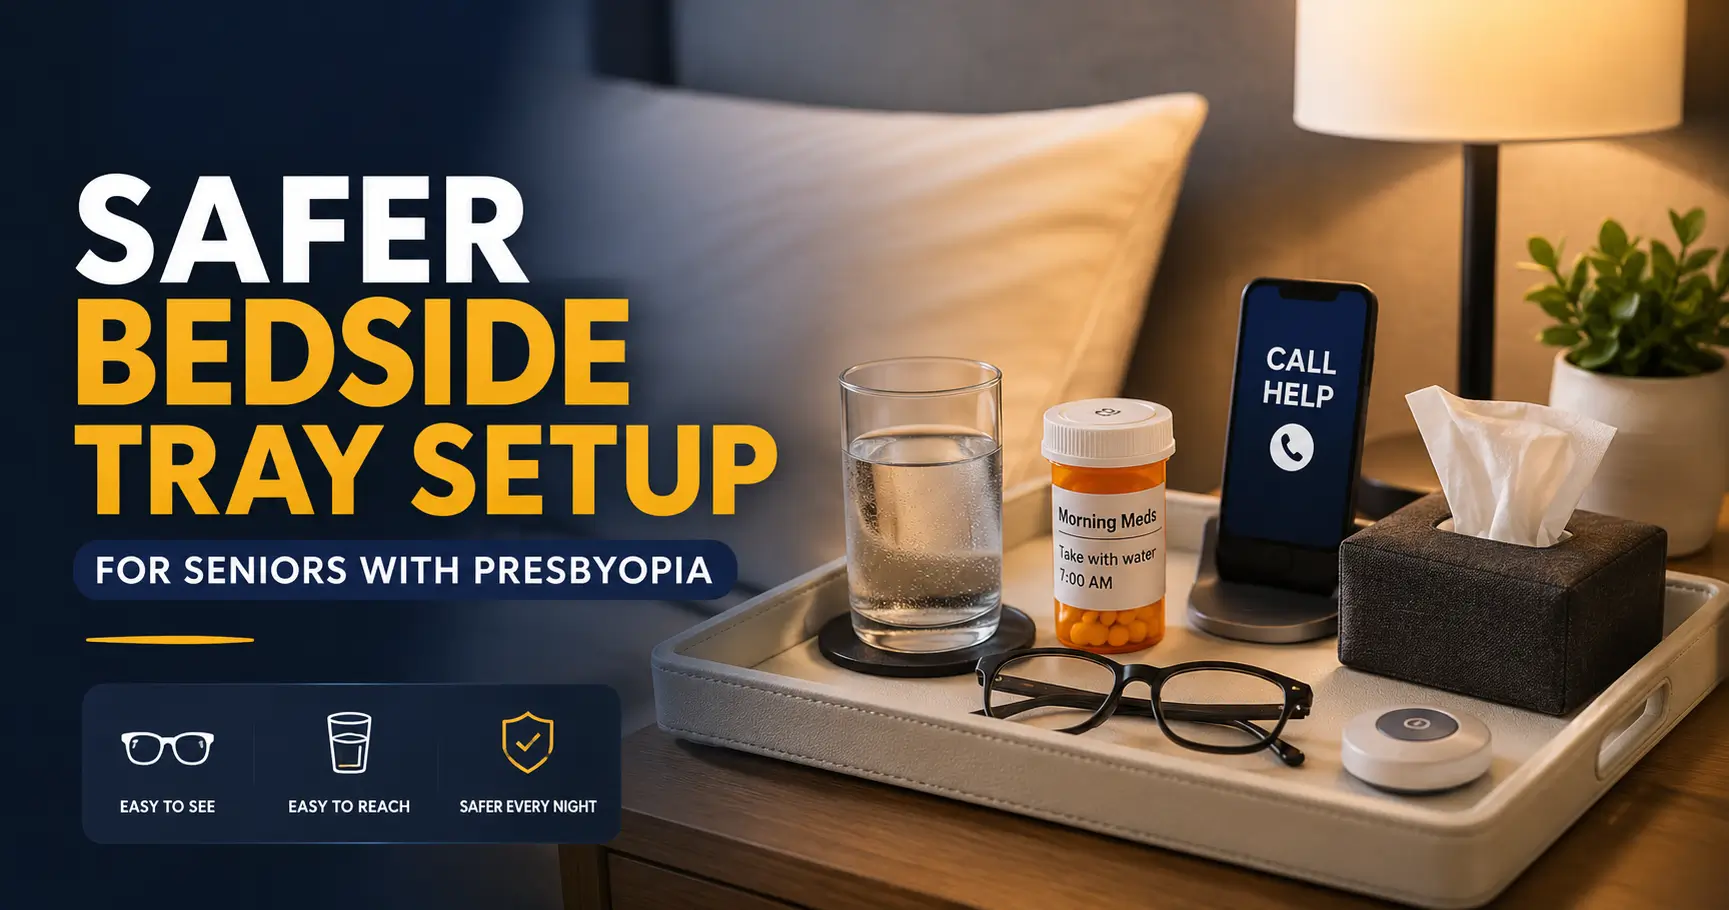
Bedside Tray Setup for Seniors with Presbyopia:
A Safer Nightstand That Actually Works
A bedside tray looks small until the room is dark, the glasses are missing, the pill label is tiny, and the water glass is just far enough away to invite a risky reach. For seniors with presbyopia, the ordinary nightstand can become a quiet maze of smudged lenses, beige objects, shadowed labels, and too many decisions before the lamp is even on.
This guide turns that little tray into a practical safety station. Not a decorator’s tray. Not a storage dump. A working, forgiving, easy-to-read setup built around near vision, contrast, lighting, hand placement, medication habits, water spills, phone access, and the real bedtime routines families actually live with.
The goal is not to buy a perfect product. The goal is to create a place where the right item is obvious, reachable, and hard to confuse at 2:13 a.m., when even a familiar bedroom can feel like a room wearing a hat.
Fewer squints
Use contrast, large print, and predictable placement so essentials do not disappear into the nightstand fog.
Fewer reaches
Place the highest-use items closest, especially glasses, water, phone, tissues, and call options.
Fewer mistakes
Separate medication, emergency contacts, remotes, and clutter so the tray does one job well.
Best promise: build one safer bedside tray tonight before buying another organizer. 🌙
Snapshot
This article is for adult children, caregivers, aging-in-place planners, and seniors who want a safer bedside tray setup for presbyopia, blurry near vision, nighttime reading, medication organization, and emergency access.
By the end, you will know what belongs on the tray, what should be removed, where each item should go, and how to test the setup in real bedroom lighting.
Table of Contents
Safety and Disclaimer: A Tray Helps, But It Is Not Care
This article is for general education and practical home organization. It is not medical advice, occupational therapy advice, pharmacy advice, or a substitute for a home safety evaluation by a qualified professional.
Presbyopia is common with age, and a better bedside tray can make daily life easier. Still, sudden vision changes, repeated falls, nighttime confusion, dizziness, medication errors, or trouble recognizing items should be treated as care signals, not simple clutter problems.
Use this guide as a practical starting point. Then involve an eye care professional, pharmacist, physician, occupational therapist, or fall-prevention specialist when the situation feels bigger than the tray. A tray can reduce friction, but it should never be asked to do the work of a care plan.
Key takeaway:
A safer bedside tray supports routines. It does not diagnose vision problems, replace medication guidance, or solve fall risk by itself. When safety worries keep repeating, the tray is telling you to widen the circle of help.
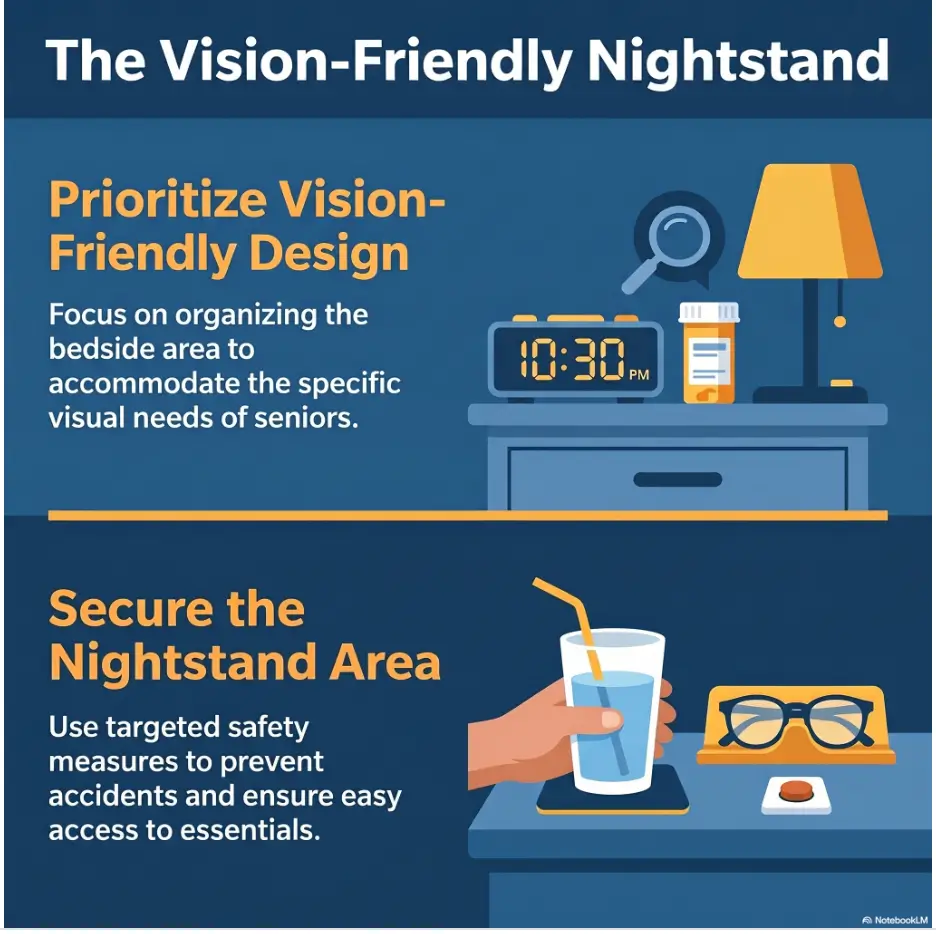
The Bedside Tray Is Not “Just a Tray”
For younger eyes, a tray is a surface. For aging eyes with presbyopia, it becomes a small control center. The same nightstand that once held a paperback, a water glass, and a phone may now need to support reading glasses, a magnifier, pill reminders, tissues, a call button, a charging cord, eye drops, a remote, and emergency information.
That is why the best bedside tray setup for seniors with presbyopia is not about squeezing in more items. It is about reducing visual effort. Every object should have a reason, a home, and enough contrast to be found without a full search party.
Why Presbyopia Turns Tiny Clutter Into a Nighttime Risk
Presbyopia makes near focus harder. Small print, low contrast, dim lighting, and shiny surfaces become especially frustrating. At night, that frustration can turn practical: the senior may pick up the wrong bottle, knock over a glass, reach too far, or get out of bed to search for something that should have been within reach.
The risk is not always dramatic. Often it is a chain of small annoyances. The glasses case blends into the tray. The phone is under a magazine. The lamp switch is behind the lamp. The pill organizer is facing the wrong direction. None of these problems looks urgent in daylight, but at 2 a.m. they can feel like a tiny obstacle course wearing slippers.
The Three-Second Rule: Can They Find It Without Searching?
A useful bedside tray passes the three-second rule. In normal nighttime lighting, the senior should be able to locate the most important item within three seconds: glasses, water, phone, tissues, medication organizer, remote, or call button.
This rule is simple because real life is simple when someone wakes up groggy. They should not need to remember that the magnifier is under the book, the phone is behind the tissue box, and the pill list is inside the drawer beneath the coaster. Good organization works before the brain has finished booting up.
The Real Goal Is Less Reaching, Not More Storage
A common mistake is buying a bigger tray because the current one feels crowded. Sometimes that helps. More often, it simply gives clutter a larger apartment.
The safer question is not, “How much can this tray hold?” It is, “What must be reachable from the resting position?” A tray that holds five essential items in obvious places is safer than a tray that holds twenty items in a handsome little chaos festival.
Quick test: the bedside reach audit
- Have the senior lie in their usual sleeping position.
- Ask them to reach for glasses, water, phone, tissues, and the light switch.
- Watch whether they twist, stretch, sit up fully, or sweep their hand across the tray.
- Move the item closer if the reach looks strained.
- Remove anything that gets bumped during the test.
Who This Is For, And Who Needs More Than a Tray
A bedside tray setup is most helpful when the senior is generally oriented, can follow a routine, and can identify objects when lighting, contrast, and placement are improved. It is not meant to solve complex care needs by itself.
Think of the tray as a support tool. It can make a good routine easier. It cannot make an unsafe routine safe if the underlying issue is confusion, repeated falls, medication mismanagement, or untreated vision changes.
Best Fit: Seniors Who Can Still Read With Help
This setup works especially well for seniors who can read with reading glasses, a magnifier, stronger lighting, large print, or phone accessibility settings. They may complain that labels are too small, menus are harder to read, or they keep misplacing their glasses, but they can still use visual cues when those cues are designed well.
For this group, the tray acts like a stage manager. It puts the right prop in the right place at the right time. The senior still performs the routine, but the environment stops heckling them.
Also Helpful For: Recovery, Arthritis, and Low Night Vision
A bedside tray can also help after cataract surgery, hip or knee surgery, shoulder pain, hand arthritis, tremor, vertigo, or general nighttime unsteadiness. In these cases, the tray should reduce bending, twisting, gripping, and searching.
For example, someone recovering from surgery may need water, pain medicine instructions, tissues, a phone, and a small notepad for medication times. Someone with arthritis may need easy-grip containers and fewer snap-shut cases. Someone with poor night vision may need larger, brighter targets and a clear path to the bathroom. For a broader bedroom review, you may also find this related guide useful: bedroom safety for seniors with poor vision.
Not Enough For: Confusion, Frequent Falls, or Medication Mix-Ups
If a senior is waking confused, taking the wrong pills, doubling doses, falling often, or forgetting how to use familiar items, the tray should not be treated as the main fix. It may still help, but the bigger concern needs professional attention.
A tray can reduce visual clutter. It cannot reliably prevent unsafe decision-making. In those cases, consider a medication review, fall-risk evaluation, home health support, occupational therapy, or a conversation with the primary care clinician.
| Situation | Tray likely helps | Also consider |
|---|---|---|
| Misplacing reading glasses | Yes, add a fixed glasses zone | Extra pair near the bed |
| Trouble reading pill labels | Partly, use large print and lighting | Pharmacist label support |
| Frequent falls at night | Only as a small support | Fall-prevention review |
| Confusion about medications | Not enough by itself | Clinician or pharmacist guidance |
The Near-Vision Zone Should Sit Closest
When presbyopia is part of the picture, the first tray zone should be the near-vision zone. This is the place for the items that help the senior see everything else: reading glasses, a magnifier, a lens cloth, and sometimes a small large-print note.
Place this zone at the front edge of the tray, closest to the hand the senior naturally uses when reaching from bed. If the glasses are not easy to grab, every other label, bottle, and phone screen becomes harder to manage.
Reading Glasses Need a Parking Spot, Not a Treasure Hunt
Reading glasses should live in one exact spot every night. Not “somewhere on the nightstand.” Not “near the book.” One spot. Same direction. Same container. Same feel under the hand.
A shallow, high-contrast dish or soft-lined tray pocket works better than a deep decorative bowl. A deep bowl hides thin frames and encourages the senior to poke around. A shallow zone lets the glasses announce themselves like a small brass section in an otherwise quiet room.
If glasses are often missing, place a second pair in the tray and another pair in a daytime reading location. The point is not elegance. The point is reducing the nightly opera called “Where did I put them?” For a broader setup, see this related guide on a reading glasses setup for seniors.
Add a Magnifier Only If It Will Actually Be Used
A magnifier can be helpful for pill labels, small instructions, thermostat numbers, and phone setup notes. But it only belongs on the bedside tray if the senior actually uses it. A magnifier that feels awkward will become one more object to bump in the dark.
Choose the simplest option that matches the task. A handheld magnifier may be enough for a quick label check. A stand magnifier may be easier for someone with hand tremor. A phone magnifier feature may be useful for a tech-comfortable senior, but only if it is set up in advance and practiced before bedtime.
Keep Lens Cloths Visible, Because Smudges Pretend to Be Bad Eyesight
Smudged glasses can make a senior think their vision has worsened, especially under dim light. Keep one bright lens cloth in the glasses zone. Avoid gray or beige cloths that blend into the tray like shy moths.
Do not tuck the cloth inside a case if the senior forgets it is there. Make it visible, washable, and easy to replace. A bright microfiber cloth can double as a visual marker for the glasses zone.
Key takeaway:
Put the tools for seeing closest to the bed. Glasses, magnifier, and lens cloth should not compete with books, cords, tissues, coins, receipts, or decorative bowls.
Here’s What No One Tells You: The Case Matters More Than the Glasses
A good glasses case is not just protection. It is a landmark. It should be easy to see, easy to open, and easy to identify by touch.
For a senior with presbyopia, a slim black case on a dark tray may be a poor choice. So is a tiny snap case that requires fingernail strength. Better options include a bright clamshell case, a soft sleeve with a textured edge, or an open-front glasses holder that allows the frames to slide in without precision.
If the senior uses multiple pairs, mark the reading pair clearly. Use large print, tactile tape, or a color band. The bedside pair should not look identical to distance glasses unless the senior can confidently tell them apart.
Lighting First, Organization Second
Organization fails when the lighting is wrong. A tidy tray under glare, shadow, or dim amber haze can still be hard to use. Before buying bins, dividers, or a new tray, look at the light.
For seniors with presbyopia, good bedside lighting does two jobs. It helps the eyes focus on nearby objects, and it reduces the temptation to reach blindly. The lamp should make the tray readable without blasting the whole room like a tiny interrogation chamber.
Glare Makes Large Print Feel Small Again
Large print helps only when the surface is easy to see. Glossy pill labels, shiny trays, glass tabletops, and reflective phone screens can bounce light back into the eyes. That glare can make a bold label feel strangely unreadable.
Use matte surfaces where possible. Angle the lamp so light falls across labels without reflecting directly upward. If the senior has glare sensitivity, a lampshade, directed reading light, or lower-glare bulb can matter more than a fancier organizer.
Warm Light for Comfort, Directed Light for Reading
Warm light can feel calmer at night. Directed light helps with reading. The best bedside setup often uses both: a gentle room-friendly lamp plus a focused reading light that points at the tray, book, or medication list.
Avoid lights that are so dim they turn everything into soup. Also avoid lights that are so bright they cause squinting or afterimages. The sweet spot is personal, which is why testing the tray at actual bedtime matters.
The Switch Must Be Reachable Without Sitting Up
If the light switch requires sitting up, twisting, or reaching behind the lamp, it is not well placed. The switch should be reachable from the bed with the same hand the senior naturally uses at night.
Options include a lamp with a large base switch, a touch lamp that is not overly sensitive, a cord switch secured in one visible spot, a remote-controlled lamp with one simple control, or a smart plug used only if the senior is comfortable with it. For more ideas, see this related guide on light switches for seniors.
Don’t Place the Lamp Where It Casts a Shadow Over Labels
A lamp behind the senior can cast the hand’s shadow directly over the medication organizer, phone, or note card. That shadow may force the senior to lift items, tilt labels, or lean forward.
Set the light slightly forward or to the side so labels are illuminated when the hand reaches in. Test it by placing your own hand over the tray. If your hand turns the important item into a little eclipse, adjust the lamp.
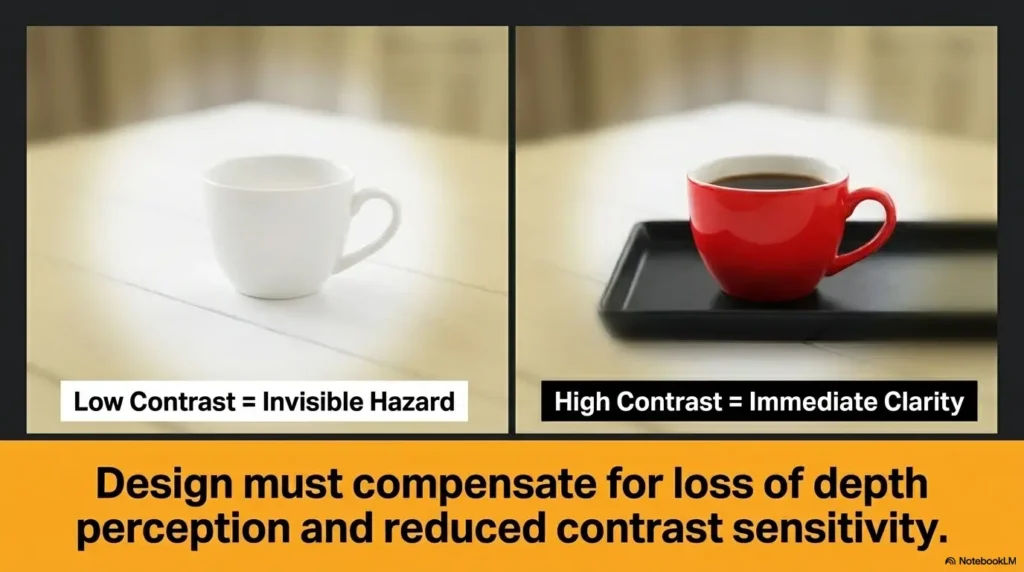
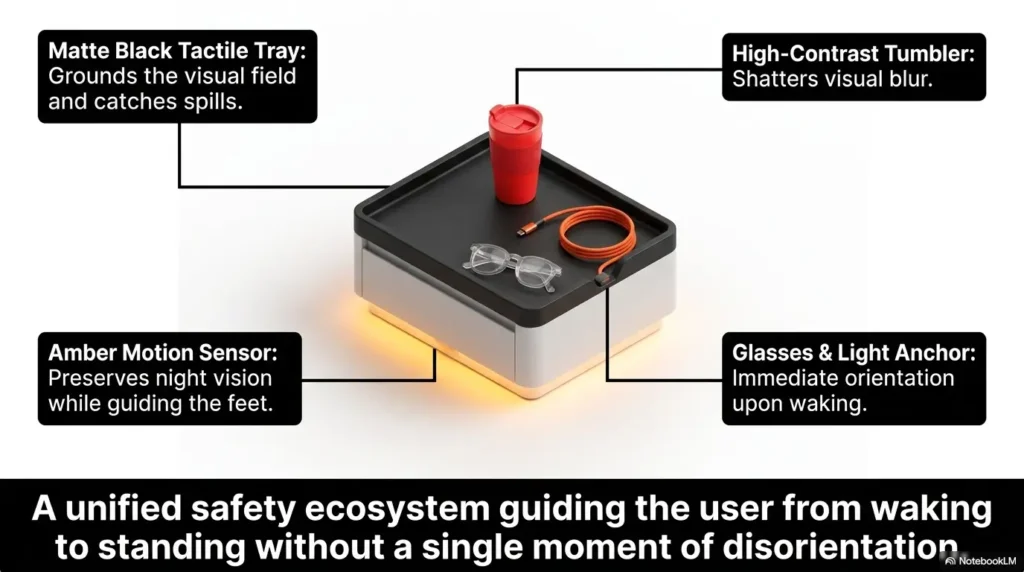
High-Contrast Layouts Beat “Pretty” Trays
A beautiful bedside tray can still be bad at its job. For presbyopia and low night vision, contrast matters more than matching the curtains. The tray should help objects separate from the surface, not politely vanish into it.
Designers often love soft neutrals. Aging eyes often prefer clear difference. A dark tray with light objects, a light tray with dark objects, or colored zones for different categories can make the setup easier to use without making the room look like a supply closet.
Dark Tray, Light Items: The Simple Visibility Trick
If most bedside items are light-colored, choose a darker tray. White tissues, white pill organizers, pale lens cloths, silver remotes, and paper notes stand out better against charcoal, navy, dark walnut, or deep green.
If the senior uses dark glasses cases, black remotes, or a dark phone, reverse the logic. Use a lighter tray or add a pale tray liner. The right contrast depends on the items, not a universal color rule.
Use Color Blocking for Medication, Glasses, Phone, and Water
Color blocking gives each category a visual home. Blue might mean glasses. Yellow might mean medication. White might mean tissues. Red should be used sparingly for emergency information or a call button, so it keeps its importance.
You do not need a craft project. A colored coaster, tray liner, silicone mat, or large label can be enough. The goal is to help the hand and eye agree quickly: “This is the water zone. This is the phone zone. This is not where pills go.”
Skip Clear Acrylic If the Surface Disappears at Night
Clear acrylic looks clean in photos, but it may be hard to perceive in dim light. Transparent edges can disappear, especially on glass or pale wood surfaces. Small items can also blend into the background beneath the tray.
If you already own a clear tray, add a high-contrast liner. A matte placemat cut to size, a dark felt insert, or a non-slip shelf liner can make the tray edge and zones easier to see.
Let’s Be Honest: Beige-on-Beige Is Where Objects Go to Retire
Beige tray, beige nightstand, beige tissue box, beige pill case, beige lamp cord: this is how useful objects quietly enter witness protection.
The solution does not need to be loud. One strong contrast choice can rescue the entire setup. Try a navy tray liner, a black-and-white label card, a bright glasses case, or a high-contrast phone dock. The room can still feel calm while the essentials become visible.
The Safer Bedside Tray Framework
1. Light
Can labels be seen without glare or shadows?
2. Contrast
Do important items stand apart from the tray?
3. Zones
Does each purpose have one fixed home?
4. Reach
Can the senior reach essentials without stretching?
5. Test
Does it work in real nighttime conditions?
Medication Needs Its Own Mini-System
Medication is the part of the bedside tray that deserves the least improvisation. A tray can support medication routines, but it should not encourage loose pills, mystery bottles, or late-night guessing.
For seniors with presbyopia, medication safety depends on visibility, separation, consistency, and a clear plan. The tray should make the correct action easier and the wrong action harder.
Separate Daily Pills From “As Needed” Items
Daily medications and “as needed” items should not be jumbled together. A senior waking up at night should not have to sort through a crowd of bottles to find one item.
If nighttime medication is part of the routine, use a clearly labeled organizer or a single designated container approved by the senior’s care team. Keep “as needed” items in a separate, clearly marked zone. If there is any confusion about timing or dosage, ask a pharmacist or clinician before changing the setup.
Use Large-Print Labels Facing Upward
Labels should face the person, not the wall. If a medication list or pill organizer is on the tray, orient it so the senior can read it from bed without lifting it.
Large print helps, but placement matters too. A large label on the side of a bottle may still be useless if the bottle is lying sideways, turned around, or partly hidden by tissues. Face-up labels are small acts of mercy.
Keep a Written Medication List Nearby, But Not Buried
A one-page medication list can help during emergencies, caregiver visits, or late-night uncertainty. It should include medication names, doses, timing, allergies, pharmacy contact information, and emergency contacts when appropriate.
Do not bury the list under books or inside a drawer no one opens. Use a bright folder, large-print card, or labeled envelope near the back of the tray. For a full printable approach, see this related article on a one-page medication list template.
Don’t Store Loose Pills on the Tray, Even “Just for Tonight”
Loose pills are easy to drop, confuse, spill, or forget. They can also be dangerous around grandchildren, pets, or visitors. A pill on a tray may look harmless until it rolls under a tissue or sticks to the bottom of a cup.
Use original containers, approved pill organizers, or pharmacist-recommended packaging. If the senior struggles to open containers, ask the pharmacy about easier packaging options. Do not create a homemade system that makes the medication unidentifiable.
| Medication tray item | Safer setup | Avoid |
|---|---|---|
| Night pill organizer | Large-print, face-up, same position nightly | Tiny compartments with faint letters |
| Prescription bottles | Only if needed at night and clearly separated | Several similar bottles in one pile |
| Medication list | Large print in bright folder or envelope | Folded note under unrelated papers |
| Eye drops | Labeled and separated from other small bottles | Mixed with cosmetics or travel-size bottles |
Key takeaway:
Medication belongs in a clear mini-system, not a mixed bedside pile. If the senior has ever missed, doubled, or confused a dose, ask for professional guidance before relying on organization alone.
The Water Setup Can Prevent Small Disasters
Water is one of the most common bedside essentials, and one of the easiest to underestimate. A glass that is too narrow, too heavy, too slippery, or placed on the wrong side can cause spills, wet papers, damp pills, startled pets, and risky cleanup in the dark.
The best water setup is boring in the finest way: stable, easy to grip, easy to see, and placed where the senior naturally reaches.
Choose a Stable Cup Over a Stylish Glass
A wide-base cup is usually safer than a tall, narrow glass. A textured grip can help if hands are stiff or damp. Lightweight is helpful, but feather-light cups can tip easily, so balance matters.
Choose a cup color that contrasts with the tray. Clear glass can disappear, especially on a clear tray or glass-topped nightstand. If the senior prefers a clear cup, use a contrasting coaster or tray zone beneath it.
Use a Lidded Bottle If Tremors or Pets Are Part of the Room
A lidded bottle or straw cup may be better if the senior has tremor, limited grip, nighttime coughing, or a loyal pet who patrols the nightstand like a furry inspector. The lid should be easy to open, not a puzzle cap.
For some seniors, a straw bottle reduces head movement and effort. For others, a straw can be awkward or hard to clean. Test the option for one night rather than assuming the product photo knows your family.
Place Water on the Dominant-Hand Side
Water should sit on the side the senior naturally reaches with. That may not be the same as the side where the nightstand currently sits. If the person sleeps on the left side of the bed but reaches with the right hand across the body, the setup may need adjustment.
Watch the movement. If the senior reaches across cords, medication, or glasses, the water is in the wrong spot. Water should have a clear lane, not a little obstacle course.
The Napkin Test: What Happens If It Spills at 2:13 A.M.?
Place a napkin under the water zone and imagine the cup tipping. What gets wet? The medication list? The phone charger? The pill organizer? A paperback? If one spill could create several problems, move the water.
Use a raised-edge tray, absorbent coaster, silicone mat, or lidded bottle when spills are likely. The best spill plan is the one that does not require anyone to stand up suddenly in the dark.
Short Story: Mary’s Water Glass Moved Four Inches
Mary’s daughter thought the problem was the cup. Every week, her mother knocked over water at least once. They tried a heavier glass, then a plastic tumbler, then a bottle with a lid.
The real problem appeared only when Mary got into bed and reached. Her hand crossed over the tissue box first, brushed the phone cord second, and then found the water.
They moved the water four inches forward and placed it on a dark silicone coaster. The spills stopped.
The lesson was quiet but useful: sometimes the safest product is not a new product. Sometimes it is the same object finally placed where the hand expects it to be.
Phone, Remote, and Emergency Items Need Big Targets
Small electronics can be surprisingly hard to manage with presbyopia. A phone screen locks. A remote has tiny buttons. A charging cable slips behind the nightstand. An emergency contact list exists, but only inside a phone app that requires glasses to open.
The bedside tray should turn these items into big, predictable targets. The senior should not need fine vision or perfect dexterity to call for help, adjust the room, or contact family.
Put the Phone in a Fixed Dock or Bright Tray Pocket
A phone lying flat on a dark nightstand may be hard to see. A phone under papers is worse. Use a fixed dock, charging stand, or high-contrast tray pocket so the phone has one home every night.
Set the phone so the screen faces the senior. Increase the font size, simplify the home screen, and keep emergency contacts easy to find. For a phone-specific setup, see this related guide on the best phone font size for seniors.
Emergency Contacts Should Be Printed Large, Not Hidden in Apps
Phones are useful until they are locked, uncharged, misplaced, or confusing. A printed emergency contact card belongs near the back of the tray or taped inside a visible bedside folder.
Use large print and simple categories: emergency services, primary caregiver, nearby neighbor, doctor’s office, pharmacy, and important medical notes. Keep it brief. A crowded emergency card becomes a wallpaper of panic.
Add a Simple Call Button If Getting Up Is Risky
If the senior is at risk of falling when getting up, a call button, wearable alert device, or simple communication system may be useful. The key word is simple. The device must be easy to identify by sight and touch.
Do not bury a call button among remotes and cords. Give it a dedicated high-contrast zone. Practice using it during the day so it does not feel unfamiliar at night.
One Remote Is Kind; Three Remotes Are a Puzzle Box
If the bedside tray has three remotes, the senior may have to solve a tiny plastic riddle before turning off the television or adjusting a fan. Consolidate where possible.
Use one large-button remote if it controls the necessary device. Remove unused remotes from the tray. Mark the essential buttons with tactile dots or high-contrast labels if the senior can use them safely. You may also like this related article on choosing a large-button TV remote.
Bedside communication checklist
- Phone has one visible charging home.
- Font size is large enough to read from a comfortable distance.
- Emergency contacts are printed in large type.
- Call button or alert device has its own high-contrast spot.
- Only necessary remotes stay on the tray.
- Cords are secured so they do not cross the reach path.
Show me the nerdy details
A bedside tray works better when it reduces cognitive load. That means the senior does not need to remember many locations, compare similar objects, or search through visual noise. The strongest setup uses three design ideas: salience, mapping, and friction control. Salience means important items stand out through contrast, size, texture, or placement. Mapping means each zone matches the action:
glasses near the front, water near the dominant hand, medication separated from “as needed” items, and phone in a fixed dock. Friction control means removing tiny obstacles that cause failure, such as snap cases, slippery trays, dangling cords, shiny surfaces, identical bottles, and labels that face the wrong direction. None of this needs to look clinical. It simply needs to make the right action the easiest action.
Common Mistakes That Make the Tray Less Safe
Most unsafe bedside trays are not wildly messy. They are almost good. That is what makes the mistakes sneaky. The tray has the right items, but they are too crowded, too similar, too shiny, or too far away.
Fixing these mistakes usually costs less than replacing the tray. Often, the biggest improvement comes from removing things.
Mistake 1: Choosing a Tray That Slides Too Easily
A tray that slides when touched can create spills and startle the senior. This is especially risky on glossy nightstands, glass tops, or polished wood.
Add non-slip feet, a rubber mat, or a stable tray liner. If the tray still moves when the senior reaches for water, it is not the right tray for the job.
Mistake 2: Filling Every Corner Because There Is Space
Empty space is not wasted space. Empty space is where a hand lands safely. A tray packed edge to edge may look efficient, but it gives the senior no margin for clumsy moments.
Keep a center strip open whenever possible. This gives the hand room to approach items without knocking over the water or pushing the phone off its dock.
Mistake 3: Using Tiny Labels That Require the Very Vision They Lack
Tiny labels can make caregivers feel organized while giving the senior no real help. If the label cannot be read in bedroom lighting from a natural position, it is decoration wearing office shoes.
Use fewer words, larger type, and strong contrast. “NIGHT PILLS” is better than a detailed paragraph on a small sticky note. A large arrow can sometimes do more than twelve polite instructions.
Mistake 4: Mixing Nighttime Essentials With Daytime Clutter
Receipts, jewelry, mail, coins, hand cream, spare batteries, books, wrappers, and old appointment cards can slowly colonize a bedside tray. Once that happens, the tray stops being a safety tool and becomes a drawer without walls.
Give daytime clutter another home. The bedside tray should hold only what is needed during the night or immediately after waking.
Key takeaway:
A safer tray is not a fuller tray. It is a more honest tray. If an item does not help with seeing, comfort, medication safety, hydration, communication, or a calm morning, it probably belongs elsewhere.
Mistake 5: Forgetting the Path From Bed to Bathroom
The tray is only one part of nighttime safety. If the senior must get up to use the bathroom, the path matters too. A perfect tray beside a dark, cluttered floor is only half a solution.
Check slippers, rugs, cords, pet beds, laundry baskets, and night lights. The tray should support the first moment of waking, while the room supports the next few steps. For a related nighttime safety plan, see low vision nighttime bathroom safety.
| Keep on the tray | Move elsewhere | Reason |
|---|---|---|
| Reading glasses | Extra old glasses | Avoid confusing pairs |
| Current medication organizer | Loose pills and expired bottles | Reduce medication mistakes |
| Water with stable base | Tall stemmed glass | Lower spill risk |
| One simple remote | Unused remotes | Reduce button confusion |
When to Seek Help Instead of Rearranging the Tray
Sometimes the tray reveals a bigger problem. That is useful. A bedside setup can show you where a senior struggles: seeing labels, remembering pills, reaching safely, waking disoriented, or navigating the room.
When those patterns appear, do not keep rearranging the tray forever. Use the pattern as information and bring in help.
Frequent Falls or Near-Falls Need a Safety Review
If the senior has fallen, nearly fallen, or started holding furniture to move through the room, a tray adjustment is not enough. A fall-risk review may look at vision, medications, footwear, rugs, lighting, balance, blood pressure, and bathroom access.
A safer tray can support that plan, but it should not delay it. Falls can change independence quickly, and prevention is far kinder than repair.
Missed or Doubled Medications Need Professional Guidance
If medications are missed, doubled, taken at the wrong time, or confused with other products, talk with a pharmacist, prescriber, or care team. Ask about large-print labels, simplified schedules, blister packaging, medication synchronization, or caregiver support.
Do not solve medication confusion by creating a private code that only one caregiver understands. The system should be clear to the senior and to anyone who may help in an emergency.
Sudden Vision Changes Should Not Be Treated as Normal Aging
Presbyopia develops gradually, but sudden blurry vision, new distortion, flashes, floaters, eye pain, loss of vision, or sudden trouble reading should be evaluated promptly. Do not assume a new bedside magnifier is the answer.
Organization is useful for stable, everyday near-vision difficulty. New or worsening symptoms deserve medical attention. For warning-sign context, see this related article on senior vision changes warning signs.
Night Confusion May Need More Support Than Better Organization
If the senior wakes confused, mistakes objects for other things, cannot remember how to use the phone, or repeatedly searches for items that are in plain view, the issue may not be the tray.
Better labels and brighter colors may still help, but they should be part of a wider conversation about sleep, medications, infection risk, cognition, hydration, safety, and support at night.
FAQ
What size bedside tray is best for seniors?
The best bedside tray is large enough for essentials without crowding, but not so large that it invites clutter. For many seniors, a medium tray with raised edges and an open center works well. The tray should fit the nightstand securely and leave room for a lamp or phone dock if those sit outside the tray.
Should a senior’s bedside tray have handles?
Handles can help if a caregiver moves the tray, but they can also take up space or catch cords. Choose handles only if they do not interfere with reaching. Raised edges are usually more important than decorative handles.
Is a rolling bedside table better than a tray?
A rolling bedside table may be better for recovery, meals, writing, or frequent care tasks. A tray may be better for simple nighttime essentials. If wheels are used, they should lock securely. A rolling table that drifts away is not safer.
What color tray is easiest to see at night?
The easiest color depends on the items placed on it. A dark tray often works well with light pill organizers, tissues, and papers. A light tray may work better for black remotes, dark glasses cases, or a black phone. Contrast matters more than the exact color.
Where should reading glasses go on a nightstand?
Reading glasses should go in a fixed, front-facing spot close to the senior’s natural reaching hand. Use a shallow, high-contrast holder or soft tray pocket. Avoid deep bowls, crowded shelves, or cases that blend into the surface.
How do you organize medications safely on a bedside tray?
Keep only needed nighttime medications on the tray, use large-print labels, separate daily pills from “as needed” items, and avoid loose pills. If there is any confusion about timing, dosage, or identification, ask a pharmacist or clinician for help.
What should not be kept beside an elderly person’s bed?
Avoid loose pills, candles, tangled cords, unstable water glasses, clutter piles, expired medication, sharp objects, and stacked items that can tip. Also avoid decorative containers that hide important items too well.
How can caregivers make nighttime items easier to find?
Use consistent placement, high contrast, large labels, good lighting, and fewer items. Test the setup while the room is dim and the senior is in bed. Ask what was hard to find in the morning and adjust from there.
Key takeaway:
The FAQ answers all point to one principle: the senior should not have to search, guess, stretch, or decode tiny information at night. Make important things obvious.
Next Step: Build a One-Night Test Tray
The fastest way to improve a bedside tray setup for seniors with presbyopia is not shopping. It is testing. You can learn more from one honest night than from twenty product pages glowing politely on a screen.
Start with the tray you already have, or use a temporary surface with a non-slip liner. Remove everything first. Then add back only five essentials: glasses or magnifier, water, tissues, phone or call device, and the medication item that truly belongs at night.
Remove Everything First, Then Add Only Five Essentials
Clearing the tray first prevents old clutter from winning by seniority. Once the surface is empty, choose items based on nighttime need, not habit.
Place glasses at the front. Put water on the dominant-hand side. Give the phone a fixed dock or pocket. Keep medication separate. Leave the center open. Add one bright lens cloth or label if it helps the eye find the zone.
Test It in Real Bedroom Lighting
Do not test at noon under cheerful daylight. Test it when the bedroom looks the way it looks at night. Turn on the actual lamp, night light, or hallway light. Check for glare, shadows, and vanishing objects.
Ask the senior to find each item from bed. Do not coach. Watch. The tray will tell you what needs to change.
Ask One Question in the Morning: “What Was Hard to Find?”
The morning review matters because the real test happens when nobody is performing for the checklist. Ask what was hard to find, what felt too far away, what got bumped, what felt unnecessary, and what should be added.
Keep the question gentle. The purpose is not to grade the senior. The purpose is to let the setup confess its flaws.
Adjust the Tray Before Buying More Products
Move items first. Add contrast second. Improve lighting third. Buy products last. This order saves money and prevents the classic caregiver trap: buying a clever organizer for a problem caused by placement.
Within 15 minutes tonight, you can clear the tray, choose five essentials, move the glasses closest, place water on the dominant-hand side, and test the lamp angle. That small reset may turn a cluttered nightstand into a quiet little safety station, the kind that works without applause.
15-minute bedside tray reset
- Clear the tray completely.
- Put back only five nighttime essentials.
- Place glasses or magnifier closest to the bed.
- Move water to the dominant-hand side.
- Give the phone or call button one fixed, visible home.
- Turn on the actual nighttime light and check glare.
- Ask tomorrow morning what was hard to find.
Last reviewed: 2026-06