

Precision Beyond Sight: Defining True Accessibility in the Kitchen
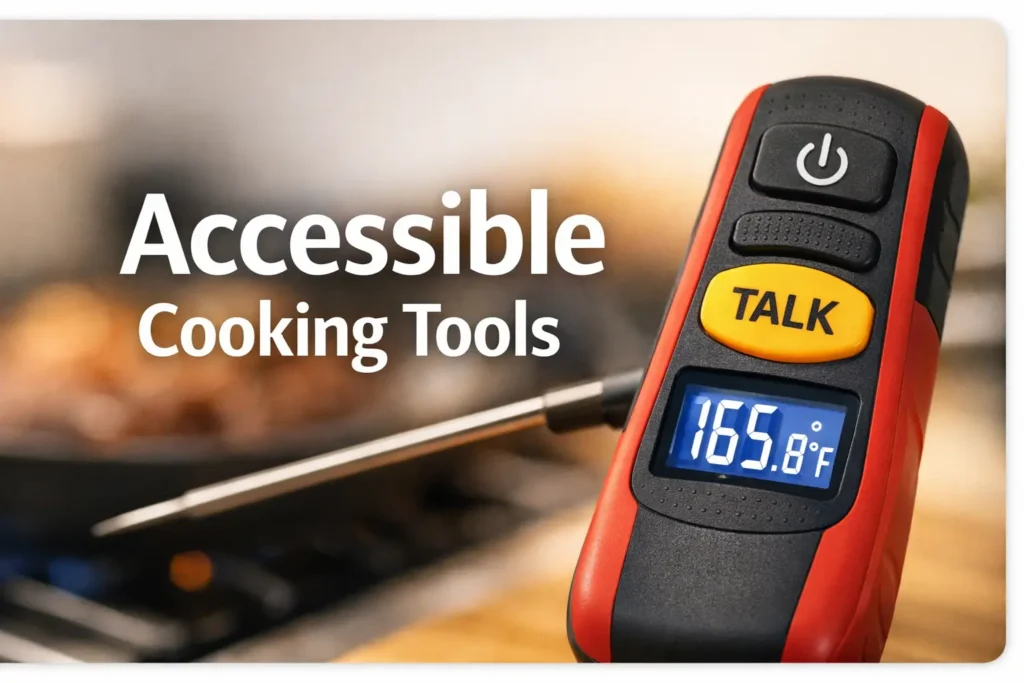
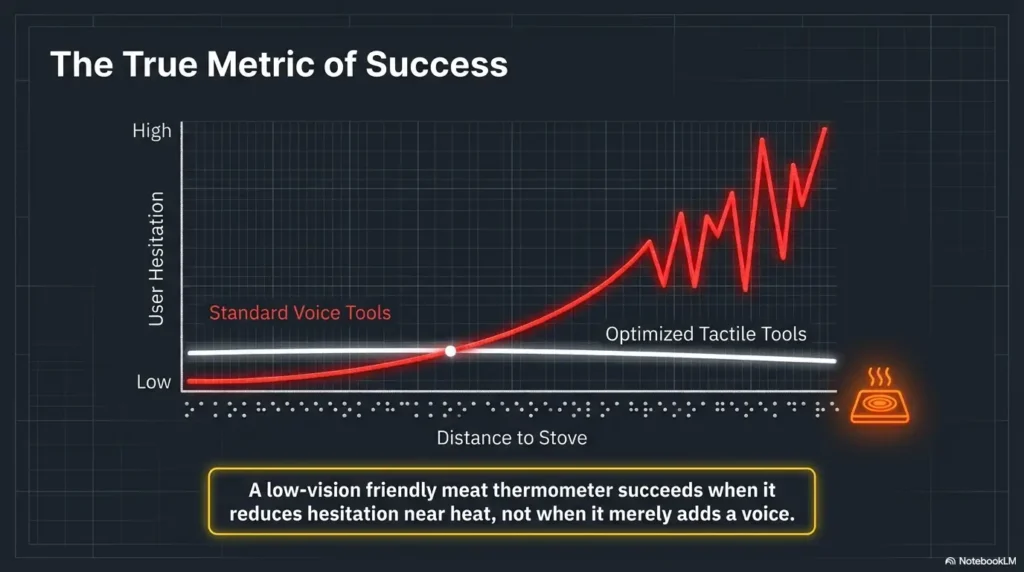
A low vision friendly meat thermometer is not just one that talks. It is one you can operate by touch, hear clearly over a range hood, and trust near real heat without turning dinner into a clumsy little hazard.
That distinction matters more than most product pages admit. Too many thermometers sell “large display” or “audio enabled” as if those features automatically solve low-vision cooking, when the real pain usually lives elsewhere: identical buttons, faint speech, awkward probe handling, and too much friction at exactly the wrong moment.
Keep guessing, and the cost is not just annoyance. It is slower cooking, less confidence, and more room for food-safety mistakes when color and texture cannot be trusted.
This guide helps you judge a low vision friendly meat thermometer the way it will actually be used: one-handed, under noise, around steam, and with safety in mind.
You will leave with a sharper buying filter, a better sense of which accessibility features matter most, and a much easier way to spot marketing language that sounds helpful but wilts in a real kitchen.
The method here is practical, not showroom-pretty. It follows the everyday pressure points that decide whether an accessible kitchen tool earns trust or ends up forgotten in a drawer.
Because this is where most buying advice goes soft and where real usability begins:
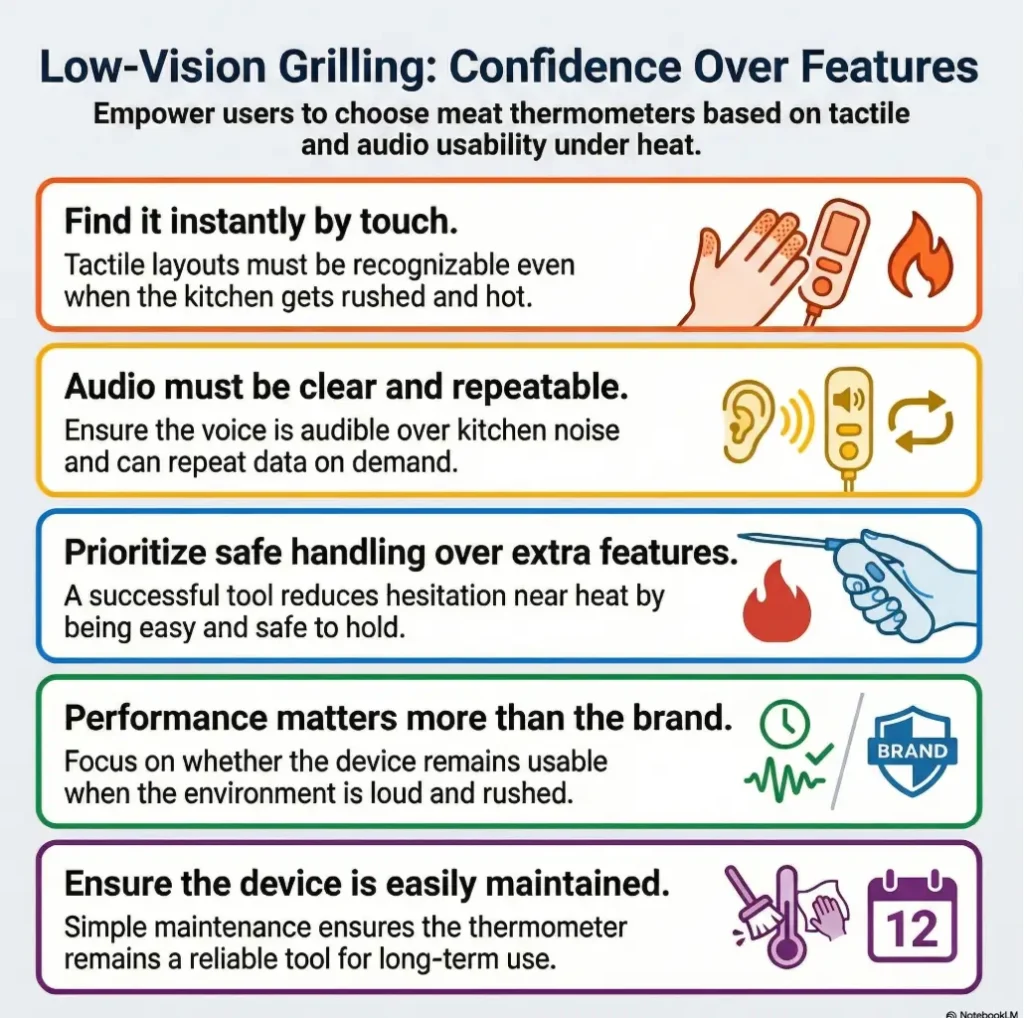
- 1. Buttons First
- 2. Then Audio
- 3. Then Handling
Everything else is decoration until those three work.
Table of Contents
Start Here First: Who This Is For / Not For
This is for readers who…
- Have low vision and want a meat thermometer with tactile buttons and loud audio
- Need something usable in a busy, noisy kitchen
- Care more about safe, independent cooking than gadget novelty
- Are shopping for themselves, a parent, or a visually impaired family member
- Want fewer tiny frustrations and fewer risky workarounds
This is not for readers who…
- Only want the cheapest basic instant-read thermometer
- Prefer app-only smart systems and do not need tactile controls
- Need restaurant HACCP procedures or commercial kitchen documentation
- Want a broad adaptive-device guide outside food prep
Purchase-intent readers are often sold the same old fairy tale: accuracy, speed, and price are all that matter. For many low-vision cooks, that story leaves out the whole actual kitchen. The kitchen has glare. It has wet hands. It has sizzling oil and a pan handle sticking out like a trap in a stage play. A product can be technically good and still be functionally exhausting.
I have seen this pattern across a lot of supposedly accessible kitchen gear. The box says “large display.” Great. Then the display washes out under bright overhead lights. The box says “talking.” Also great. Then the speech sounds like a bored robot calling bingo numbers through a wall. The result is not empowerment. It is friction dressed up in optimistic packaging. The same problem shows up in other tools too, from talking kitchen scales that sound helpful until real-world use exposes the weak points to devices with shiny features but thin practical usability.
- Look for tactile controls first
- Test for clear repeatable speech
- Judge safety by handling, not spec-sheet glamour
Apply in 60 seconds: Before comparing prices, write down the three things that frustrate you most in the kitchen: finding buttons, hearing readings, or handling the probe safely.
What “Low Vision Friendly” Really Means Before You Buy
Tactile first, not just voice-first
A genuinely low-vision friendly thermometer should let you start, measure, and repeat a reading without needing to see the screen clearly. Voice helps, but voice alone is not the whole bridge. If the device only speaks after the exact right sequence of button presses, and those buttons feel identical, the “accessible” part begins to wobble.
Why button shape matters more than button count
Three well-spaced buttons can be easier than eight shallow, multipurpose ones. Shape, separation, and texture give the fingers something to understand. Flat identical controls are the kitchen version of being handed six house keys cut from the same metal and told to hurry. It is the same principle behind a strong low-vision key identification system: the hand needs reliable landmarks, not abstract optimism.
Loud audio is useful, but only if it is understandable
Volume without clarity becomes its own nuisance. Older adults and mixed-vision households often do better with speech that is crisp, slightly slower, and easy to repeat on demand. A device that barks once and moves on is less a helper than a dramatic acquaintance.
Screen readability still matters for mixed-vision households
Some homes have one person with low vision and another with typical vision. In those cases, readable contrast, large numerals, and minimal visual clutter still matter. Accessibility does not lose points for being cooperative. A good tool should work by touch and still make sense when glanced at. That visual comfort is shaped by the room too, especially when under-cabinet lighting throws glare across glossy kitchen surfaces.
USDA’s food temperature guidance makes the practical stakes clear. Poultry should reach 165°F, and many other foods have their own safe targets, which means you need a thermometer that helps you get a trustworthy reading without guesswork. FDA also notes that color is not a reliable indicator of doneness. That is exactly why usability is not a cosmetic feature here. It supports correct checking at the right moment.
Show me the nerdy details
When shoppers compare kitchen thermometers, they often focus on response time and stated accuracy. Those matter, but low-vision usability adds another layer: input confidence. Can you locate the main control by touch within two seconds? Can you trigger repeat speech while holding a hot tray? Can another person in the home understand the interface without a tutorial? Those are not soft criteria. They directly affect whether safe temperature checks happen consistently.
The Hidden Test: Can You Use It With One Hand and Hot Food Nearby?
Probe placement should not become a dexterity trap
The best thermometer in a calm product photo may become ridiculous over a real skillet. If unfolding the probe requires a thumbnail pinch, or if the hinge is too stiff, or if the handle gets slippery, your attention drifts from cooking to device wrestling. That is not a tiny inconvenience. Near hot food, every extra second matters.
Cable, hinge, and grip design can quietly ruin the experience
Some cooks do fine with a simple fixed probe. Others prefer folding probes for storage. The issue is not style. It is whether orientation is obvious by touch. If you cannot tell which direction the probe is pointing without rotating it three times in the air like a confused orchestra conductor, the design is working against you.
Why “fast read” matters more for safety than convenience
Fast read is not about impatience. It is about reducing time over heat, reducing repeated insertions, and cutting down on the small chaos that builds when a device feels indecisive. A slow reading encourages second guesses. Second guesses encourage extra fumbling. Fumbling and hot oil are not dear friends.
Let’s be honest… if the device makes you pause too long over a hot pan, accessibility has already failed
I once used a kitchen tool that required just enough force to open that my grip shifted every time. Nothing dramatic happened. That was the problem. Most kitchen failures do not arrive with cymbals. They arrive as repeated micro-hesitations that wear down confidence. If a low-vision cook must stop, adjust, re-grip, and try again while checking chicken or burgers, the product is not doing its job.
- Choose simpler controls if you mostly cook one item at a time and want fewer wrong presses.
- Choose more modes only if you can identify them by touch without slowing down.
- Choose a longer or better-shaped handle if you often cook over steam, grills, or deep pans.
Neutral next step: Write down whether your biggest risk is heat proximity, button confusion, or audio weakness.
Tactile Buttons That Work by Feel, Not Memory Alone
Raised power and speak buttons vs flat identical pads
A raised power button and a distinct speech button solve more trouble than a bright backlight ever will. The hand wants landmarks. That might mean one round button and one bar-shaped button. It might mean a centered button with a rim while the others sit lower. Texture can do a lot of heavy lifting when vision is limited and the kitchen is noisy.
Separated controls that reduce wrong-button presses
Spacing is not glamorous, but it is one of the quiet heroes of usability. Controls that are too close together ask for mistakes. In a calm room, a mistaken press is annoying. While checking a roast with oven mitts nearby, it becomes one more way to lose focus. Good spacing buys calm.
Click response, spacing, and texture cues that help under pressure
Tactile feedback matters because it confirms action without needing visual confirmation. A mushy button creates doubt. A clean click says, yes, the command happened. That one small confirmation can save a whole chain of second-guessing. If you do end up modifying a device, some lessons from using tactile dots for microwave buttons carry over surprisingly well: markers must stay distinct, stay put, and survive cleaning.
Why flush touch panels often disappoint low-vision cooks
Touch panels can look sleek in a product listing. Sleek is not always useful. Flush surfaces give the fingers almost no map. They may also misread taps when hands are damp or when the device is angled awkwardly. Accessibility cannot live on aesthetics alone. Beautiful glassy minimalism is lovely until dinner is cooling and you are trying to make the thermometer say the number again.
One of the oldest lessons in accessible design is painfully simple: the user should not need perfect memory for the interface. A good low-vision friendly meat thermometer should work by feel, not by memorizing a control puzzle you learned on Tuesday and forgot by Saturday.
- Raised buttons beat flush controls
- Distinct shapes beat identical rows
- Physical click feedback reduces hesitation
Apply in 60 seconds: When reading product photos, ignore color first and zoom in on button shape, spacing, and whether one main button is clearly distinct.
Loud Audio in a Real Kitchen: Not Just Loud, but Usable
Volume needs to compete with fans, oil splatter, and range hoods
Kitchen noise is oddly relentless. Range hoods hum. Pans hiss. The oven fan adds its own opinion. A thermometer can sound perfectly fine in a quiet review video and still disappear in the acoustic soup of actual cooking. That is why “audio enabled” is not enough. You want audio that can be heard in the room where the food is actually being made.
Clear speech beats robotic speech
Loudness is only half the job. The speech must also be decipherable on the first try. Crisp enunciation matters more than dramatic volume. A softer but clearer voice can beat a louder distorted one every day of the week and twice on Thanksgiving.
Repeat-on-demand features reduce stress during cooking
This feature is easy to underestimate until you need it. Speech that repeats on demand is a gift when you are juggling plates, checking several pieces of meat, or working with another person in the kitchen. Having to restart a reading sequence just because you missed one number is a small annoyance that breeds bigger ones.
Ear-friendly voice prompts matter for older users too
Many households shopping for accessible kitchen tools include seniors. That means the most useful audio is often moderate in pace, not too compressed, and predictable in wording. Fancy prompt design is not the point. Trust is.
Here’s what no one tells you… “audio enabled” can still mean too quiet to trust
I have learned to treat that phrase like “water resistant” on a jacket. It might mean exactly what you hope. It might also mean a very cheerful disappointment. If the product page does not clearly describe volume or repeat playback, assume the audio feature is less robust than the marketing copy wants you to imagine.
For food safety, that matters. FDA says a thermometer is the reliable way to confirm doneness because color and texture can mislead. If a low-vision user cannot hear the reading clearly while cooking, the practical value of the thermometer drops, even if the sensor itself is accurate.
- Yes if the reading can be repeated without restarting
- Yes if the voice is understandable over the range hood
- No if the volume is fixed and weak
- No if the unit speaks only during setup or only once
Neutral next step: Keep only the products that pass at least three of these four checks.
Don’t Get Tricked by Packaging Words That Sound Accessible
“Talking” does not always mean independently usable
A thermometer may speak the temperature and still be awkward to operate without sight. Independent use means you can find the main button, trigger the reading, repeat it, and power the unit on or off without needing a second person to decode the interface. Voice alone does not guarantee that.
“Large display” is not the same as low-vision friendly
Large text helps some shoppers. It does not solve poor contrast, glare, cluttered layouts, or impossible controls. A giant number on a screen is lovely, but not if you need eagle vision to reach the button that makes it appear. In many kitchens, the same glare logic that affects screens also shows up on counters, walls, and finishes, which is why choices like matte vs glossy paint in glare-sensitive spaces can quietly change how readable the whole room feels.
Why product photos hide button problems
Photos are often taken from flattering angles, with generous lighting, and a suspicious devotion to visual cleanliness. What they rarely show is depth, tactile ridges, or how the buttons feel when the device is wet-wiped, slightly greasy, or used one-handed. In other words, the photo shows the theater set, not the backstage.
Accessibility claims that deserve a second look before checkout
Any phrase that sounds broad and reassuring deserves a pause. “User friendly.” “Easy operation.” “Senior friendly.” “Accessible design.” These can be meaningful, or they can be decorative fog. When the page does not show the controls clearly or explain the audio behavior plainly, the safest assumption is that you still have unanswered questions.
Real accessibility usually looks almost boring in the copy. It sounds like this: raised speak button, repeat playback, large contrast display, probe orientation easy to identify, battery compartment simple to open, auto shutoff not overly aggressive. Boring can be beautiful when dinner is on the line.
Common Mistakes When Choosing a Low Vision Friendly Meat Thermometer
Buying for screen size while ignoring tactile navigation
This is probably the most common trap. A bright display feels impressive and easy to imagine using. But the first thing your fingers meet is not the screen. It is the controls. If the controls fail, the large display becomes a lovely billboard for your frustration.
Assuming loud audio indoors means loud enough while cooking
Quiet-room testing flatters products. Kitchen testing tells the truth. The difference is not subtle. Buyers often discover too late that “loud” meant “audible in a peaceful living room,” not “clear while potatoes are boiling and the vent fan is roaring like a patient dragon.”
Choosing a foldable probe that is hard to orient by touch
Folding designs can be excellent, but they can also become tiny geometry quizzes. If the hinge location and handle shape do not make orientation obvious, the user loses time every single meal. It is the kind of design issue that never appears in the headline feature list and somehow matters all the time.
Ignoring battery door design and replacement frustration
Small maintenance annoyances become large resentments with repeated use. A hard-to-open battery compartment can turn a helpful tool into a drawer exile. Accessibility is not just the moment of measuring. It is also storage, cleaning, charging, and battery replacement.
Overvaluing extra modes you cannot easily control
Preset modes for meat type and doneness can be handy. But if selecting them requires cycling through confusing states or reading tiny labels, they become decorative complexity. Many users are better served by a cleaner workflow: turn on, insert, hear reading, compare to safe target, done.
- Your main cooking style: oven, stovetop, grill, air fryer
- Your main barrier: hearing, button finding, grip, or glare
- Whether another household member also uses the tool
- How often you cook poultry, burgers, roasts, or reheated leftovers
Neutral next step: Compare products only after you know which obstacle happens most often in your kitchen.
Don’t Do This: Accessibility Add-Ons That Create New Problems
Do not rely on adhesive bump dots without checking heat and cleaning issues
Bump dots can help, but they are not a magic wand. Near heat, grease, and repeated wipe-downs, they may shift, peel, or collect grime. On some devices they work beautifully. On others they turn the interface into a sticky archaeology project. Use them carefully, and only after checking whether the original controls are already usable enough.
Do not choose tiny multi-function buttons just because reviews mention accuracy
Accuracy matters. Of course it matters. But an accurate thermometer you cannot operate smoothly is like a beautiful staircase with a missing step. The data is right. The experience is wrong.
Do not confuse smartphone dependence with accessibility
Some smart thermometers are excellent. Some are also helpless without an app, a pairing sequence, and a clean phone screen. For some low-vision users, app zoom and screen reader support make that setup workable. For others, app dependence adds another layer of friction that a standalone talking device avoids.
Do not skip grip comfort if hand strength or steadiness is limited
Grip is an accessibility feature. So is weight balance. So is a handle that does not become slippery during quick wipe-downs. A thermometer is used in motion, often near heat. Comfort is part of control, and control is part of safety.
CDC food safety advice also reminds home cooks to refrigerate perishable leftovers within 2 hours, and within 1 hour if food has been exposed to temperatures above 90°F. That matters because a thermometer is not only about the first safe reading. It often becomes part of a larger routine around reheating, leftovers, and kitchen timing. Good routines also depend on what happens before cooking starts, especially if your freezer is cluttered and hard to decode, which is where a low-vision freezer organization system can make food handling less error-prone.
Show me the nerdy details
Accessibility add-ons work best when they reduce cognitive load instead of increasing maintenance. Any modification should answer three questions: Will it stay in place after cleaning? Will it remain distinguishable by touch over time? Will it interfere with battery access, folding action, or sanitation? If the answer to any of those is shaky, the modification may cost more usability than it adds.
The Kitchen Reality Check: Features That Matter More Than Brands
Instant-read speed
Speed reduces exposure to heat and reduces the temptation to re-check the same piece of meat three times because the number feels slow to settle. Even a second or two can feel long when you are leaning over steam.
Tactile button layout
This is where many products quietly win or lose. The best layout is obvious on day one and forgettable by day three, because it becomes natural. That is success.
Audio volume and clarity
Not one or the other. Both. Clear audio matters in busy kitchens and in households where hearing varies from person to person. Think usable speech, not theatrical volume.
Probe length and safe hand distance
A little extra reach can help keep fingers farther from heat. Too much length, though, can create awkward balance. The sweet spot is enough distance without making the device feel clumsy.
Easy battery changes
Maintenance should not require a tiny jewelers’ screwdriver and a monk’s patience. A tool that is annoying to maintain tends to disappear into drawers and stay there.
Simple mode switching
If switching units or modes is confusing, the device invites errors. Straightforward controls help users focus on cooking, not interface archaeology.
Durable body that survives frequent wipe-downs
Kitchen tools get wiped. A lot. Durability is not glamour, but it is deeply practical. A fragile body, loose hinge, or delicate speaker opening can age badly under real use.
Can you identify the main buttons without looking?
Can you understand the reading with the vent fan on?
Does the grip and probe shape reduce awkward handling near heat?
Can the device speak again without restarting the whole sequence?
Are battery changes, cleaning, and storage straightforward?
- Favor repeatable handling over flashy presets
- Favor tactile maps over sleek surfaces
- Favor clarity over feature overload
Apply in 60 seconds: Rank these from 1 to 5 for your kitchen: speed, tactile buttons, loud audio, grip safety, and easy battery access.
A Better Buying Filter: How to Judge the Thermometer Before You Trust It
Can the main functions be learned in under five minutes?
If the answer is no, the product is probably asking too much. Accessible tools should reduce learning burden, not turn dinner into employee onboarding. A short learning curve is not laziness. It is humane design.
Can you identify each button without sight?
This single question eliminates a surprising number of weak candidates. If the answer is only “with practice,” be careful. Practice is fine. Dependence on perfect recall is something else.
Can the device speak the reading on demand, not just once?
This is one of the sharpest filters because it reveals whether the accessibility feature was built as a core function or tacked on at the end like parsley.
Can you use it safely around steam, grease, and oven heat?
Always imagine the product in your actual kitchen. Your actual stovetop. Your actual vent fan. Your actual tendency to juggle two pans and one cutting board while muttering noble promises about being more organized next time. The surrounding setup matters more than people think, especially when glare from counters, tile, or lighting makes every surface a little harder to read. That is part of why articles on the best cutting board color for low vision and glare-free under-cabinet lighting end up belonging in the same conversation as thermometer shopping.
Does it reduce friction, or just relocate it?
This is the big question. Some products make the screen easier but the buttons harder. Some make the audio louder but the interface more confusing. Some feel great in the hand but make maintenance annoying. The goal is not perfection. It is reduced friction where it matters most.
Count how many times in a typical week you struggle with each problem:
- Button confusion
- Not hearing the reading
- Awkward hot-food handling
Output: The highest count is your first buying filter. Start there, then use price as a tie-breaker.
Neutral next step: Reject any product that does not clearly solve your top obstacle.
Short Story: A reader once described their kitchen routine like this: they could cook fine until the moment a thermometer entered the scene. Then everything slowed down. They had one eye on the pan, one ear on the fan, and neither hand free enough to decode a tiny interface. They bought a model with a bright screen and glowing marketing language, only to discover the speech was faint and the main button felt exactly like the two beside it. So they changed strategy.
Instead of searching for “best accuracy,” they searched for “best under pressure.” The next device had fewer features, but it had a raised repeat button and a more obvious grip. The first week felt boring. Then the boring turned into trust. Chicken stopped being a little debate. Burgers stopped getting checked twice. The device did not make the kitchen magical. It simply stopped getting in the way. That, in practice, is what accessibility often looks like.
Safety Starts After Purchase: How to Set It Up for Fewer Kitchen Mistakes
Practice button mapping before first cooking use
Do this cold, calm, and away from dinner. Spend three minutes learning where the main buttons live and how the probe opens. The goal is to make the interface familiar before steam and timing join the conversation.
Test audio volume with the range hood on
This is the fastest reality check in the whole buying process. A product that sounds fine in silence can disappear under normal kitchen noise. Test it in the environment that matters, not the one that flatters it.
Create a simple storage spot so orientation stays consistent
Consistent storage helps memory and reduces fumbling. Keep it in the same place, facing the same way, with spare batteries nearby if the device uses them. Little routines save surprising amounts of energy. The same principle is what makes low-vision spice jar labels and orderly kitchen zones so effective: you are not just storing objects, you are reducing decision-making under pressure.
Learn safe probe insertion depth for common meats
For poultry, burgers, roasts, and reheated leftovers, safe temperature checking depends on placing the probe in the right area, not just anywhere that seems convenient. Foodsafety.gov and USDA both emphasize checking internal temperature properly and using a thermometer rather than relying on color.
Pair accessibility with basic food-safety habits, not guesswork
The best accessible thermometer still belongs inside a broader routine: wash hands, avoid cross-contamination, check safe temperatures, and handle leftovers promptly. CDC says perishable foods should usually be refrigerated within 2 hours, or 1 hour above 90°F. Accessibility should support that routine, not replace it. And when package text becomes part of the routine too, tools and habits for reading expiration dates with low vision can prevent a different category of quiet kitchen mistake.
- Tier 1: Accurate reading, weak usability
- Tier 2: Better display, still weak tactile map
- Tier 3: Good tactile controls or good speech, but not both
- Tier 4: Strong tactile layout plus repeatable audio
- Tier 5: Strong tactile layout, clear speech, safe handling, easy upkeep
Neutral next step: Aim for Tier 4 or 5 if independence and lower kitchen stress are your priority.

FAQ
What makes a meat thermometer low vision friendly instead of just talking?
A low vision friendly meat thermometer does more than announce a number. It should have controls you can find by touch, speech you can hear in a real kitchen, and handling that does not become awkward near heat. Talking is one feature. Usable independence is the goal.
Are tactile buttons better than touch controls for visually impaired cooks?
For many users, yes. Tactile buttons provide landmarks, spacing, and feedback that touch panels often lack. A good physical button can reduce wrong presses and make repeat actions easier under pressure.
How loud should a talking meat thermometer be for home use?
There is no single perfect number for every kitchen. What matters is whether the voice remains understandable with normal cooking noise, including a vent fan, sizzling pans, or a running oven. Clarity is just as important as raw volume.
Can a low vision friendly meat thermometer still be accurate?
Yes. Accessibility and accuracy are not opposites. The best products support both. The problem is that many shoppers evaluate only the sensor and forget that real-world usability affects whether the correct reading is actually obtained.
Is a large backlit screen enough if the buttons are hard to feel?
Usually not. A large screen may help some households, but if the controls are difficult to identify, the overall experience still breaks down. Good accessibility often starts with the fingers before it reaches the eyes.
Are smart Bluetooth meat thermometers good for low vision users?
Sometimes. They can work well for users who rely comfortably on phone zoom, voice support, or other mobile accessibility features. But app dependence can also add pairing steps, notification clutter, and extra setup friction. A standalone accessible device may be simpler.
What probe style is easier to handle safely in a hot kitchen?
The easier style is the one whose orientation is obvious by touch and whose grip feels secure in your hand. Folding probes can be excellent, but only if they open easily and do not turn into a small dexterity puzzle.
Do seniors and low-vision users need different accessibility features?
There is a lot of overlap. Many seniors also benefit from clear speech, tactile buttons, stronger contrast, and simple maintenance. Some may also need slower voice prompts, easier battery access, or more secure grip comfort.
Can I add tactile markers to a regular meat thermometer?
You can, but do it carefully. Adhesive markers can help identify key buttons, yet they may loosen with cleaning or heat exposure. They work best as a minor improvement, not as a rescue mission for a badly designed interface.
What should I test on day one before trusting it with chicken or turkey?
Test the basic workflow first: power, probe opening, reading speed, repeat speech, and button recognition by touch. Then test the audio with the range hood on. Finally, practice taking a reading safely before using it in a live cooking moment.
Final word
The real question was never whether a thermometer could talk. The real question was whether it could help when the kitchen stopped being neat and became real. That curiosity loop closes here: the best low vision friendly meat thermometer is the one that helps you act with less hesitation near heat, hear the reading clearly, and trust the process without squinting or improvising.
There is no gold medal for enduring a bad interface. There is only dinner, and the quiet relief of tools that do not make you negotiate with them. So before you buy, use the three-point accessibility checklist from this article: tactile button identification, voice clarity in kitchen noise, and safe probe handling distance. If a product page cannot answer those three points plainly, skip it and keep walking. In the next 15 minutes, that one filter will save you more time than an hour of scrolling shiny roundups.
Last reviewed: 2026-03.