
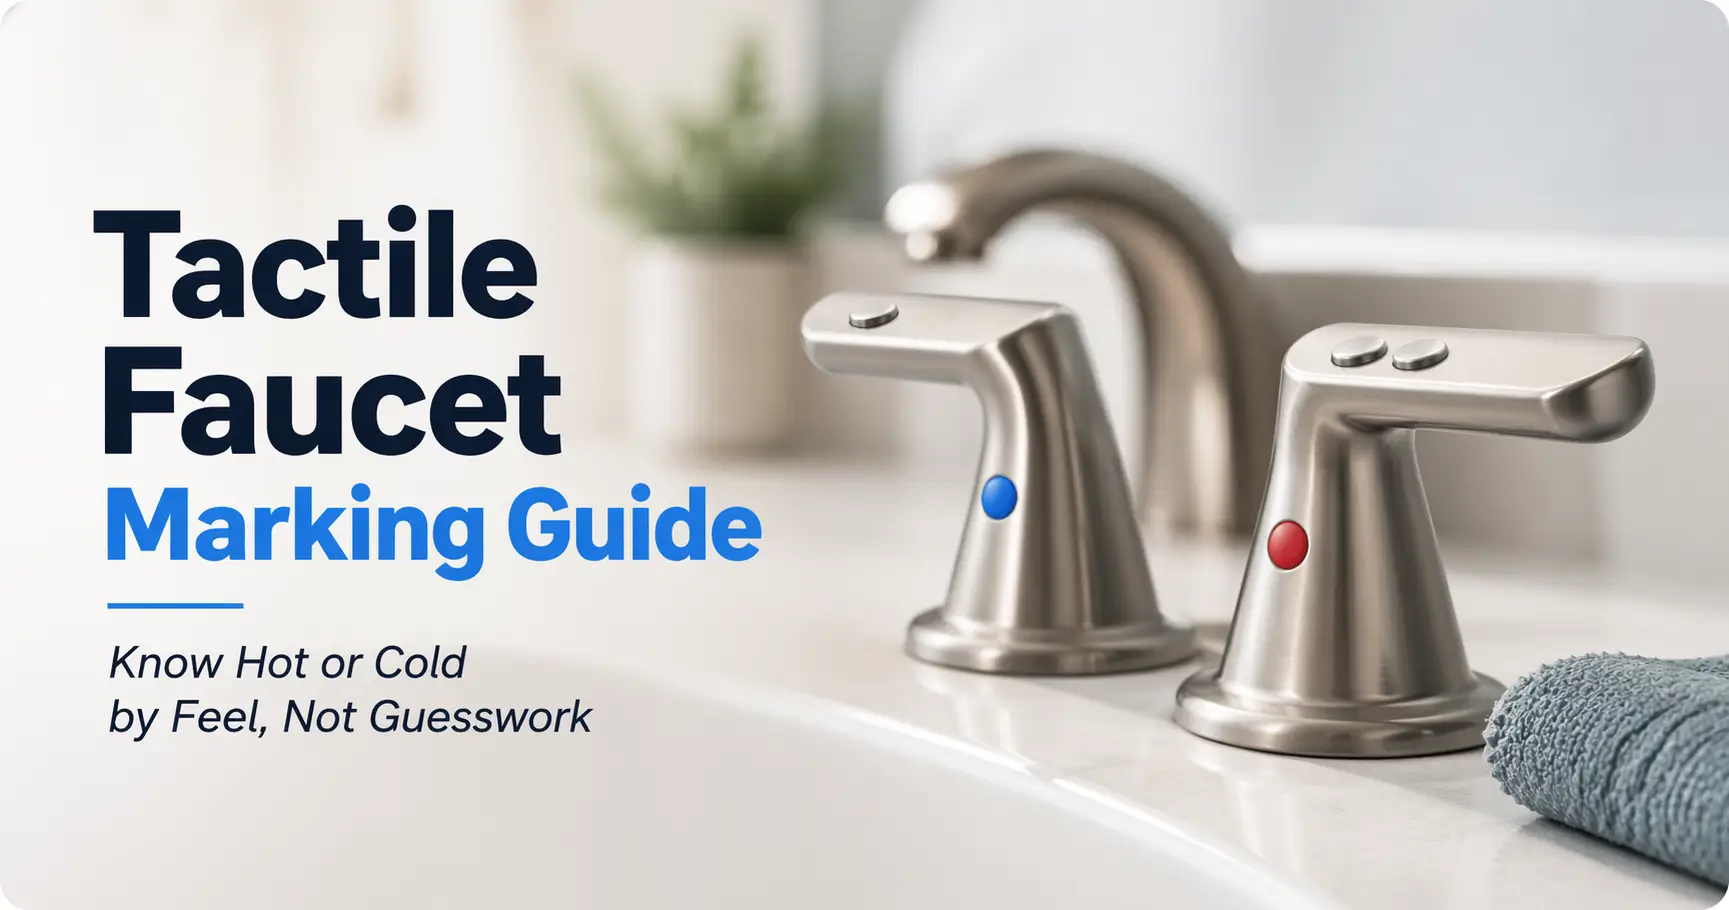

The Intuitive Touch: A Guide to Tactile Faucet Marking
Some home problems are tiny right up until the moment they bite. A bathroom faucet that cannot be read by touch is one of them. When your hands are wet, your eyes are tired, or the fixture design seems to have been commissioned by a minimalist with a grudge, knowing hot from cold should not require a small act of detective work.
That is the real friction behind how to mark bathroom faucets hot/cold tactile. The issue is not memory in the abstract; it is split-second uncertainty in a real bathroom, with real water, real routines, and real chances to get it wrong. Keep guessing long enough, and you do not just lose time. You lose ease, confidence, and sometimes a meaningful margin of safety.
This guide helps you build a tactile faucet marking system that is simple, renter-aware, and consistent. You will explore what works on knobs, lever handles, and single-handle faucets, focusing on markers that withstand humidity and the physical realities of daily use.
The best setup is not the fanciest one. It is the one your hand understands instantly, even half-awake, even in the dark, and especially when the house should be helping, not improvising.
Table of Contents
Fast Answer: How to mark bathroom faucets hot/cold tactile usually works best when you create one touch-based rule you can understand instantly, even with wet or sleepy hands. Think one raised marker for cold and two for hot, or one distinct texture on the hot side only. The best solution is waterproof, easy to feel, easy to replace, and consistent across every sink so you stop guessing before the water even runs.
Tactile faucet marking is really about stopping guesswork before it starts
The daily problem is not memory alone, but split-second uncertainty at the sink
Most people do not forget what hot and cold mean. What they forget is what this specific sink is doing in this specific moment. In one bathroom, hot may be left. In another, the plumbing may have been reversed years ago by somebody with optimism and a wrench. In a guest bath, the handles may look decorative and reveal nothing useful by touch. The problem is not intelligence. The problem is latency. You need the answer before your hand commits.
I have seen this kind of household friction before. Not the dramatic kind, just the kind that steals patience in teaspoons. A person reaches, hesitates, tests, pulls back, turns again. It takes maybe three seconds. Do that every day, twice a day, for months, and the sink becomes one more place where the house asks for effort instead of giving support.
A good tactile cue should work half-awake, rushed, and with wet hands
This is the standard that matters. Not whether the marker looks tidy from across the room. Not whether the product packaging promises “strong hold.” A tactile marking system should still make sense when your fingers are damp, your brain is elsewhere, and the bathroom light might as well be performing modern experimental theater.
The best tactile cue is immediate. You touch, you know, you act. It should not require decoding, counting tiny bumps with a thumbnail, or remembering whether the rough sticker means cold in this bathroom but hot in the other one. A home accessibility fix succeeds when it lowers cognitive load, not when it turns daily life into a quiz bowl.
Why “I’ll just remember which side is hot” often fails in real life
Because real life is not a calm instruction manual. People move. Guests visit. Landlords replace fixtures. Children grow tall enough to use the sink alone. Caregivers rotate in and out. Travel changes habits. Stress scrambles routines. A rule stored only in memory is fragile in exactly the situations where a physical cue would help most.
That is why tactile marking is not overkill. It is the opposite. It is a tiny piece of humility built into the environment. You are admitting that mornings are messy, wet hands are slippery, and your future self deserves better than a game of faucet roulette 🚰.
- Build for sleepy, rushed, wet-hand use
- Prioritize instant recognition over aesthetics
- Treat uncertainty as the real problem to solve
Apply in 60 seconds: Touch your faucet with eyes closed and notice where your fingers land first. That is where the marker logic should begin.
Who this is for, and who it is not for
Who this helps: low vision, no vision, memory slips, guest bathrooms, and shared households
This setup helps people with low vision or blindness, of course, but the circle is wider than that. It also helps older adults who benefit from stronger environmental cues, renters dealing with unfamiliar fixtures, households where multiple people use the same bathroom, and caregivers trying to reduce preventable confusion. It even helps sighted guests in a dark bathroom where the handle design is more “boutique hotel” than “clear human communication.”
In other words, tactile marking is good universal design. It serves the person who needs it every day and quietly helps the person who only notices the problem when they do not have enough coffee yet. If bathroom usability is part of a larger home setup, it often pairs naturally with broader routines such as low-vision nighttime bathroom safety and fixed-location household cues.
Who may need more than a label: inconsistent plumbing, scalding water, or hard-to-turn handles
Sometimes the handle is not the real problem. If the hot and cold sides are reversed, if the water arrives dangerously hot, or if the handle itself is painful or difficult to turn, a tactile marker alone is not enough. It can still help with identification, but it does not solve the deeper safety or usability issue.
The U.S. Centers for Disease Control and Prevention has long noted scald prevention measures such as lowering overly hot tap water settings and considering anti-scald devices for at-risk households. That matters here because a marker helps you choose faster, but it does not make overheated water gentle on contact.
When a tactile marker is enough, and when the faucet setup itself is the bigger issue
If your faucet works normally, the water temperature is reasonable, and the issue is simply identification by touch, a marker may be enough. If the fixture is unreliable, the water output is erratic, or the handle design is hostile to hands with pain, weakness, or limited dexterity, then you may need a broader solution. Sometimes the smartest accessibility move is not “label better.” It is “stop tolerating a bad fixture.”
Think of tactile marking as part of a ladder. At the first rung, you improve recognition. At the next rung, you improve control. At the top, you improve safety. Not every home needs all three. But it is useful to know which problem you are actually solving.
Eligibility checklist:
- Yes / No: The faucet works normally but is hard to identify by touch
- Yes / No: The handle area has a dry-ish placement spot for a marker
- Yes / No: Everyone in the home can follow one shared code
- Yes / No: Water temperature itself is not dangerously high
Neutral next step: If you checked “yes” to at least three, start with one tactile marker system before replacing any hardware.
Start with the code first, or the labels will become noise
Pick one rule and keep it everywhere in the home
The code comes before the product. This is the step people skip because buying things feels like progress. It is progress-adjacent, which is not the same thing. First decide the logic. Then choose materials that express it.
A good house rule is boring in the best way. It repeats cleanly. One raised bump means cold and two means hot. Or hot gets a textured marker while cold gets none. Or hot gets a longer strip while cold gets a smaller dot. The rule can be simple, but it must be stable. Consistency is what turns a label into a habit.
Good systems: one bump for cold, two bumps for hot; smooth versus rough; short versus long
You do not need ten options. You need one contrast that your fingers can distinguish quickly. Good tactile systems usually rely on one of three differences: count, texture, or size.
- Count-based: one bump for cold, two for hot
- Texture-based: smooth for cold, rough for hot
- Size-based: small marker for cold, larger marker for hot
Count-based systems are easy to explain, but they can fail if the bumps are tiny. Texture-based systems are excellent when fingers recognize them immediately. Size-based systems work well on lever handles where the thumb naturally finds the marked area. The winning system is the one you can identify in under a second without pausing.
Why consistency beats creativity in accessibility setups
Accessibility loves clarity more than novelty. The poetic impulse says, “Maybe blue dots for cold and red lines for hot.” The practical impulse says, “Color disappears in low vision and lines feel like lint if they are too thin.” The practical impulse wins.
Once, in a relative’s house, every bathroom had its own personality. One sink had separate knobs, another had a single lever, and the powder room faucet seemed to have been designed by someone offended by fingers. Beautiful fixtures. Tiny daily chaos. That is when it becomes obvious that consistency is not dull. It is mercy. The same logic shows up in other tactile systems too, from tactile labels for shampoo and conditioner to a low-vision key identification system where one repeating rule matters more than decorative variation.
Show me the nerdy details
Human factors design often works best when one cue carries one meaning and repeats across environments. Tactile systems fail when multiple variables change at once, such as shape, placement, and meaning shifting from room to room.
- Pick one contrast type: count, texture, or size
- Use the same meaning in every room
- Favor instant touch recognition over visual cleverness
Apply in 60 seconds: Write one sentence on paper: “Hot will always be ___; cold will always be ___.” That is your house rule.

Best tactile markers for bathroom faucets, depending on the handle style
Round knobs: where small raised dots or textured stickers tend to work best
Round knobs are often the easiest to mark because the hand naturally grips around them. Small raised dots, bump-ons, or compact textured tabs usually work best near the point where fingers first make contact. Avoid placing the marker on the top center if the hand usually approaches from the side. That is like putting the doorknob instructions on the ceiling.
For dual-handle sinks, many people do well with a single marker only on the hot side. Why? Because one marker is often faster to interpret than two. No marker becomes the default cold, marker becomes hot. This is elegant when the plumbing is standard and the layout is dependable.
Lever handles: where to place a marker so your thumb finds it naturally
Lever handles are less forgiving because the wrong placement can feel invisible in actual use. A marker placed where the thumb or index finger rests during the turning motion works far better than one placed at the decorative tip. For many lever designs, that means the upper or outer touch zone, not the prettiest polished edge.
I once tested a beautifully applied marker on a lever handle that looked perfect and failed completely. Why? My thumb never touched it in normal use. It was the accessibility equivalent of hanging a map behind the door.
Single-handle faucets: how to mark direction instead of left versus right
Single-handle faucets change the logic. You are not labeling separate hot and cold handles. You are labeling the direction of travel. On many faucets, center is mixed or off-position logic, and moving the handle left or right changes temperature. Here a tactile strip or one directional cue can help more than a simple dot.
Examples that often work:
- A short textured strip on the side you move toward for hot
- Two small bumps on the hot-direction side of the base
- A single memorable cue at the hot end only
The goal is not to narrate the whole faucet. It is to signal the risky direction fast.
Touchless or unusual fixtures: when the sink design changes the strategy
Some modern fixtures are friendly to magazines and unfriendly to hands. Touchless faucets, combined controls, minimalist mixers, and certain vessel-sink designs can reduce the usefulness of simple tactile stickers. In those cases, the better strategy may be to mark the surrounding control surface, the wall plate, or the counter position rather than the faucet body itself.
When the design gets strange, return to first principles: where does the hand search, and what decision needs to happen there? Accessibility is often less about the object and more about the moment. The same principle can help with other household controls, such as tactile thermostat labeling or placing tactile dots for microwave buttons where fingers actually land.
Do not mark the wrong thing first
Why the prettiest spot is often the least useful spot
There is a funny little trap in home fixes: we place things where they look best, not where they work best. A marker belongs where the hand searches, not where the eye approves. Many failures begin right there. The marker is visible, neat, and almost philosophical in its uselessness.
Close your eyes and use the faucet naturally. Where does your thumb land? Where does your index finger brace? Where do you touch first when you are moving quickly? That contact path is the real blueprint.
Avoid areas that stay soaked, rubbed, or cleaned aggressively
Bathrooms are a difficult little climate. Steam rises, soap films appear, towels swipe, and cleaning products arrive with the confidence of tiny chemical monarchs. A marker placed in a constantly wet or heavily scrubbed zone may peel, soften, or become slick. That does not mean tactile marking fails. It means placement matters as much as material.
Try to avoid:
- the direct water stream path
- undersides that trap constant moisture
- spots frequently wiped with abrasive cloths
- edges that catch nails or rings and peel away
A marker that is hard to find by touch is only a tiny piece of clutter
This is the blunt truth. If the marker is technically present but functionally invisible, it is not assistive. It is bathroom confetti. The test is not “Can I feel it if I look for it carefully?” The test is “Do I find it automatically without hunting?” Those are different universes.
One useful rule is this: if a tactile system requires you to stop and search, it is already overcomplicated. Homes should not demand detective work before handwashing.
Decision card: Where should the marker go?
When A: Your fingers always land in the same place during use. Choose: Put the marker exactly there.
When B: Your hand position varies or the faucet shape is odd. Choose: Mark the hot side or hot direction only, with the most distinct texture.
Time/cost trade-off: Spending 3 more minutes testing placement is usually better than buying a fancier product.
Neutral next step: Dry-test two possible locations before you stick anything permanently.
Material choices matter more than most people think
Waterproof matters: bathroom steam, soap, and wiping wear everything down
Bathrooms punish weak adhesives. Even products that work beautifully on a remote control or medication organizer can surrender quickly on a faucet. Heat changes surfaces. Condensation lingers. Repeated wiping adds friction. A marker that starts strong and turns gooey after ten days is not saving time. It is borrowing trouble.
The best bathroom-ready tactile markers usually share a few traits: decent grip, clean edges, a texture that remains recognizable when damp, and a thickness that can be felt without snagging constantly.
Raised dots, bump-ons, silicone markers, textured tape, and adhesive labels compared
Here is the practical landscape.
| Material | Best for | Strength | Watch out for |
|---|---|---|---|
| Raised bump-ons | Knobs, flat touch points | Easy to recognize | May peel in constant moisture |
| Silicone markers | Wet environments | Soft, grippy feel | Can feel too subtle if very thin |
| Textured tape | Directional cues on single handles | Customizable length | Edges can lift |
| Adhesive tactile labels | Temporary testing | Easy to replace | Not always shower-proof |
Which materials feel distinct without becoming sharp, slimy, or easy to peel off
This is where fingers become critics. A useful marker should be distinct but not abrasive, noticeable but not irritating. Too sharp and it becomes annoying. Too soft and it becomes meaningless. Too glossy and wet fingers slide right past it. The ideal feel is a modest, reliable interruption in the surface.
For many households, the sweet spot is a medium-profile bump or a short textured silicone patch. Enough presence to register. Not so much presence that it catches every towel and loses an argument with physics.
Here’s what no one tells you: the best tactile marker is the one that still makes sense after three weeks
The first-day test matters, but the three-week test matters more. Some markers feel clever on installation day and become forgettable later. Others start modestly and prove themselves by simply staying put and remaining obvious. Longevity is not glamorous, but it is the whole game.
A 5-minute project becomes valuable when it survives ordinary life. The standard is not “works during setup.” It is “works after cleaning day, rushed mornings, and absentminded evenings.” That is the same discipline behind durable systems like pill bottle tactile label placement, where a marker has to survive handling, moisture, and repetition rather than merely look right on day one.
Show me the nerdy details
Adhesion on bathroom fixtures depends on surface finish, curvature, residue, and moisture exposure. Even strong adhesives perform better after the surface is cleaned and dried thoroughly, then left undisturbed long enough to bond.
Quote-prep list: Before comparing tactile marker products, gather these three details.
- Handle type: knob, lever, or single-handle mixer
- Surface shape: flat, curved, textured, or constantly wet
- Need level: renter-temporary or homeowner-longer-term
Neutral next step: Buy one small pack only after you know the handle style and placement zone.
One sink is easy, but whole-house consistency is where the real win lives
Bathroom sink, kitchen sink, tub, and shower controls should not each tell a different story
One sink can be solved in an afternoon. A home is harder because homes drift. The kitchen has one rule, the main bath another, the shower something “temporary” that quietly becomes permanent for 18 months. Accessibility loses power when every room invents its own language.
Whole-house consistency means deciding that hot will always be the same tactile idea everywhere it can reasonably be the same. The fixture shape may change, but the meaning should not. If hot is always the textured side, keep it textured. If hot is always the double-bump signal, repeat that logic.
Why guest bathrooms and powder rooms quietly create the most confusion
Guest bathrooms are sneaky little troublemakers. They are used less often, updated more randomly, and approached with less body memory. Because you do not use them daily, your hand has fewer rehearsed habits there. That makes a tactile cue even more important, not less.
I have noticed this in older homes especially. The main bath gets all the thoughtful adjustments. The little hallway sink stays on its own strange island, smiling politely while confusing everyone who visits.
Build a house rule that survives travel, fatigue, and habit drift
The best house rule is durable enough that you can leave for a week, come back, and your fingers still understand the system instantly. It should also be easy to explain in one sentence to a visiting family member or caregiver. If you need a paragraph, the rule is too ornate.
Try saying it aloud: “Hot has the bump. Cold has none.” Or, “Hot is rough. Cold is smooth.” If it sounds plain, that is perfect. Plain survives. And when the household already relies on repeatable organizing logic, a system like a low-vision filing system can be a useful mental model: the power comes from consistency, not flair.
- Standardize meaning, even if handle shapes differ
- Do not neglect the least-used bathroom
- Choose a rule simple enough to explain in one breath
Apply in 60 seconds: Make a quick list of every faucet and shower control in the home. Circle the ones that currently break the pattern.
Common mistakes that make tactile faucet labels fail fast
Using markers too similar in shape or texture
If hot and cold feel almost the same, the system is doing impressionist painting when it should be doing road signs. Similar shapes create hesitation. Similar textures create doubt. Under dry, careful testing, you may tell them apart. Under real bathroom conditions, that subtle distinction can vanish.
Placing labels where fingers do not naturally land
This is the champion mistake. The marker exists, but the hand never meets it. The fix is simple and unromantic: observe your actual grip. Accessibility work often improves when vanity exits the room.
Choosing adhesives that surrender to moisture
Weak adhesion is a morale problem disguised as a materials problem. The marker slides, curls, softens, or disappears. Then the person using it stops trusting the system. Rebuilding trust takes longer than reapplying tape.
Changing the code from room to room
Maybe the kitchen needed a different material. Fine. The meaning should still stay consistent. Material can vary. Meaning should not. This distinction saves homes from becoming confusing in a very organized way.
Let’s be honest: if you need to stop and decode it, the system is already too complicated
That sentence is worth keeping. The best tactile solutions are almost invisible to thought. You touch and move on. If you have created a small intellectual puzzle at the sink, you have overdesigned the problem. This happens to smart people all the time. We build elegant systems that ignore tired human hands.
Accessibility is not impressed by cleverness. It wants reliability.
Common failure signs to watch in the first 7 days:
- You still pause before turning the handle
- You touch the marker but cannot interpret it instantly
- The marker shifts, peels, or softens
- Another household member misunderstands the code
- You avoid using the marked sink because it feels fiddly
Do not rely on tactile labels alone when water temperature is the real risk
Why a hot/cold marker does not fix an unsafe water heater setting
This is the safety line worth drawing clearly. A tactile marker helps identify a control. It does not make hot water less hot. If a home’s water temperature is set too high, the label simply helps someone arrive at the hazard more efficiently. That is not the outcome we want.
Public health guidance has long emphasized practical scald prevention steps, including keeping household hot water at safer levels and considering anti-scald or thermostatic devices in some situations. The U.S. Environmental Protection Agency also notes that very hot water at faucets and showers can present scald risk, especially for children, older adults, and others who may not respond quickly.
Fast identification helps, but scald prevention is still a separate decision
Think of tactile marking as navigation, not temperature control. It answers, “Which control is this?” It does not answer, “Is the water safe at the source?” Those are siblings, not twins.
If the home includes infants, older adults, people with slower reaction time, or individuals with sensory changes, true scald prevention deserves its own check. That may involve verifying water heater settings, inspecting fixture performance, or asking a qualified plumber about anti-scald protections. This is not alarmism. It is just respecting the fact that faster access and safer output are different jobs.
In homes with children, older adults, or sensory changes, the margin for error gets smaller
Small errors matter more when skin is more vulnerable or reaction time is slower. That is why the best setup often combines both: tactile identification for clarity and temperature management for safety. One helps the brain. The other helps the body.
I like this distinction because it keeps expectations honest. A dot on a handle is helpful. It is not magic. Good home design is usually a chorus, not a solo.
Coverage tier map:
- Tier 1: Tactile label only. Helps identification.
- Tier 2: Label plus whole-house consistency. Helps recognition under stress.
- Tier 3: Label plus temperature check. Adds basic safety awareness.
- Tier 4: Label plus temperature management and fixture review. Better for at-risk households.
- Tier 5: Fully standardized household system with anti-scald planning where needed.
Neutral next step: Decide which tier fits your home instead of assuming a label solves everything.
A better setup for renters, homeowners, and caregivers
Renter-friendly options that remove cleanly without damaging fixtures
Renters need something that works without starting an unnecessary feud with the deposit. That usually means removable bump-ons, low-residue tactile stickers, or short-term silicone options that can be replaced easily. The trick is to test on one less-visible area first and avoid anything that bonds like it intends to inherit the property.
Renter-friendly does not have to mean flimsy. It just means you accept that the ideal solution may be replaceable rather than permanent.
Longer-lasting options for homeowners who want a more permanent system
Homeowners may choose stronger adhesives, more durable tactile markers, or even fixture upgrades that improve both control and clarity. If you own the space and know the system works, permanence can be a gift. But only after testing. Permanently installing a bad idea is still a bad idea, only with better commitment.
Caregiver setups: how to make tactile markings understandable to more than one person
Caregivers need explainable systems. A good setup should work for the person receiving support, the spouse, the adult child visiting on weekends, and the professional aide who starts next Tuesday. That means the code should be verbalizable and intuitive.
Useful caregiver script examples:
- “The hot side always has the bump.”
- “If you feel rough texture, that is the hot direction.”
- “No marker means cold.”
The simpler the sentence, the better the hand remembers it later.
Here’s what no one tells you: the best accessibility fix is the one other people in the home can follow too
This may be the quiet heart of the whole topic. A home adjustment succeeds more often when it can be shared without friction. If one person understands the logic and everyone else keeps undoing it, misplacing it, or forgetting it, the setup never fully lands. Accessibility is personal, yes, but home life is collaborative.
The Americans with Disabilities Act guidance on effective communication is about broader settings, not private sink labels specifically, but the principle is still useful here: communication works better when the message is clear to the people involved. Your household system is a tiny form of communication. Let it be understandable. In caregiver households, that same clarity often matters in adjacent decisions too, including helping a spouse with vision loss without turning every routine into a whispered negotiation.
- Renters should favor clean removal and easy replacement
- Homeowners can move toward stronger long-term materials after testing
- Caregiver households need one-sentence explainability
Apply in 60 seconds: Tell another person in the home your code in one sentence. If it sounds confusing aloud, simplify it.
Test the system before you trust the system
Check it with dry hands, wet hands, soap on fingers, and low attention
A marker that works in calm conditions may fail in actual bathroom life. Test like a human, not like a showroom mannequin. Dry hands are step one. Wet hands are step two. Soapy fingers are the real exam. If the texture disappears under those conditions, it may not be distinct enough.
Try the setup at night or early morning, when real-life errors tend to happen
There is a useful honesty in testing a system when you are a little tired. Many household mistakes happen at the edges of the day. That is when environmental design matters most. If the marker still makes sense in low attention mode, you have found something worth keeping.
For some people, the test goes better when the rest of the bathroom is easier on the eyes too. If overhead glare or mirror brightness complicates the routine, related fixes like reducing bathroom mirror glare or learning how to make an iPhone flashlight less harsh can reduce one more layer of friction during late-night use.
Why a five-second test now can prevent months of low-grade frustration
Testing feels small. It is not. Five seconds of purposeful testing now can save a long trail of hesitation later. A good home setup reduces friction quietly. A bad one creates a background hum of annoyance that no single moment fully captures, but the body notices anyway.
Here is a simple four-step test:
- Close your eyes and reach naturally.
- Identify hot or cold by touch only.
- Repeat with wet hands.
- Repeat again the next morning without thinking about the system first.
If you pass all four, lovely. If not, change placement before changing products. Placement fixes more problems than shopping does.
Mini calculator:
If testing one sink takes about 5 minutes and your home has 4 water controls to standardize, your first full setup pass is roughly 20 minutes, plus any drying time for adhesives.
If one bad placement redo takes 3 extra minutes, testing first can easily save 9 to 12 minutes across several fixtures.
Neutral next step: Time one sink today before you commit to the rest of the house.
Infographic: The 4-step tactile faucet setup flow
1. Choose the code
One bump, two bumps, or one texture rule.
2. Choose the placement
Mark where fingers actually land, not where it looks pretty.
3. Test in real conditions
Dry hands, wet hands, sleepy hands.
4. Standardize the house
Repeat the same meaning everywhere.
Short Story: A friend once tried to solve this problem the way many capable people do: by overthinking it beautifully. She bought different tactile markers for each sink because each faucet “needed its own best solution.” The main bathroom got dots. The kitchen got textured tabs. The guest bath got a slim raised line because it looked nicer. For two days, it felt clever. By the end of the week, every sink had a slightly different message, and nobody in the house could remember which rule belonged where.
We stripped the system back to one idea: hot always gets the obvious marker, cold gets none. We tested placement with eyes closed, changed one sticker that sat in the wrong spot, and repeated the same logic in the kitchen. The result was almost boring. Which is exactly why it worked. The house stopped requiring interpretation, and she stopped thinking about faucets at all. That, in home design, is a little victory worth keeping.

FAQ
What is the easiest way to mark hot and cold bathroom faucets by touch?
The easiest method is usually one distinct marker for hot and none for cold, or one bump for cold and two for hot. Simplicity wins. You want a system that works instantly without decoding.
Should I mark both hot and cold, or just one side?
Many people do best marking only the hot side because one clear signal is often faster to interpret than two competing signals. If the plumbing is unusual or multiple users need extra clarity, marking both may help, but keep the contrast strong.
What tactile marker works best in a humid bathroom?
Bathroom-friendly bump-ons, durable silicone markers, and some textured adhesive options can work well, especially when placed away from the direct water path. The best choice depends on handle shape, moisture exposure, and how removable you need the setup to be.
How do I label a single-handle faucet tactilely?
For a single-handle faucet, mark the hot direction rather than trying to label left and right as if they were separate knobs. A short textured strip or distinct bump at the hot-direction end often works better than a generic dot in the middle.
Are tactile faucet markers renter-friendly?
Yes, many can be. Look for removable options and test in a less visible spot first. Renter-friendly means easy replacement and low residue, not necessarily permanent durability.
What if the plumbing is reversed and hot and cold are not on the expected sides?
Trust the actual water output, not the assumed convention. Test carefully, then label according to reality. If the reversal causes regular confusion, it may be worth fixing the plumbing issue rather than adapting forever.
How can I make tactile faucet labels easy for guests or caregivers to understand?
Use a code that can be explained in one sentence, such as “The bump means hot.” Avoid elaborate systems that require household lore to decode. Shared understanding is part of usability.
Do tactile labels hold up under frequent cleaning?
Some do, some do not. Durability depends on material, placement, surface prep, and how aggressively the area is cleaned. Testing for a week is often more revealing than product claims alone.
Can tactile markers replace anti-scald devices or temperature adjustments?
No. Tactile markers help identification by touch. They do not reduce unsafe water temperature. If scald risk is a concern, temperature management and fixture safety deserve separate attention.
Next step: mark one sink today, then standardize the rule
Choose one bathroom sink and assign one simple tactile code
Start small. Pick the sink used most often. Choose one code. Install one marker. This keeps the project practical and gives your hand a chance to learn one pattern before the whole house joins the choir.
Test it for one week before labeling every faucet in the home
Do not mass-install on day one. A week of real use reveals more than thirty minutes of enthusiasm. If the marker shifts, the placement feels awkward, or the code is not automatic, revise before expanding.
Write the rule down once, so the system stays stable instead of drifting
This may feel unnecessary, but it is surprisingly helpful in shared homes. One simple note keeps the logic from mutating over time. Something as plain as “Hot has the marker, cold has none” can prevent future improvisation.
The hook at the start was about those fuzzy, half-awake moments when a house asks too much of tired hands. This is how you answer that problem honestly. Not with a grand renovation. Not with gadget theater. Just with a small tactile rule, placed where the hand actually searches, tested in real conditions, and repeated until the home becomes easier to trust.
In the next 15 minutes, you can do one useful thing: choose one sink, clean one placement spot, apply one simple marker, and test it tonight with the bathroom light low and your eyes closed. If it works there, it will likely work where it matters most.
Last reviewed: 2026-04.