

The fastest way to make a home safer with wet AMD isn’t a remodel—it’s a 60-minute sweep that fixes what your eyes miss when glare gets loud and edges go quiet.
With wet AMD home safety, the problem is rarely “clumsiness.” It’s modern house design: glossy floors, same-tone thresholds, throw rugs that curl, cords that blend into the walkway, and night lighting that’s either too dim to help or bright enough to wash everything out.
Keep guessing, and the stakes are brutal: one misread step becomes a fall, and a “normal” hallway turns into a place you don’t trust.
This post helps you tighten your home—lighting, contrast, then trip hazards—so your daily routes (bed → bathroom, couch → kitchen, door → main room) feel predictable again, without buying a cart of gadgets.
It’s built on a simple, finishable method: a three-pass timer plan paired with practical fall-prevention guidance (think CDC-style safety checks) and low-vision realities like glare control and edge marking.
Start here. Then do this next. Small wins, stacked.
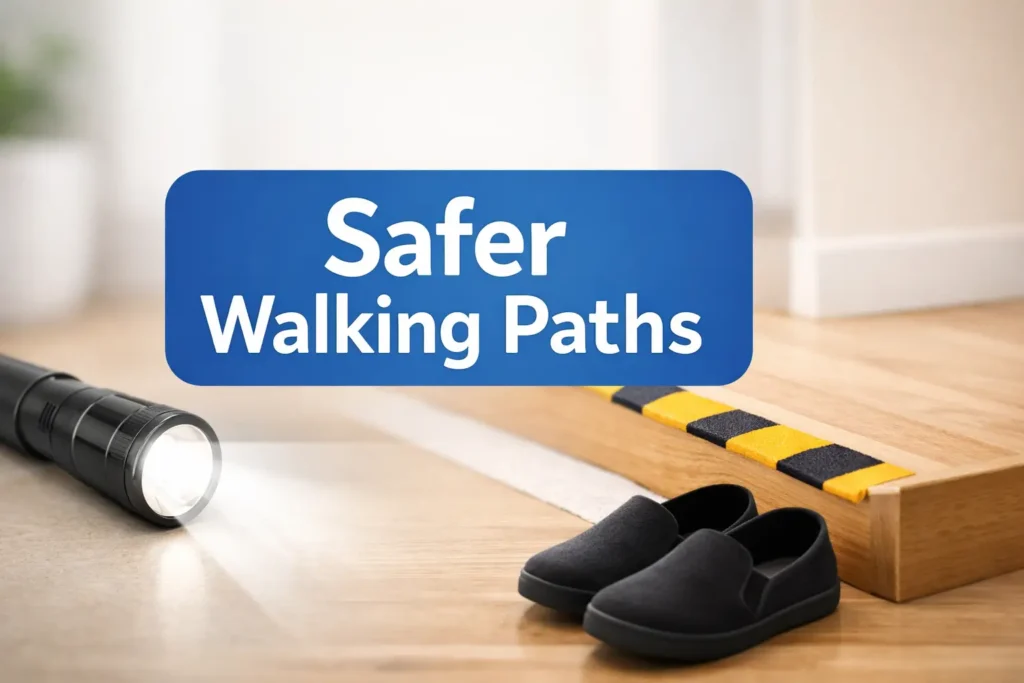
- Brighter walking lanes without glare
- High-contrast cues for stairs and thresholds
- Clear floors: rugs, cords, clutter—gone or secured
Table of Contents
Wet AMD home safety: who this is for / not for
This checklist is for real life: the kind where you don’t have time to “research products,” you just want the house to feel safer by dinner. It’s also for the quiet anxiety no one says out loud: “If I fall, will I be able to get up?” That’s not drama. That’s planning.
- Who this is for: anyone with wet AMD (or central vision loss) living at home—solo or with family—plus caregivers doing a quick safety pass before the first fall.
- Who this is not for: someone with a sudden, major vision change today, or frequent falls/fainting/new severe balance issues. Those need medical attention and a clinical fall-risk plan.
- Can you walk from bed to bathroom without holding furniture? (Yes/No)
- Do you notice glare or “sparkle” making details disappear? (Yes/No)
- Do you have rugs, cords, or clutter in common pathways? (Yes/No)
One-line next step: If you answered “Yes” to any item, start with the 20-minute “walking lane” lighting pass below.
Neutral action: Circle one pathway that feels risky and bring it into the 60-minute plan.
Quick grounding (because it matters): major eye organizations like the American Academy of Ophthalmology explain that wet AMD can damage central vision faster than dry forms, which is exactly why building safer habits at home is not “extra”—it’s smart (and if you want the plain-English difference, start with dry vs wet age-related macular degeneration). The goal here is not perfection. It’s fewer surprises.
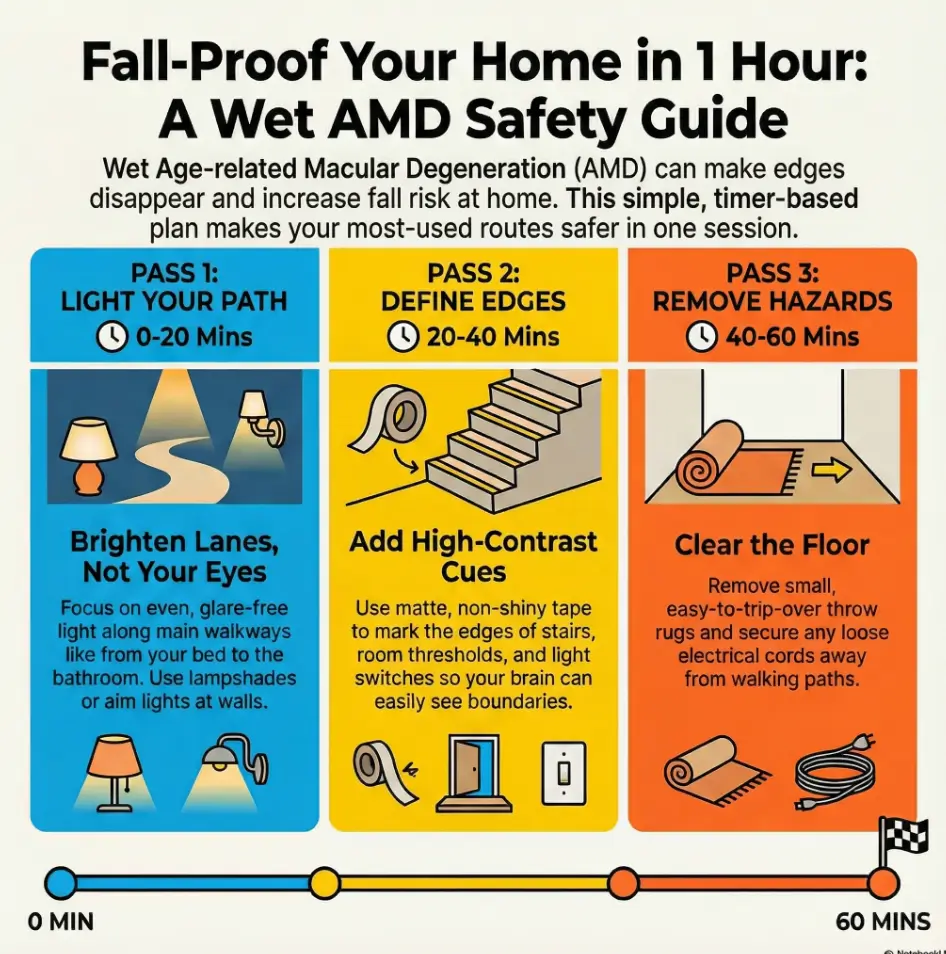
60-minute checklist: three passes that actually finish
If you do only one thing from this article, do this section. Because long lists don’t change a home. Finished actions do. Set a timer for 60 minutes. We’re doing three passes—like painting a room, but for safety.
- Pass 1 (0–20): Light the “walking lanes” (the routes you use daily).
- Pass 2 (20–40): Add contrast where edges vanish (steps, thresholds, handles).
- Pass 3 (40–60): Remove the sneaky trip hazards (rugs, cords, clutter).
Before you start, map your “top 3 routes.” These matter more than any product:
- Night route: bed → bathroom → bed
- Kitchen route: couch/chair → kitchen counter → sink
- Entry route: front door → main room (or bedroom)
Micro: Let’s be honest… you won’t redo the whole house
You don’t need to. You need a “minimum viable safety setup”: bright, glare-controlled lanes; clear edges; and fewer traps. If the house gets 20% safer, that’s a real win. You can stack another 20% next weekend.
- Prioritize routes, not rooms.
- Fix glare, not just brightness.
- Remove “quiet” trip hazards last.
Apply in 60 seconds: Stand in your hallway at night with lights on—do you see edges clearly? If not, Pass 1 starts now.
Show me the nerdy details
Why this order works: lighting changes improve overall visibility instantly; contrast helps your brain detect boundaries when central detail is missing; hazard removal reduces the chance that one misread step becomes a fall. The “route-first” approach also reduces cognitive load—you learn a consistent path instead of relearning the whole house.
Lighting first: brighter without glare (the wet AMD-friendly way)
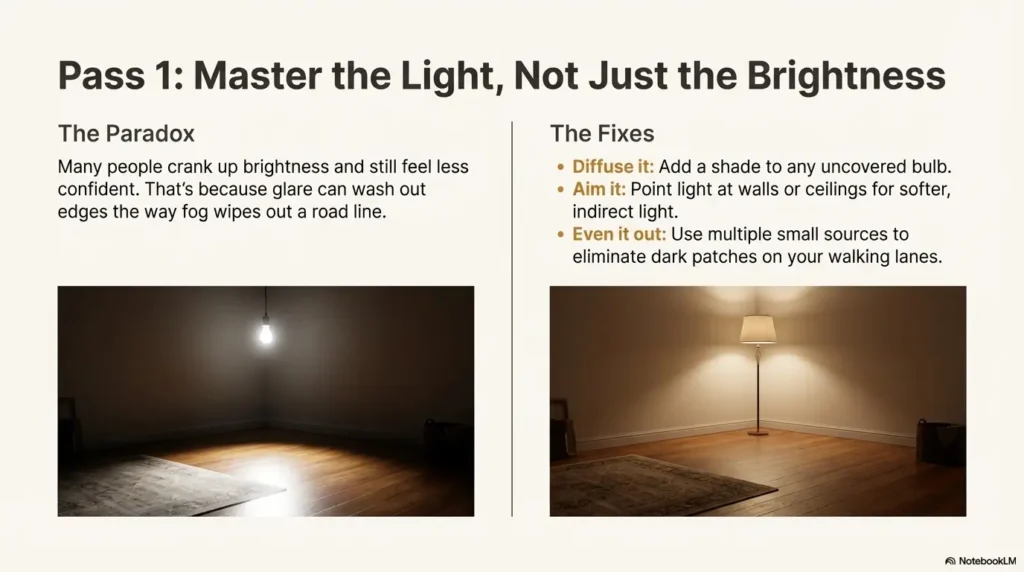
Here’s the paradox: many people crank up brightness and still feel less confident walking. That’s because glare can wash out edges the way fog wipes out a road line. Your goal isn’t “stadium lighting.” It’s clear lighting—bright enough, aimed well, and not bouncing off shiny surfaces.
Bulbs in plain English (brightness + color temperature)
- Brightness (lumens): choose “brighter” bulbs for walking lanes, then test for comfort. If you squint, it’s too intense or poorly aimed.
- Color temperature: many people prefer a neutral-to-cool white in task areas for clarity, but warm can feel gentler at night. The “best” is the one that helps you see edges without pain.
- Consistency: mismatched bulbs can create shadows and false depth cues. Try to keep hallway bulbs the same type.
Glare traps (and quick fixes you can do today)
- Uncovered bulbs: add a shade or diffuser so the light source isn’t in your line of sight.
- Shiny floors/counters: aim lamps toward walls or ceilings for indirect light; use matte finishes where you can.
- Windows at the wrong time of day: sheer curtains or adjustable blinds can reduce harsh contrast.
- Mirrors opposite windows: reposition if you’re getting “flash” glare while walking.
Open loop: Why your new “super bright” bulb can make you see less
Because your eyes and brain aren’t just “cameras.” When glare spikes, detail drops—especially at edges. Fix it by changing angle (where the light points), diffusion (shades), and placement (more small sources instead of one harsh source). Think “even lighting,” not “one bright blast.”
Night route lighting (bedside → hallway → bathroom)
This is the route where most people are sleepy, slightly dehydrated, and not negotiating with their balance system. Make it boring.
- Bedside: a lamp you can reach without leaning; keep it in the same spot every night (and if dry, scratchy eyes make nighttime navigation harder, the 15-minute night routine for dry eyes pairs well with a stable bed-to-bath setup).
- Hallway: add a low-level night light (or motion light) to reduce shadowy patches.
- Bathroom: ensure the switch is easy to find; consider a small light that turns on immediately.
Check what’s true for your bed→bathroom route:
Result: —
Neutral action: Pick one fix (shade, night light, or clearing the path) and do it before bedtime.
- Diffuse harsh bulbs.
- Aim light to reduce glare.
- Even out shadows on walking lanes.
Apply in 60 seconds: Turn on your hallway light and stand at both ends—if you see a bright hotspot, add diffusion or a second softer light.
Show me the nerdy details
Practical lighting heuristic: multiple lower-glare light sources often beat a single high-intensity source. If a bulb is in direct view (especially in a bare fixture), diffusion and repositioning can improve comfort and edge detection without changing total brightness.
Contrast next: the edge-marking system that looks normal
Contrast is the unsung hero of wet AMD home safety. When fine detail is harder to catch, your brain leans on boundaries. A high-contrast edge is like a subtitle for your feet: “This is where the step starts.”
The 10 contrast targets (do these before you buy anything else)
- Stair edges (top and bottom steps especially)
- Thresholds between rooms (tile-to-wood, carpet-to-tile)
- Bathroom tub edge and shower entry
- Light switches (plates that blend into walls)
- Door handles and locks
- Kitchen counter edge (if it blends with cabinets/floor)
- Toilet seat vs floor
- Grab points (rails, stable supports)
- Remote controls / thermostats (high-contrast labels)
- Frequently used drawers (tactile or high-contrast markers)
Same-color traps (the “my eyes lied” moments)
These are the spots where everything is the same tone—so your brain guesses. And guessing is where falls start.
- White toilet + white tile + white bath mat
- Gray rug on gray floor
- Stainless appliances reflecting light like a mirror
- Beige threshold strip on beige carpet
Open loop: The #1 contrast spot most homes miss until someone falls
Light switches. Not because switches are dangerous on their own, but because people reach for them while moving. If the switch plate blends into the wall, you get the classic “slow shuffle with a hand searching the air.” A high-contrast plate, a tactile dot, or a glow-style switch can remove that moment of uncertainty.
Micro: Here’s what no one tells you… contrast beats “more stuff”
The instinct is to add objects: more chairs, more baskets, more “places to hold.” But more objects can mean more obstacles. Contrast lets you keep the space simpler while making it clearer.
- High-contrast tape (matte finish)
- Tactile dots (for switches/remotes)
- Contrasting non-slip mat (bathroom)
- Bold marker labels (large print)
Neutral action: Choose two targets (stairs + switch plates) and fix them this week.
Trip hazards last: rugs, cords, clutter (the quiet injury-makers)
If you’ve ever “almost tripped” and then laughed it off—congrats, you have a nervous system with excellent denial skills. Trip hazards are often invisible until your toe finds them. Wet AMD doesn’t cause falls by itself; it raises the odds that a small hazard becomes a big moment.
Rugs: which ones to remove vs which ones can stay (safely)
- Remove: small throw rugs, curled edges, anything that slides when you scuff it.
- Keep (with rules): low-pile rugs that lie flat, fully secured, with clear contrast from the floor.
- Best test: run your foot lightly at the edge. If it lifts, it’s a “no.”
Cords: the “ankle hook” problem
Cords are sneaky because they belong to useful things: lamps, chargers, TVs. The fix is boring and effective: run cords along walls, tape them down, or use cord covers. Keep charging stations off walking lanes.
Clutter lanes: create a drop zone that doesn’t spill into the path
- Put a basket or tray off the walkway for mail, shoes, and bags.
- Keep the floor “clean” first, then organize surfaces.
- Make one rule: nothing lives on stairs—not even “for one minute.”
Don’t do this: “grip pads” that still curl and slide
Many “non-slip” solutions are only half-solutions. If the rug edge can curl, the rug can still trip you. When in doubt, remove it. The best fall prevention device is an empty floor.
- Remove small rugs first.
- Move charging stations off walking lanes.
- Protect stairs from “temporary” clutter.
Apply in 60 seconds: Walk your top route and count obstacles. If you step around anything, that’s your first removal list.
Short Story: The hallway that “wasn’t a problem” (120–180 words) …
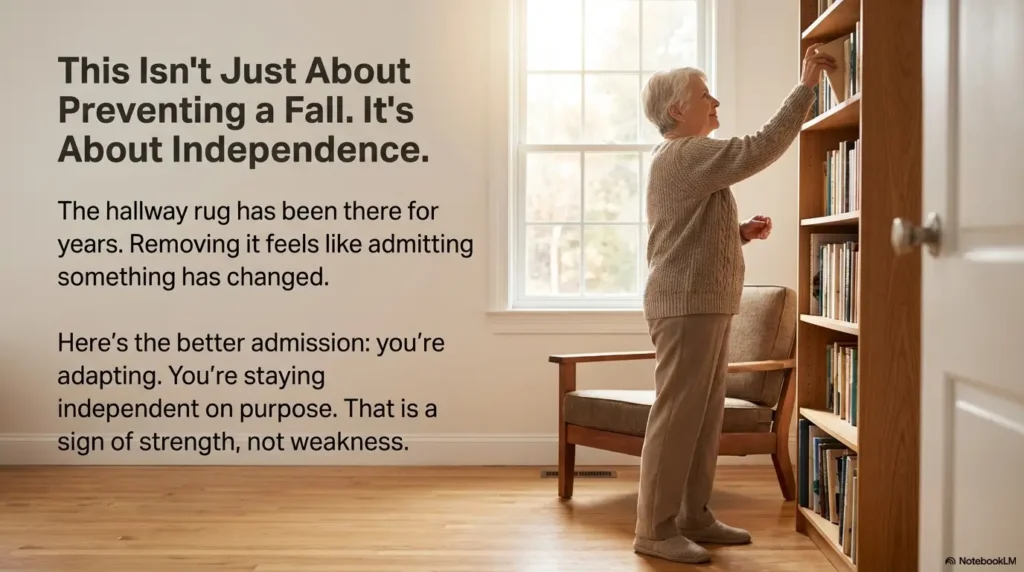
It’s almost always the same line: “We’ve had that rug for years.” The rug is usually pretty. It’s usually small. It’s usually sitting right where the foot lands when you turn a corner. One night, you get up half-asleep. The light feels too bright, so you don’t turn on the overhead.
You do the careful shuffle you’ve perfected—hand out, shoulder slightly angled, eyes hunting for the doorway. And then the rug edge catches. Not a dramatic fall, maybe. Just a fast, ugly stumble. You grab the doorframe like it’s a lifeboat. Your heart goes loud. The next day, the rug is still there because removing it feels like admitting something changed. Here’s the better admission: you’re adapting. You’re staying independent on purpose.
Bathroom safety: wet floors + low contrast (highest priority room)
If you only do one room-specific upgrade, do the bathroom. Water + smooth surfaces + nighttime urgency is a spicy combination, and not in the fun way. We’re aiming for stable footing, clear edges, and support you can trust.
Shower/tub: non-slip surfaces that won’t peel into hazards
- Use a non-slip mat or strips that lie flat and stay put.
- Replace worn mats that curl at the corners.
- Keep the floor dry: a towel within reach prevents the “drip trail.”
Grab bars vs towel bars (spot the dangerous “fake support”)
Towel bars are not designed to hold body weight. If someone grabs one during a slip, it can tear away. Grab bars are meant for support and should be installed securely. If you rent and can’t drill, look for professional guidance on temporary options—but don’t assume suction devices are safe in every situation.
Night visits: motion lights vs always-on (choose based on your routine)
- Motion lights: great if you forget switches or want hands-free light.
- Always-on dim light: better if motion sensors lag, or if sudden light changes bother you.
- Best rule: whichever helps you see edges without glare wins.
Open loop: The one bathroom detail that causes the “half-step” stumble
Bath mats with thick edges. They feel cozy, but they create a tiny “step” your foot can catch—especially when you’re turning. Choose flatter mats, keep them fully secured, and avoid placing them where you pivot.
- You want hands-free lighting
- You often forget the switch
- Your hallway is short and clear
Trade-off: sensor lag or sudden brightness can be annoying.
- You dislike sudden light changes
- You wake up groggy
- You want predictable edges every time
Trade-off: slightly more energy use, but steadier cues.
Neutral action: Try one option for 3 nights and keep the one that feels safest.
- Flat, secured non-slip surfaces.
- Support that’s designed to hold weight.
- Night lighting that doesn’t blind you.
Apply in 60 seconds: Stand where you exit the shower and look down—can you clearly see the mat edge and floor boundary?
Show me the nerdy details
Bathroom risk spikes at night because vision, alertness, and balance are all reduced at the same time. The most effective interventions are those that reduce “micro-decisions”: predictable lighting, consistent placement of items, and stable support points.
Stairs & thresholds: the “one bad step” prevention plan
Stairs are where small visual errors become big consequences. The goal is to make the edge obvious, the hand support reliable, and the lighting consistent—so you’re not negotiating each step like it’s a riddle.
Edge marking that doesn’t look industrial
- Use matte, high-contrast strips on the front edge (no shiny tape that reflects).
- Focus on the top and bottom steps first—those are common misstep zones.
- Keep markings consistent: the same look on each step reduces confusion.
Handrails that are truly “solid”
“Solid” means you can grip it and put weight into it without wobble. If it moves, it’s not a rail; it’s a suggestion. If you’re not sure, ask a handy friend or a professional to check mounting. This is a safety investment, not a cosmetic upgrade.
Don’t do this: glossy tread coatings and high-shine cleaners
Gloss creates both glare and slip risk. If a stair looks “pretty” but feels slick, it’s not your friend. Choose finishes that reduce reflection and improve traction.
- Stand before the threshold and look at the edge.
- Can you clearly see where one surface ends and the other begins?
- If not, add a contrast strip or change the mat to create a clear boundary.
Neutral action: Fix one threshold today—whichever one you cross most often.
Kitchen & meds: safer routines where sharp + small meet low vision
The kitchen is deceptively tricky: reflective surfaces, sharp tools, and lots of small labels. The goal is “less searching, fewer surprises.” You’re building safety through layout and repeatable routines.
Task lighting without stainless-steel glare
- Add under-cabinet or directional lighting that aims at the counter—not into your eyes.
- If stainless appliances create glare, avoid placing bright lamps directly opposite them.
- Use matte cutting boards in a contrasting color to the food (light board for dark foods, dark board for light foods).
Label logic that works by touch + contrast (not tiny print)
The best label system is the one you can use on a tired day. Use big print plus a tactile marker. For medications, keep a single “home base” spot and avoid relocating bottles “temporarily.”
- Large-print labels on the front of containers
- Tactile dots for critical buttons (microwave start, stove off, timer)
- One tray for daily meds (if that fits your routine)
The “carry test” (hot mug, knife, plate)
This is a simple safety test: carry a mug of water from the counter to the table. If you have to dodge objects or the lighting creates glare patches on the floor, fix the route before you trust it with something hot or sharp.
- Your top 3 “unsafe moments” (e.g., stairs at dusk, bathroom at night, kitchen glare)
- Photos of problem zones (stairs, bathroom, hallway lighting)
- Medication routine (where labels confuse, where you reach while moving)
- Any near-falls in the last 30 days (what happened right before)—and if you want a simple way to capture patterns, use a printable symptom diary for seniors for the “what happened right before” details.
Neutral action: Write down one “unsafe moment” while it’s fresh—details matter.
Tools that earn their keep: low-vision aids + smart home shortcuts
Tools should reduce effort, not add clutter. If a device becomes another thing to trip over, it’s not a tool—it’s a prank. Start low-tech, add high-tech only when it removes friction.
Low-tech first (cheap, fast, high impact)
- Tactile dots for switches, remotes, and critical buttons
- Large-print labels (bold, high contrast)
- Talking timers (kitchen) if you miss visual cues
- Matte contrast tape for edges and thresholds
High-tech next (only if it simplifies your day)
- Phone accessibility settings: larger text, voice control, screen readers (and if screens leave you foggy or headachey, digital eye strain in seniors can help you tune the “bigger text” setup without overdoing brightness).
- Voice assistants to turn lights on/off without searching for switches
- Smart bulbs for scheduled night lighting (predictable, not random)
Organization system: “home base” spots so items stop disappearing
This is a sneaky safety upgrade: if things have a consistent “home base,” you stop wandering and scanning. The “search spiral” (walking around looking for glasses/phone/keys) is a fall risk in disguise.
- Keys live in one bowl by the entry.
- Glasses/magnifier live in one tray by the bed (and if reading is the “daily battle,” low-vision reading for 80+ with AMD is a practical companion guide).
- Phone lives on one charger off the walking lane.
Neutral action: Choose one “home base” today and enforce it for a week.
Bonus: clarity doesn’t stop at the floor. If entertainment or news is part of your day and you’re tired of missing dialogue, smart TV subtitles for AMD can make the “sit and rest” hours feel less effortful—without cranking up strain.
When to seek help: red flags + who to call in the US
Home safety upgrades are powerful. But they’re not a substitute for urgent care when wet AMD changes quickly. Major medical institutions emphasize that sudden central vision changes—like new distortion or a new dark area—should be evaluated promptly.
Red flags that should trigger a same-day call
- Sudden new wavy lines, distortion, or a new “blank” spot in central vision
- Rapid worsening over hours or days
- New trouble recognizing faces or reading that feels abrupt
- Any fall with head impact, or a near-fall that scared you
- New dizziness, weakness, fainting, or fear of walking
Who helps (and what to ask for)
- Retina specialist / eye clinic: “I have wet AMD and new changes in central vision.” (If you’re in active treatment, keeping your wet AMD injection schedule handy can also make triage conversations faster.)
- Primary care: fall risk, dizziness, balance concerns, medication review.
- Low-vision rehabilitation / occupational therapy: home setup, lighting/contrast strategies, safe routines.
- Call same-day for new distortion or a new central spot.
- Take near-falls seriously; they’re warnings, not “clumsiness.”
- Ask for low-vision rehab/OT if home navigation feels uncertain.
Apply in 60 seconds: Save your eye clinic number in your phone favorites and write it in large print near the bed.
And if “treatment talk” is part of the stress you’re carrying: it can help to know what’s normal. People often feel steadier after reading what to expect for a first anti-VEGF injection for wet AMD, and it’s common for nerves to spike in later decades (see wet AMD injection anxiety in your 70s and wet AMD injections after 75 for the human side of “I’m doing my best”).
If costs or coverage are part of the decision pressure, these two guides can help you frame the conversation before you call: AMD treatment cost and Medicare coverage for Eylea injections.
Common mistakes: well-meant changes that backfire
This section is the “save yourself a headache” portion of the program. Most mistakes come from a good impulse—then they quietly increase glare, clutter, or confusion.
| Mistake | Why it backfires | Better move |
|---|---|---|
| “Brighter is always better” | Glare washes out edges and detail | Diffuse and reposition light sources |
| Tiny labels and low-contrast fonts | You lean in, squint, and move while reading | Large print + tactile markers |
| Adding more furniture “to hold onto” | Creates obstacles and narrow lanes | Simplify routes; add reliable support points |
| Relying on furniture as a handrail | Furniture can slide or tip under load | Check rails/supports for stability |
Quick gut-check: if a “fix” makes your home more complicated, it’s probably not a fix. In wet AMD home safety, the winners are: clarity, consistency, and fewer surprises.
FAQ
1) What is the best lighting for wet AMD at home—warm or cool light?
It depends on what helps you see edges without discomfort. Many people prefer neutral-to-cool white for task clarity, but warm light can feel gentler at night. The best test is practical: can you see thresholds and step edges clearly without squinting?
2) How do I reduce glare from windows and shiny surfaces with wet AMD?
Reduce the “direct hit” of light: use shades/diffusers, angle lamps toward walls for indirect light, and add adjustable window coverings. If stainless steel or glossy floors reflect harshly, change the angle of the light source rather than only changing bulb brightness.
3) Are motion-sensor night lights safe for seniors with low vision?
Often, yes—especially for hands-free lighting on the bed-to-bathroom route. But they’re not perfect. If the sensor lags or the light is too bright, an always-on dim light can be safer and more predictable.
4) What’s the safest way to mark stair edges for someone with AMD?
Use a matte, high-contrast strip on the front edge of steps and ensure consistent lighting at the top and bottom. Focus on the first and last step because they’re common misstep points.
5) Do magnifying lamps help with wet AMD or do they cause glare?
They can help for tasks like reading labels, but glare is a real risk if the light source is harsh or poorly aimed. Look for diffusion and position the lamp so light falls on the task, not into your eyes.
6) How do I make my bathroom safer for low vision without remodeling?
Prioritize flat non-slip surfaces, reliable support, and predictable night lighting. Remove thick-edged mats that create a “half-step,” and keep essentials within easy reach to reduce turning and searching.
7) Should I remove all throw rugs if I have macular degeneration?
Small throw rugs and curled edges are high risk. If a rug lifts when you scuff the edge, remove it. If you keep any rug, it should lie flat, be fully secured, and contrast clearly with the floor.
8) What high-contrast colors work best for labels and switches?
High contrast is the goal: dark on light or light on dark, with bold, large print. The “best” color depends on your surfaces—choose what stands out clearly in your home’s lighting.
9) When should a wet AMD patient call the eye doctor urgently?
Call same-day for sudden new distortion (wavy lines), a new central dark/blank spot, or rapid worsening. Wet AMD can change quickly, and early evaluation protects vision options (and it can help to understand the broader treatment landscape in AMD injections).
10) Can occupational therapy or low-vision rehab help with wet AMD home safety?
Yes—low-vision rehabilitation and occupational therapy can help you set up lighting, contrast cues, and safe routines that fit your home and habits. Coverage varies by plan; ask your clinic or insurer (including Medicare-related plans) what’s available in your area.
Next step: do one thing today (and make it stick)
Remember the open loop from earlier—why “super bright” can make you see less? The answer is glare and unpredictability. So here’s your honest next step: build one predictable, well-lit route and keep it stable for a week. Independence is rarely one big change. It’s a series of small wins that don’t fall apart on a tired Tuesday.
- Pick your top route (bed → bathroom is usually the winner).
- Remove anything you step around (even if it’s “temporary”).
- Add one predictable light source that doesn’t glare (shade/diffuser if needed).
Neutral action: Do the route once with lights on, once with night lighting—keep whichever feels safer.
Reduce glare
Add night route light
Fix thresholds
Make switches visible
Secure cords
Clear clutter lanes
If you want official, printable support for the fall-prevention side, the CDC’s STEADI “Check for Safety” home checklist is a solid companion to this guide. For the wet AMD side, the American Academy of Ophthalmology and the National Eye Institute explain wet AMD basics and treatments (including anti-VEGF injections and other options) in patient-friendly language. You don’t need to memorize everything. You just need a safer house and a clear plan for when to call.
Last reviewed: 2025-12.