

A clearer, calmer kitchen guide for older adults and caregivers
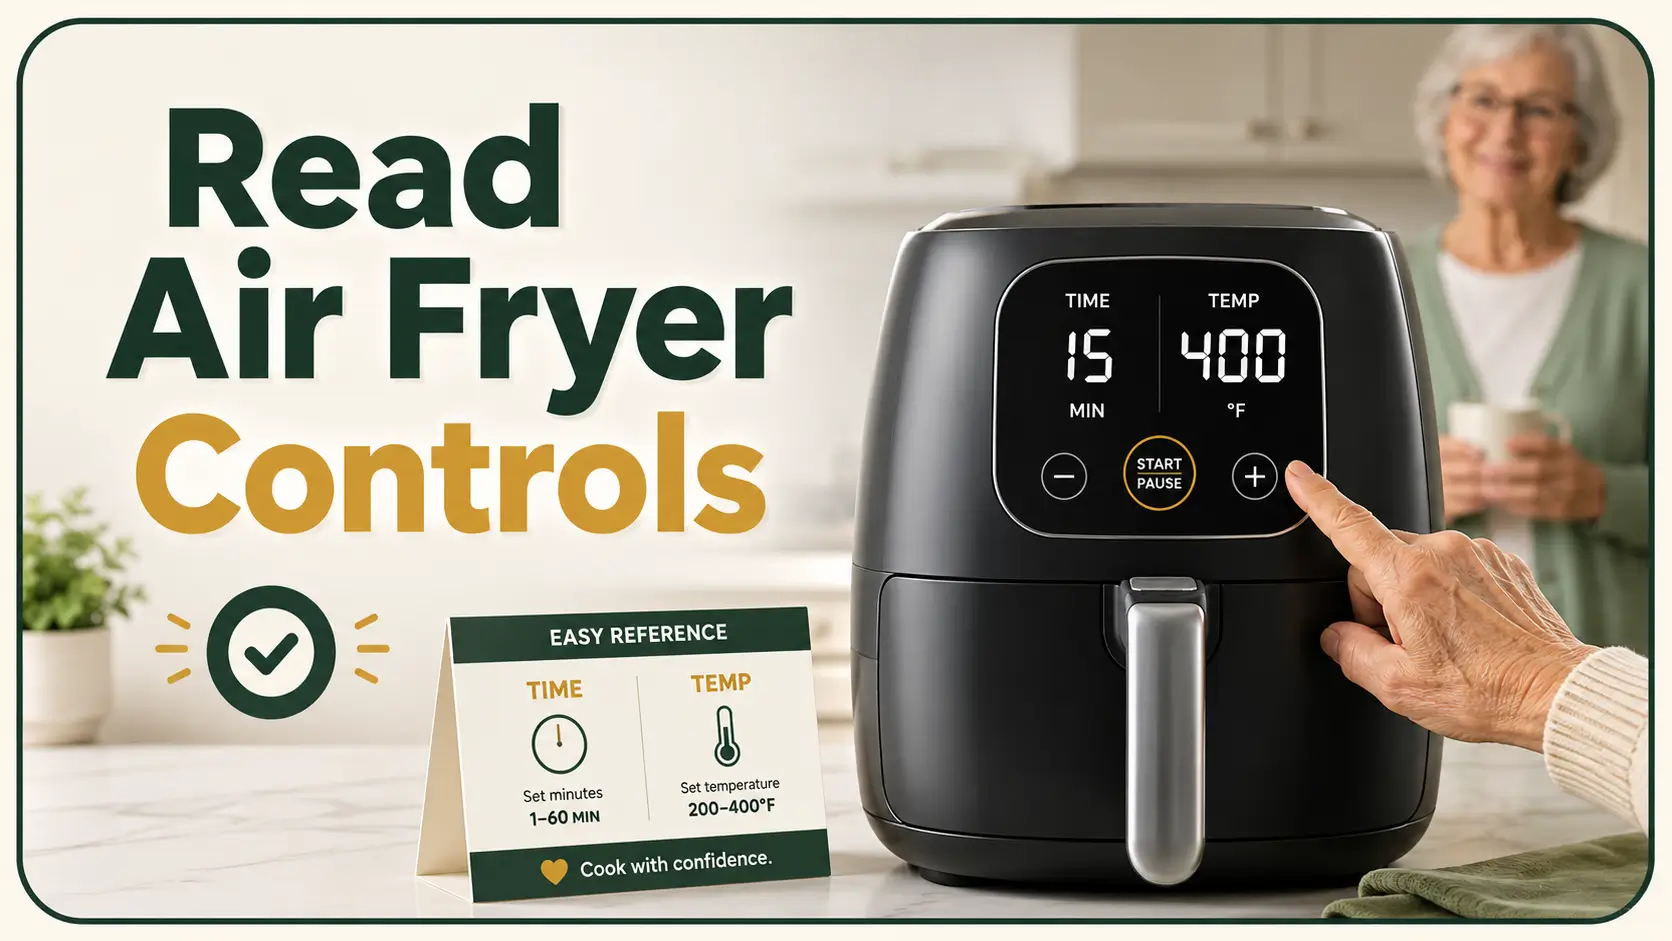
How Seniors Can Read Air Fryer
Time and Temperature Controls
An air fryer may promise simpler cooking, yet its glossy black panel can feel like a tiny airport departure board. One number flashes, another disappears, and a cheerful french-fry icon offers no clue whether the machine is set for 15 minutes or 400 degrees.
For seniors with aging eyes, reduced contrast sensitivity, hand tremor, arthritis, or mild memory changes, the problem is rarely a lack of intelligence. It is often poor appliance design: small symbols, shared buttons, reflective surfaces, delayed responses, and displays that alternate between time and temperature without explaining themselves.
This guide turns that blinking control panel into a repeatable routine. You will learn how to identify each number, reduce glare, label essential controls, build a large-print cooking card, choose safer practice foods, and decide when a different appliance would be the wiser purchase.
Read the numbers
Tell cooking minutes from degrees, presets, and status messages.
Simplify the panel
Use lighting, labels, tactile markers, and large-print instructions.
Cook more safely
Practice one dependable sequence before cooking independently.
Small win, big difference: one clearly labeled button can remove an entire layer of kitchen anxiety. 🔎
Article snapshot: This guide is for seniors, family caregivers, occupational therapy clients, and anyone helping an older adult use a digital air fryer. It solves the practical problem of unreadable or confusing controls. By the end, you will be able to identify the essential buttons, improve visibility, create a one-page cooking card, teach a three-step routine, and recognize when independent use is no longer safe.
Table of Contents
Safety Comes Before Settings
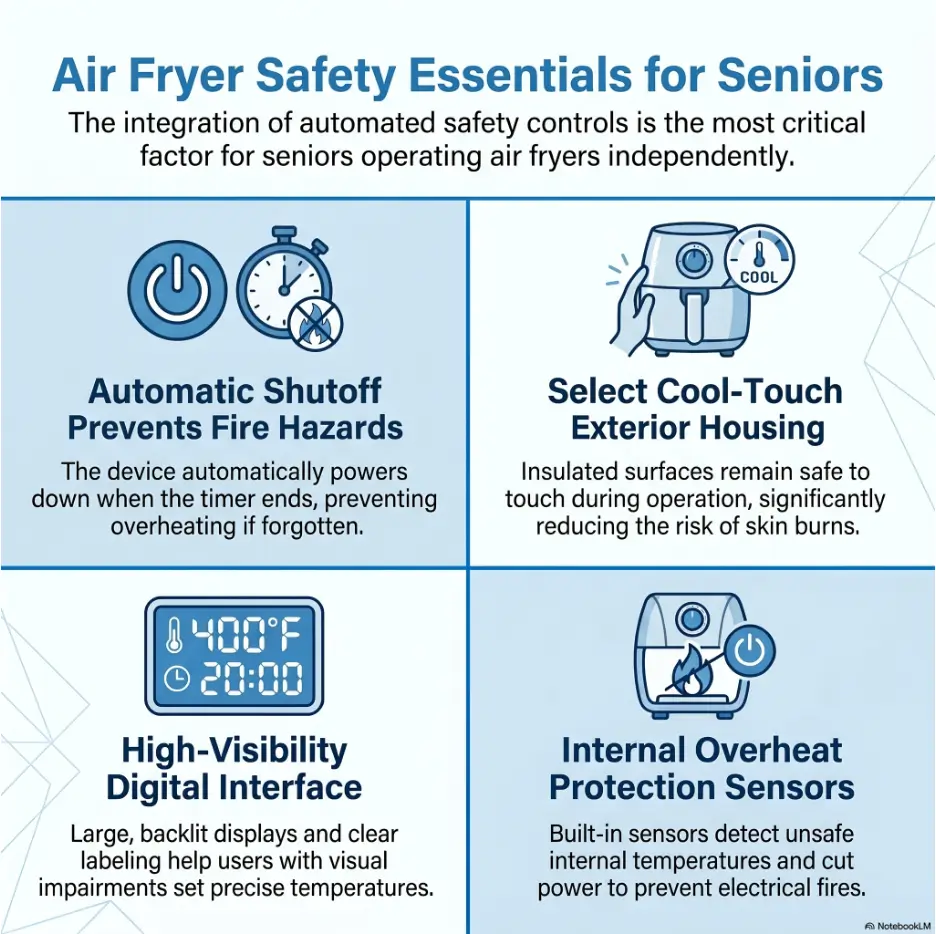
Learning an air fryer is not merely a technology lesson. It involves heat, electricity, hot metal, steam, grease, and a basket that may remain hot long after the display goes dark. That means the first lesson should not be “press this button.” It should be “set up the space so one wrong button does not become a burn or fire.”
The safest learning sessions happen while the appliance is unplugged, cool, empty, and resting on a stable heat-resistant surface. A senior can inspect the controls, practice finding the basket release, and rehearse the button sequence without the hiss and urgency of active cooking.
Safety and independence note
This article provides general household guidance, not medical or occupational therapy advice. A person who forgets active cooking cycles, cannot feel heat reliably, has frequent dizziness, struggles to remove the basket safely, or repeatedly confuses controls may need supervision or a different cooking method. Stop using any air fryer that smokes unusually, sparks, smells electrically hot, has a damaged cord, or is subject to a product recall.
Prepare a cool practice area first
Place the unplugged air fryer where it will normally be used. Avoid a temporary teaching location if possible. A routine learned at the dining table may not transfer neatly to a crowded countertop beneath different lighting.
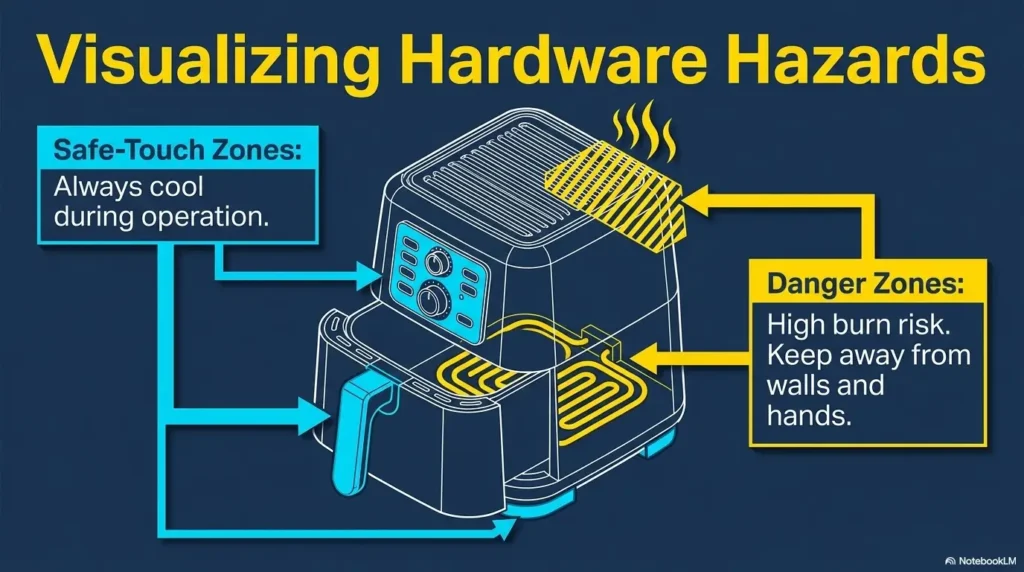
Leave clear space around the appliance, especially near its exhaust vents. Move paper towels, curtains, plastic bags, medication organizers, grocery receipts, and loose mail away from the machine. These objects have a mysterious talent for migrating toward warm appliances.
- Confirm that the air fryer sits flat and does not wobble.
- Keep the cord away from the counter edge and sink.
- Make sure the basket can be pulled out without striking a wall or nearby appliance.
- Place a heat-resistant landing area beside the air fryer.
- Keep oven mitts in the same visible location every time.
- Test the smoke alarm according to its manufacturer’s instructions.
Separate control reading from hot-food handling
One common difficulty is trying to read the screen while simultaneously holding the basket, checking food, or avoiding steam. That stacks several tasks together. The safer method is sequential: set the basket down, move hands away from hot surfaces, then read or adjust the controls.
If the control panel sits above the basket, do not lean across the open drawer to inspect it. Close the basket first or step to the side. Steam can rise quickly, and the front edge of the drawer may be hotter than it looks.
Key takeaway
Teach the controls while the air fryer is unplugged. Teach hot-basket handling as a separate skill. Combining both lessons too early creates unnecessary pressure.
Know who this guide fits
These adaptations can help someone with mild near-vision difficulty, reduced contrast sensitivity, arthritis, a modest tremor, or occasional confusion about unfamiliar symbols. They are also useful for a senior who cooks well but has purchased a newer appliance with a panel designed by someone apparently fond of microscopic hieroglyphics.
Labels and routines are less likely to be enough when a person cannot remember that the appliance is running, repeatedly leaves food cooking after an alarm, cannot safely grip the basket, or becomes disoriented by a familiar routine. In those cases, the goal should shift from preserving use of a particular appliance to preserving safety and confidence.
Which Number Is Time and Which Is Temperature?
Most digital air fryers use a single display for several jobs. It may show temperature while settings are being adjusted, switch to cooking time, count down during operation, and briefly display a message such as “OFF,” “END,” or “COOL.” The screen is not necessarily malfunctioning when the number changes. It may simply be speaking several dialects of appliance.
The most reliable clues are the number’s size, the nearby symbol, and what happens after a control is pressed. Do not rely on number length alone, but use it as an early hint.
Look for “MIN,” a clock, or a one- or two-digit number
Cooking time is commonly shown in minutes. A display of 8, 12, 15, or 25 usually means minutes when the appliance is awaiting a time setting or counting down. Some models show time as “15:00,” while others show only “15.”
A clock symbol, the word “TIME,” or the abbreviation “MIN” usually identifies the time control. The clue may be printed near a button rather than illuminated on the screen, so inspect both areas.
- 15 commonly means 15 minutes.
- 05 commonly means 5 minutes.
- 0:30 may mean 30 seconds on some models or 30 minutes on others.
- 12 flashing beside a clock usually means the time is ready to be adjusted.
- A steadily decreasing number is usually the active countdown.
Look for “°F,” “°C,” “TEMP,” or a thermometer
Temperature is usually a three-digit number in Fahrenheit, such as 350, 375, or 400. In Celsius, common air-fryer temperatures may appear as 160, 180, or 200. A degree symbol, “°F,” “°C,” the word “TEMP,” or a thermometer icon confirms the unit.
Do not assume every three-digit number is a temperature. Some displays may show error codes or model-specific messages. The instruction manual remains the final authority for unusual codes.
| What you see | What it probably means | What to confirm |
|---|---|---|
| 15 | Cooking time in minutes | Clock icon, “MIN,” or countdown movement |
| 375 | Temperature in Fahrenheit | Degree symbol, “°F,” thermometer, or TEMP light |
| 180 | Temperature in Celsius or a model-specific setting | Check whether the appliance is set to °C |
| 0:08 | Eight minutes remaining | Whether the colon format represents minutes and seconds |
| END | Cooking cycle finished | Whether the fan is still cooling the unit |
| E1 or another letter-number code | Possible error message | Stop and consult the manual |
Wait, why did the number change?
A single-screen air fryer may alternate between the selected temperature and the remaining time. For example, it may show 375 for a few seconds, then 12, then return to 375. That switching can look like an accidental adjustment even when nothing has changed.
Watch for supporting indicators. A small thermometer light may appear while temperature is shown, followed by a clock light when time appears. On a poorly lit panel, these indicators can be much harder to see than the main digits.
During the first lesson, write down exactly what the display does during one complete cycle. Record the order: temperature appears, time appears, fan begins, countdown starts, completion alarm sounds, fan continues briefly. A predictable sequence is far less alarming than a sequence that seems random.
Key takeaway
A changing number does not always mean a changing setting. Check the clock, thermometer, “MIN,” “TEMP,” “°F,” or “°C” indicator before touching another button.
Decode the Display Before the Air Fryer Gets Hot
The quickest way to make a control panel feel familiar is to study cause and effect. Press one control, pause, and observe the exact response. Pressing five controls in quick succession turns the screen into a guessing game, especially when the appliance has a delayed touch response.
Map one control at a time
Start with the air fryer unplugged and photograph the panel in good light. Then plug it in without food and identify the power control. Press power once, keeping hands away from the basket release. Observe which symbols illuminate.
Next, locate the time and temperature selector. Some appliances use separate buttons. Others use one button that toggles between the two. A third group requires pressing “TEMP/TIME” and then using shared plus and minus buttons.
- Press power once.
- Wait two full seconds.
- Press the time or time-temperature selector once.
- Observe which number or symbol flashes.
- Press plus once and note which value changes.
- Return the value to its original setting.
- Repeat the process for temperature.
- Press cancel or power off before moving to the next control.
Understand flashing, steady, and alternating numbers
A flashing number often means “this is the setting you can change now.” A steady number may mean the setting is accepted, the machine is waiting, or the cycle is active. Alternating numbers commonly represent time and temperature sharing one screen.
These conventions are common, not universal. A caregiver should test the specific model rather than writing generic instructions from memory. Two air fryers from the same brand may behave differently enough to make a borrowed instruction card unsafe.
Why dark touch panels can be unusually difficult
Show me the nerdy details
Aging eyes often need more light, stronger contrast, and extra time to adapt between bright and dim areas. Glossy black panels create reflections that compete with faint illuminated symbols. A bright ceiling light can produce a white streak precisely where the temperature indicator appears.
Touch controls add another difficulty: they may offer no physical boundary, click, or movement. The user cannot confirm by touch that the correct spot was pressed. Dry fingertips, a light touch, or touching between icons may produce no response, while repeated tapping can suddenly register several commands.
The practical answer is not simply “use brighter light.” It is to improve contrast while controlling glare, create consistent visual or tactile landmarks, and allow a deliberate pause after each press.
Record the startup sequence instead of trusting memory
Use a phone to record a short video of the control panel while starting a normal cycle. Narrate what is happening: “Power is on. Temperature is flashing. I press plus twice. Now time is flashing. I set 10 minutes. I press start. The countdown begins.”
This video becomes a reference for the caregiver who creates the printed card. It also helps identify delays. If the screen responds one second after a touch, the written instruction should include “press once, then wait.”
The P-A-U-S-E control-reading method
1. Point
Find the clock, thermometer, or highlighted setting.
2. Act once
Press one control one time, using a deliberate touch.
3. Use a pause
Wait two seconds instead of tapping repeatedly.
4. Save the result
Write what changed and what that control actually does.
Make Tiny Controls Easier to See
Before replacing the appliance, improve the viewing conditions around it. A dim screen may become readable after a simple change in angle, lighting, contrast, or distance. The aim is not maximum brightness. The aim is a clear signal without a reflective halo.
Reduce glare before adding more light
Stand where the senior normally stands and look at the panel from eye level. If you see a window, ceiling fixture, or your own reflection, the display is fighting competing light.
Move the air fryer a few inches to the side, rotate it slightly, or close a nearby blind. A small positional change can make faint numbers appear much sharper. Do not place the appliance in an unsafe location merely to improve visibility; keep required ventilation and a stable work surface.
A task lamp should illuminate the control area from above or slightly to one side. Light aimed directly at a glossy panel may bounce straight back into the user’s eyes. For more ideas about controlling harsh reflections around the kitchen, see this guide to reducing under-cabinet lighting glare on glossy surfaces.
Add removable high-contrast labels beside essential controls
Label only the controls needed for the senior’s routine. A panel covered in labels can become busier than the original. Most users need four landmarks: power, temperature, time, and start or cancel.
Use large uppercase text with strong contrast, such as black lettering on matte white or pale yellow tape. Place the label beside the control, not over the touch-sensitive area, vent, warning, seam, or indicator light.
- Clean the surface according to the manufacturer’s directions.
- Test removable tape on an inconspicuous area.
- Use short labels: POWER, TEMP, TIME, START.
- Keep lettering horizontal whenever space allows.
- Avoid glossy tape that creates a second glare problem.
- Photograph the original panel before applying anything.
Do not cover safety markings or place adhesive where heat could loosen it. Check labels regularly. A curled corner near a hot vent is not charming vintage patina; it is a cue to remove and replace the label.
Use magnification without creating a juggling act
A handheld magnifier can help during setup, but it occupies one hand and may be awkward near a hot basket. A stand magnifier, phone camera, or mounted magnifying lens can leave both hands free.
The phone camera is especially useful before cooking. Open the camera, point it at the control panel, and enlarge the image. Do not hold the phone over steam or hot exhaust. Take a clear photograph while the appliance is cool, then study the picture away from the cooking area.
For help deciding which type of magnification is easier to stabilize, compare reading glasses and magnifiers for close-up tasks. Someone with hand tremor may also benefit from the practical comparison of a handheld versus stand magnifier.
Key takeaway
Improve the visual environment before blaming the senior or buying a new appliance. A better angle, matte label, and side-positioned task light may solve more than extra brightness.
Short Story: Margaret’s Four Labels
Margaret had used ovens for more than fifty years, but her new air fryer made her feel oddly dependent. The panel woke only after she touched it, and the tiny icons vanished into the black glass whenever the ceiling light reflected across it.
Her daughter first printed a complete diagram with twelve labeled controls. Margaret took one look and laughed. “You have turned four confusing buttons into a tax return,” she said.
They started again. They placed four matte labels beside POWER, TEMP, TIME, and START. Then they wrote one card for reheating a familiar vegetable side. Margaret practiced the sequence twice with the appliance cool and once with her daughter nearby.
The useful change was not more information. It was less information, arranged in the order she needed it. By the following week, Margaret no longer asked what every symbol meant. She knew the four landmarks that carried her safely from an empty basket to a finished meal.
Button Symbols, Shared Controls, and the Preset Trap
Air fryer symbols are supposed to save space. They often save space by transferring the confusion directly to the user. A snowflake may mean frozen food, defrosting, or a preset category. A fan may indicate convection, active cooking, or nothing the user can change.
Decode the most common symbols
| Symbol or label | Common meaning | What can go wrong |
|---|---|---|
| Circle with a line | Power or standby | May wake the panel without starting cooking |
| Triangle or play symbol | Start or resume | May share a control with pause |
| Clock | Cooking time | Plus and minus may adjust a different setting until selected |
| Thermometer | Temperature | Unit may be Fahrenheit or Celsius |
| Plus and minus | Increase or decrease | May affect time or temperature depending on the active mode |
| French fries, fish, chicken, steak | Cooking preset | Does not measure portion size, thickness, or doneness |
| Fan | Air circulation or active cooking | May continue after heating stops |
| Snowflake | Frozen-food preset on some models | Meaning varies by manufacturer |
Why plus and minus buttons change the “wrong” number
On many models, plus and minus are shared controls. They adjust whichever setting is active. If temperature is selected, plus raises the temperature. If time is selected, the same plus button adds minutes.
The difficulty comes when the active setting is not obvious. A tiny icon may blink for only a few seconds. If the user pauses too long, the machine may return to its default state, so pressing plus changes a different value than expected.
A good instruction card should never say only “press plus twice.” It should say “press TEMP, confirm 350 flashes, press plus twice, then wait.” The confirmation step prevents a small ambiguity from slipping into the rest of the sequence.
The french-fry picture is not a doneness guarantee
A preset is a stored combination of time and temperature. It does not inspect the food, weigh the portion, measure thickness, or know whether the fries are frozen, thawed, crowded, or coated in oil.
Presets can be convenient when they are tested with a familiar portion and adjusted as needed. They become risky when a picture is treated as proof that food will be fully cooked at the end of the cycle.
- Basket crowding can slow browning and cooking.
- Thick pieces cook differently from thin pieces.
- Frozen and refrigerated foods begin at different temperatures.
- Bone-in meat behaves differently from boneless meat.
- A preset may be designed for a portion smaller than the one in the basket.
- Opening the basket repeatedly can change total cooking time.
For raw meat, poultry, seafood, and reheated leftovers, use an appropriate food thermometer rather than relying only on color, crispness, or the preset alarm.
Common Air Fryer Control Mistakes to Avoid
Most control errors begin with an understandable assumption: the machine responded when it did not, the last setting cleared when it remained, or the number on the screen meant the same thing it meant five seconds earlier. The best protection is a routine that catches the mistake before heat begins.
Do not confuse 15 minutes with 150 degrees
Fifteen is a common cooking time. One hundred fifty is a possible temperature, especially on a Celsius display or a machine with a low-temperature function. When vision is blurred or a segment of the display is faint, the two can be misread.
Say both the number and the unit aloud: “Temperature, 375 degrees. Time, 12 minutes.” The spoken unit is a small verbal guardrail. It forces the brain to interpret the number rather than merely recognize its shape.
Do not press several buttons when the display seems delayed
Touch panels may hesitate. A rapid series of taps can produce several changes at once, skip a desired setting, activate a preset, or cancel the cycle. Teach the rhythm “press, pause, read.” Two seconds can feel comically long when staring at a silent appliance, but it is cheaper than restarting dinner.
Do not assume the last-used setting has cleared
Some air fryers remember the previous time, temperature, or preset. Others return to a default. A few remember certain settings only when the basket remains closed. Because memory behavior varies, each new cycle should begin with visible confirmation of both time and temperature.
A caregiver can test this by running a short empty setup sequence without activating heat, turning the appliance off, and powering it on again. Record what returns. Do not perform experiments that conflict with the manual.
The five-second mistake checklist
Before pressing START, confirm:
- The basket is fully inserted.
- The displayed temperature has the correct unit.
- The displayed time is in minutes.
- No unwanted preset symbol is active.
- The cord, counter, and exhaust area are clear.
- The food and portion match the written cooking card.
For a broader look at countertop hazards, cords, hot surfaces, and appliance placement, review the kitchen appliance safety guide for seniors. The control panel is only one piece of the safety puzzle.
Key takeaway
The safest habit is not memorizing a perfect sequence. It is confirming the active unit, value, and mode before pressing START.
Build a Large-Print Air Fryer Control Card
A good cooking card removes decisions at the moment they are hardest to make. It should identify one food, one portion, one container or basket arrangement, and one exact button sequence. It is not a miniature cookbook. It is a route map.
Photograph the original panel before adding labels
Take one straight-on photograph and one wider photograph showing the entire air fryer. Make sure every printed word and icon is readable. Save these images in a clearly named phone album, such as “Mom Air Fryer Controls.”
The photographs preserve the original layout if a label falls off, covers an indicator, or must be repositioned. They also make it easier to ask the manufacturer or another caregiver for help without transporting the appliance.
Write the button sequence as numbered actions
Use direct verbs, one action per line, and the exact button labels visible on the appliance. Avoid instructions such as “set normally” or “cook until done.” Those phrases assume the reader already knows the missing steps.
| Weak instruction | Safer instruction |
|---|---|
| Turn it on and set the heat. | Press POWER once. Wait until the display lights. |
| Cook at 375 for 10. | Press TEMP. Confirm 375°F. Press TIME. Confirm 10 minutes. |
| Use the vegetable setting. | Do not use a preset. Follow the manual time and temperature below. |
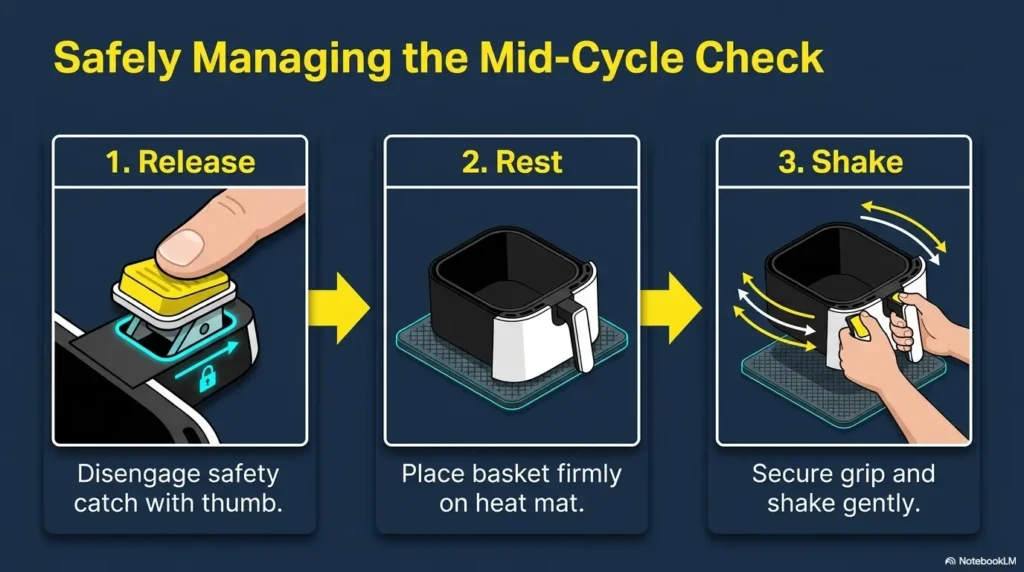
| Check halfway. | When the timer shows 5 minutes, pull out the basket and inspect the food. |
| Take it out when finished. | Place the basket on the marked heat-safe mat. Do not touch the metal basket. |
Use this one-food card template
AIR FRYER CARD
Food: Fully cooked frozen vegetable bites
- Put one measured portion in the basket.
- Push the basket fully closed.
- Press POWER once. Wait.
- Press TEMP. Set to the tested temperature.
- Say: “Temperature is ___ degrees.”
- Press TIME. Set to the tested number of minutes.
- Say: “Time is ___ minutes.”
- Press START once.
- Confirm the countdown begins.
- At the written check time, place the basket on the heat-safe mat and inspect the food.
STOP: If the screen shows an unfamiliar number, error code, or symbol, turn the appliance off and ask for help.
Print the card in a large sans-serif font, usually at least 18 to 24 points depending on the reader. Use generous spacing and strong contrast. Test readability from the senior’s actual standing position rather than holding the card six inches from their face.
Add a check-food time, not only a finish time
A card that says “cook 12 minutes” encourages the user to wait for the final alarm. A card that says “check when 5 minutes remain” creates an earlier safety and quality checkpoint.
The check time can remind the user to shake the basket, rotate food, look for smoke, or test temperature. Choose the checkpoint while practicing with a caregiver, then keep it consistent.
Store the card beside the appliance in a standing holder, wall pocket, or easy-clean sleeve. A card hidden in a drawer is less a safety tool and more an archaeological artifact.
Use the Same Three-Step Routine Every Time
Long instructions become easier when organized around three checkpoints: temperature, time, and start verification. The details can vary by model, but the mental order stays fixed.
Step 1: Set the temperature and say the unit aloud
Press the temperature selector and wait for the correct indicator. Adjust the value slowly. Then say, “Temperature is 375 degrees Fahrenheit,” or the appropriate setting for the tested food.
Saying the unit matters. “Three seventy-five” is merely a number. “Three hundred seventy-five degrees” identifies what the number is doing.
Step 2: Set the cooking time and confirm minutes
Press the time selector, wait for the clock or “MIN” indicator, and adjust the value. Say, “Time is 10 minutes.” If the screen displays a colon, confirm how that model represents time before independent use.
When a talking timer is used as backup, set it immediately after confirming the air fryer time. The backup timer does not replace the appliance controls, but it can provide a clearer alarm and a second reminder.
Step 3: Press start and verify that cooking actually begins
Press START once, then look and listen. The countdown should begin. The fan may become audible. An active-cooking symbol may illuminate. Some models start automatically after a delay, while others require a second command.
Do not walk away merely because time and temperature were entered. Confirm that the machine moved from setup mode into an active cycle.
Key takeaway
Use the spoken sequence “degrees, minutes, countdown.” It confirms the temperature unit, the time unit, and whether the cycle truly started.
A simple practice scorecard for caregivers
| Skill | Independent | Needs a prompt | Needs hands-on help |
|---|---|---|---|
| Finds POWER | Completes without hesitation | Uses label after reminder | Cannot locate reliably |
| Distinguishes time from temperature | Names number and unit correctly | Checks card when prompted | Repeatedly confuses units |
| Uses plus and minus | Adjusts active setting accurately | Needs reminder to select mode first | Changes unintended setting |
| Starts the cycle | Confirms countdown and fan | Needs reminder to verify | Walks away before start is confirmed |
| Handles the basket | Uses mitts and heat-safe mat | Needs verbal reminder | Touches hot area or loses grip |
| Responds to confusion | Stops and asks for help | Needs reminder not to guess | Continues pressing controls randomly |
Use the scorecard to identify the precise point of difficulty. Someone may understand the display perfectly but struggle with basket weight. Another person may handle hot food safely yet become confused by shared plus and minus buttons. Solutions should address the real barrier, not merely add more instructions.
Choose Safer Foods for Early Practice
The first independent practice food should be forgiving, familiar, and low in grease. It should not create a serious food-safety problem if the cooking time is slightly short, nor heavy smoke if it runs slightly long.
Begin with foods that are already fully cooked
Good early choices may include a small portion of fully cooked frozen vegetables, a familiar bread product, or a previously tested fully cooked item whose package permits air-fryer preparation. The exact food should suit the person’s dietary needs and the appliance manufacturer’s instructions.
The point is to practice controls and basket handling without simultaneously teaching raw-food safety. Once the routine is steady, more complicated foods can be introduced with supervision.
Use a small, repeatable portion
Measure the practice portion with the same cup, bowl, or count each time. “A handful” changes with the hand and the mood. “One level measuring cup” is repeatable.
Do not overfill the basket. Crowded food may cook unevenly and require more shaking, checking, and judgment. A modest portion keeps the lesson focused.
Save raw poultry and thick meat for supervised cooking
Raw poultry, burgers, thick meat, and fish introduce extra variables: cross-contamination, internal temperature, thickness, thawing, basket cleanup, and the possibility that browning may be mistaken for doneness.
A low-vision-friendly thermometer may help, but it must also be readable, easy to position, and used correctly. See the guide to choosing a low-vision-friendly meat thermometer before adding raw proteins to an independent air-fryer routine.
Practice-food decision table
| Food type | Early-practice fit | Why |
|---|---|---|
| Small portion of an approved fully cooked frozen item | Good starting option | Repeatable and lower decision burden |
| Reheating a familiar cooked food | Possible with a tested card | Requires attention to safe reheating and container suitability |
| Greasy bacon or heavily marbled food | Poor first choice | May smoke, splatter, or require grease management |
| Raw chicken | Supervised only at first | Requires reliable internal-temperature checking |
| Large mixed basket | Avoid during training | Different foods may need different times and handling |
| Loose lightweight paper liners | Use only as allowed by the manufacturer | Improper placement can interfere with airflow or contact heating areas |
When to Seek Help, Replace the Appliance, or Stop
Adaptations should make cooking easier and safer. When the workaround becomes more complicated than the meal, the appliance is no longer serving its owner. There is no prize for mastering a touchscreen that remains hostile after labels, lighting changes, and practice.
Try tactile and audio aids carefully
A tactile dot can mark POWER or START when the surface design permits it. Place markers beside the active touch area rather than on a control if covering the sensor could affect operation. Never cover indicator lights, ventilation, warnings, seams, or heat-exposed areas.
Use only a few distinct markers. One dot may mean POWER, two dots may mean START, and a short strip may identify TEMP. A panel covered in identical bumps offers texture without information.
Compare marking options in the guide to bump dots versus tactile tape. A talking timer can also provide a strong backup reminder, particularly when the air fryer’s completion beep is faint.
Replace the appliance when the controls remain unreadable
A replacement may be appropriate when the panel has low contrast, shared controls, tiny status icons, weak audio feedback, or a menu system that resets unpredictably. A dial model is not automatically better, but large mechanical dials can provide position, movement, and tactile feedback that flat touch panels lack.
When shopping, test the appliance in person when possible. Stand at a normal countertop distance and check whether the user can identify time, temperature, start, and cancel without bending close to the panel.
- Look for large, high-contrast numbers.
- Prefer separate time and temperature controls.
- Check whether the display remains visible during cooking.
- Listen for clear button and completion sounds.
- Test whether the basket is too heavy when loaded.
- Check whether controls can be operated with arthritis or tremor.
- Confirm that the manual explains symbols in plain language.
- Search the model number for safety recalls before purchase.
Seek hands-on help after repeated warning signs
Stop independent air-fryer use after repeated forgotten cycles, burns, dropped baskets, smoke incidents, confusion about whether the appliance is on, or inability to follow the same tested sequence. These events should not be dismissed as ordinary learning bumps when they recur.
A family member, occupational therapist, low-vision rehabilitation professional, or other appropriate clinician may help identify whether the main issue is vision, memory, dexterity, balance, hearing, fatigue, or appliance design.
Sudden changes deserve particular attention. A person who previously used the appliance confidently but abruptly becomes confused, unusually weak, dizzy, or unable to complete familiar steps may need prompt medical assessment rather than another label on the control panel.
Key takeaway
Repeated burns, forgotten cooking cycles, random button pressing, or unsafe basket handling are reasons to pause independent use. Safety is the goal; preserving one appliance routine is not.
FAQ
How can I tell whether an air fryer is showing time or temperature?
Look for a clock, “MIN,” or “TIME” indicator for minutes. Look for a thermometer, “TEMP,” degree symbol, “°F,” or “°C” for temperature. One- or two-digit numbers are often minutes, while three-digit Fahrenheit numbers are usually temperatures. Confirm the symbol because number length alone is not foolproof.
Why does the air fryer display switch between two numbers?
Many models use one screen to alternate between selected temperature and remaining time. A small clock or thermometer indicator may change with the number. If the display shows an unfamiliar letter-number code, stop and consult the model’s manual.
Can I put large-print labels on an air fryer control panel?
Removable labels may be placed beside essential controls if they do not cover touch sensors, indicator lights, safety warnings, vents, seams, or heat-exposed areas. Use short, high-contrast labels and check them regularly for lifting or heat damage.
What do the plus and minus buttons change?
They usually adjust whichever setting is active. Select TEMP before changing degrees and TIME before changing minutes. Watch for a flashing number or highlighted symbol, then press once and pause to confirm the result.
Should seniors use air fryer presets?
Presets can be useful after they have been tested with a specific food and portion. They should not be treated as automatic proof that food is safely cooked. Portion size, thickness, starting temperature, and basket crowding can change the result.
How can I reduce glare on a digital air fryer screen?
Move the appliance away from direct window reflections, rotate it slightly, and use a task light from above or the side rather than aiming light directly at the panel. Matte labels are usually easier to read than glossy ones.
Is a dial air fryer easier for seniors than a touchscreen model?
It can be. Large mechanical dials offer tactile boundaries and a visible position, but small markings may still be difficult to read. The best choice depends on contrast, label size, grip strength, timer accuracy, basket weight, and the individual user’s abilities.
What should I do when the display is too dim to read?
First reduce glare, change the viewing angle, and check whether the panel has a brightness or standby behavior described in the manual. Use a photograph or magnifier while the appliance is cool. Replace the appliance if the active settings cannot be confirmed reliably.
Are tactile dots safe to use on air fryer buttons?
They may help when placed carefully beside selected controls. Do not cover a touch sensor, status light, warning, seam, vent, or hot surface. Use only a few distinct markers and confirm that adhesive remains secure during normal operation.
Create One Safe Cooking Card Today
The control panel becomes less intimidating when it stops being a collection of mysterious symbols and becomes one familiar route. You do not need to decode every preset this afternoon. You need one dependable food, one tested portion, and one sequence that can be repeated without guessing.
The 15-minute action plan
- Minutes 1–3: Unplug the air fryer, clear the surrounding counter, and take a straight-on photograph of the controls.
- Minutes 4–6: Identify POWER, TEMP, TIME, START, and CANCEL. Ignore nonessential presets.
- Minutes 7–9: Place temporary high-contrast labels beside the essential controls without covering active areas.
- Minutes 10–12: Choose one familiar, fully cooked practice food and write its tested portion, temperature, time, and check point.
- Minutes 13–15: Rehearse the sequence with the appliance unplugged: degrees, minutes, countdown.
Then complete one supervised cooking test. Watch for the point where confidence breaks: identifying the correct mode, waiting for the display, adjusting shared controls, hearing the alarm, or handling the basket. Improve that single point before adding another food.
A safe routine should feel almost boring. The same card stands in the same place. The mitts wait on the same hook. The basket lands on the same heat-safe mat. The words are spoken in the same order. Repetition turns a glittering panel of symbols into a path the hands and mind already know.
Your one practical promise
Before the next meal, create and test one large-print card for one familiar food. Do not expand the menu until the user can set degrees, set minutes, confirm the countdown, and handle the basket safely.
Last reviewed: 2026-06