
The Quiet Danger in the Kitchen
The most dangerous kitchen mistake is often not dramatic. It is quiet. A black knob on a black stove. A microwave button that says “Cancel” in gray letters the size of sesame seeds. A kettle cord curling near a walker like a sleepy little tripwire.
How to make kitchen appliances safer for seniors with aging eyes starts with one truth: older eyes do not only need bigger words. They need better contrast, calmer lighting, fewer confusing choices, safer reach, and routines that make the right action obvious before heat, steam, or panic enters the room.
Delay the fixes, and small frustrations can become burns, forgotten burners, spoiled food, falls, or a parent quietly giving up cooking. Do the right fixes, and the kitchen becomes less of a test and more of a familiar instrument again.
Good News
You do not have to remodel the kitchen.
You do have to make the important things impossible to miss.
- 🔍 Find the risky buttons and knobs first.
- 🎨 Add contrast only where it matters.
- 🔌 Move heat, cords, and daily tools into safer patterns.
- 🛠️ Know when DIY is not enough.
The Kitchen Safety Rule: Make “Off” Easier Than “On”
A safer senior kitchen does not depend on perfect memory. It uses visible cues, tactile markers, light placement, appliance position, and short routines so the safest choice is the easiest choice.
If a senior cannot identify Off, Stop, Cancel, and Power on daily-use appliances in three seconds from normal cooking distance, that is your first upgrade.
Table of Contents
Start With the Real Problem: Aging Eyes Don’t Just Need “Bigger Buttons”
It is tempting to solve senior kitchen safety with one cheerful order: “Buy appliances with large buttons.” That helps, sometimes. But it misses the cranky orchestra of aging vision.
Many older adults have reduced contrast sensitivity. Some have cataracts, glaucoma, macular degeneration, diabetic eye disease, glare sensitivity, blind spots, double vision, or simply tired eyes by dinner. The result is not always “I cannot see.” Often it is “I can see, but I cannot quickly tell what matters.”
Contrast loss turns familiar appliances into tiny puzzles
Low-contrast controls are sneaky. A glossy black microwave with charcoal-gray labels may look elegant in the store. At home, under a weak ceiling bulb, it becomes a crossword puzzle with steam.
Look for these troublemakers:
- Black buttons on black panels
- Gray text on stainless steel
- Flat touchscreens with no tactile edge
- Small icons instead of words
- Similar-looking buttons grouped tightly together
- Displays that dim automatically
For someone with central vision loss, even a clear button can disappear if it sits in the wrong part of the visual field. For someone with glaucoma-related field loss, the button may be visible only when they scan deliberately. That is why appliance safety pairs naturally with broader home safety planning for glaucoma field loss, not just kitchen decorating.
Glare is not brightness
More light can help. More glare can betray you.
Glare scatters light across shiny surfaces, turning useful information into a silver fog. Stainless steel appliances, glossy counters, polished tile, exposed bulbs, and reflective backsplashes can make labels harder to read even when the room is technically bright.
That is why a senior might say, “The kitchen is too dark,” while the caregiver thinks, “But the light is on.” Both may be right. The light exists. The useful visibility does not.
The hidden danger: seniors may stop trusting the kitchen
Kitchen safety is not only about preventing fire or falls. It is about preserving independence.
When appliances become unpredictable, seniors may start avoiding cooking, skipping tea, eating less varied food, reheating meals poorly, or relying on snacks. The kitchen quietly shrinks from a room of agency into a room of doubt.
- Contrast matters as much as size.
- Glare can erase labels even in a bright room.
- Confidence is a safety feature, not a luxury.
Apply in 60 seconds: Stand at the stove and check whether “Off” is visible without leaning in.
Who This Is For, And Who Needs More Than DIY Fixes
This guide is for families trying to make practical changes before the kitchen becomes a daily hazard zone. It is also for seniors who want to keep cooking without feeling that every knob is being judged by a committee.
But some situations need more than labels and better lighting. A red sticker cannot carry the full emotional weight of a forgotten burner.
Good fit: mild vision changes, steady routines, and independent cooking
DIY upgrades may work well when the senior:
- Uses appliances independently most days
- Understands appliance instructions
- Can follow a simple routine
- Has mild to moderate difficulty reading labels
- Has no repeated burns, fires, falls, or major near-misses
- Can explain what feels confusing or annoying
In these homes, the goal is not to take over. It is to remove friction. Think of it as tuning a piano that is still beautifully played.
Not enough: repeated burns, falls, forgotten burners, or confusion
DIY fixes are not enough when there are repeated safety events. That includes leaving burners on, forgetting food in the microwave, dropping hot liquids, confusing cleaner bottles with food items, falling near appliances, or becoming disoriented during routine tasks.
Vision changes can overlap with medication side effects, dizziness, memory changes, fatigue, hearing loss, neuropathy, and mobility issues. If the pattern is getting worse, treat it as information, not family drama.
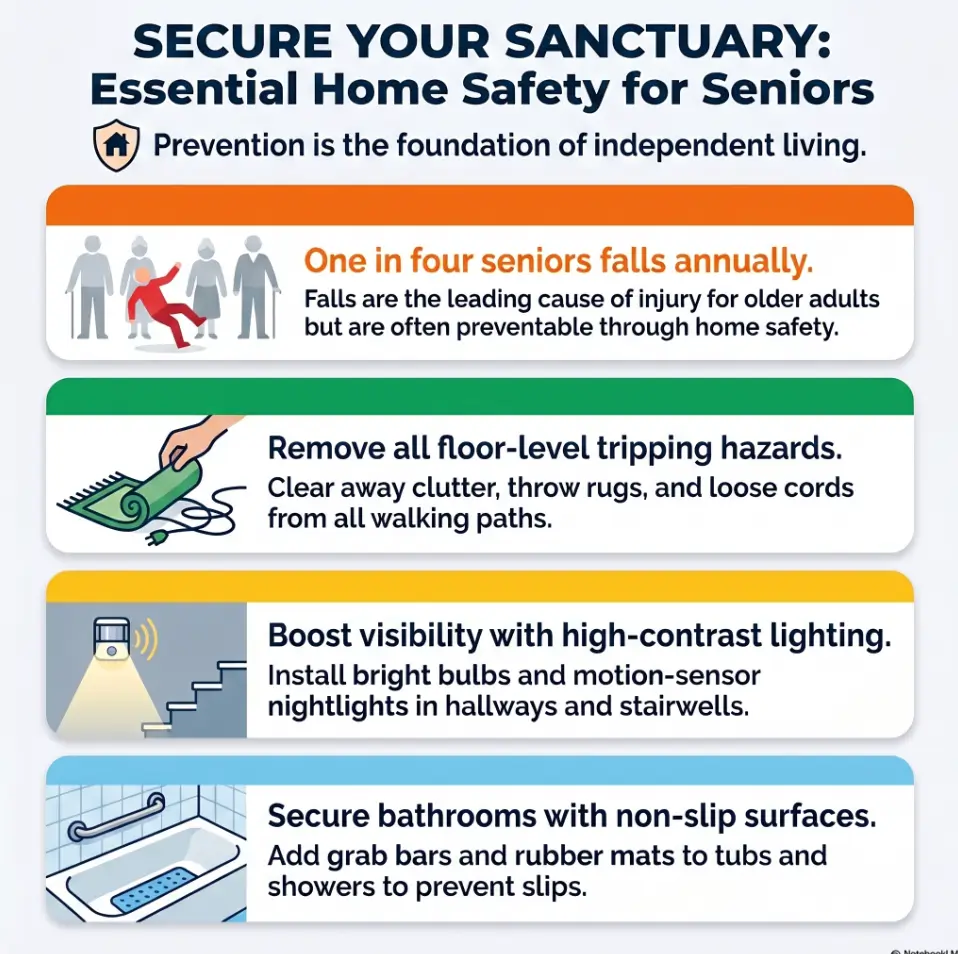
The CDC discusses fall prevention as a serious aging-safety issue, and the National Institute on Aging encourages older adults and families to take home hazards seriously. In the kitchen, falls often meet heat, glass, water, cords, and urgency. Not a friendly club.
Caregiver note: preserve dignity while reducing risk
Words matter. “You can’t use this safely anymore” may be accurate in a crisis, but it often lands like a locked door.
Try language that invites collaboration:
- “Let’s make the buttons easier to see.”
- “This stove is badly designed. Let’s make it less annoying.”
- “Can we test a few labels and keep only what helps?”
- “I want the kitchen to feel easier, not smaller.”
That last sentence matters. Many seniors do not fear tape on the microwave. They fear losing a room that holds decades of rituals: soup, birthday cake, coffee, holiday potatoes, the quiet saucepan of grief after a funeral.
The 10-Minute Appliance Audit: Find the Risk Before It Finds Grandma’s Sleeve
Before buying anything, audit the kitchen. It takes about 10 minutes and prevents the classic mistake of ordering a gadget before identifying the actual problem.
Bring reading glasses, the senior’s usual kitchen glasses, a flashlight, painter’s tape, and a phone camera. Then inspect the kitchen during the conditions that create mistakes: early morning, cloudy afternoon, and evening.
Check the stove, microwave, kettle, toaster, fridge, dishwasher, and coffee maker
Use this risk scan:
| Appliance | What to check | First safety upgrade |
|---|---|---|
| Stove | Knob position, burner match, “Off” visibility, heat cues | High-contrast knob markers |
| Microwave | Start, Stop, Cancel, display, door resistance | Tactile dot on Start and Cancel |
| Kettle | Fill line, cord path, auto shutoff, pouring angle | Clear landing zone and cord control |
| Toaster | Heat, crumb tray, dial visibility, location near paper | Contrast mark on normal setting |
| Fridge | Expiration dates, shelf contrast, food zones | Large date labels and zones |
Look from the senior’s eye level
Do not inspect controls from your height, your glasses, and your confident little hawk eyes. Test from where the senior actually stands, sits, bends, and reaches.
Check controls:
- From normal cooking distance
- While wearing the senior’s usual glasses
- With the under-cabinet light on and off
- While seated, if the senior uses a stool or wheelchair
- At night, when contrast and fatigue often worsen
Take photos of confusing controls. Photos make patterns obvious. They also reduce family debates, which can otherwise multiply like sourdough starter.
Pattern interrupt: turn the lights off first
Yes, start by turning lights off. Not forever, please. This is not a haunted-house assessment.
Turn off the main light and ask: what happens during a midnight snack, early breakfast, power-saving habit, or cloudy morning? Can the senior find the kettle, the microwave handle, the stove “Off” position, and the path back to the table?
Money Block: DIY Safety Upgrade Checklist
Use DIY upgrades when most answers are “yes.”
- Yes / No: The senior can explain what each appliance is for.
- Yes / No: Mistakes are rare and usually related to visibility.
- Yes / No: The senior agrees to test labels or lighting changes.
- Yes / No: Appliances are working normally.
- Yes / No: There are no recent fires, burns, gas smells, or electrical faults.
Next step: If any serious safety item is “no,” pause DIY changes and seek professional help.
High-Contrast Labels: The Tiny Upgrade That Prevents Big Mistakes
Labels are the cheapest kitchen safety upgrade, but they are easy to overdo. The goal is not to decorate the microwave until it looks like a suitcase after a world tour.
The goal is to make the most important actions unmistakable.
Mark “Start,” “Stop,” “Off,” and “Cancel” first
Start with controls that prevent escalation. If a pot boils over, a towel smokes, or a microwave runs too long, the senior needs to stop the machine quickly.
Prioritize:
- Stove “Off” position
- Microwave “Cancel” or “Stop”
- Microwave “Start” or “Add 30 Seconds”
- Coffee maker power button
- Kettle switch
- Air fryer power and temperature controls
For tactile marking, bump dots and tactile tape can work beautifully when used with restraint. Raised markers help when eyes are tired, lighting is poor, or the senior prefers touch confirmation.
Use tactile dots where eyesight fails
Use raised bump dots for buttons pressed often. Use textured tape for edges, hot zones, and control boundaries. Choose appliance-safe materials that do not melt, block ventilation, interfere with door closure, or cover warning labels.
Good tactile placements include:
- One dot on microwave Start
- Two dots on microwave Cancel
- A raised line showing stove knob “Off” alignment
- Textured tape on a kettle base edge
- A contrast strip around the air fryer hot drawer area
If the microwave is the main daily appliance, pair labels with tactile dots for microwave buttons so the system becomes simple by touch and sight.
Don’t label everything
Too many labels create visual static. The appliance starts shouting in six colors, and the senior has to read the stickers before reading the buttons. That is not safety. That is a tiny office-supply parade.
Use the “four-button rule” first: Start, Stop, Off, Cancel. Add only what is truly used every week.
- Mark Off, Stop, Cancel, and Start first.
- Use touch cues for repeated actions.
- Avoid turning the appliance into a sticker storm.
Apply in 60 seconds: Put one temporary tape mark on the most-used appliance’s Cancel or Off control.
Stove Safety: The Appliance Where One Wrong Turn Matters Most
The stove deserves special attention because it combines heat, timing, cookware weight, small controls, and distractions. It is the kitchen’s grand piano, but with fire.
Make “Off” impossible to miss
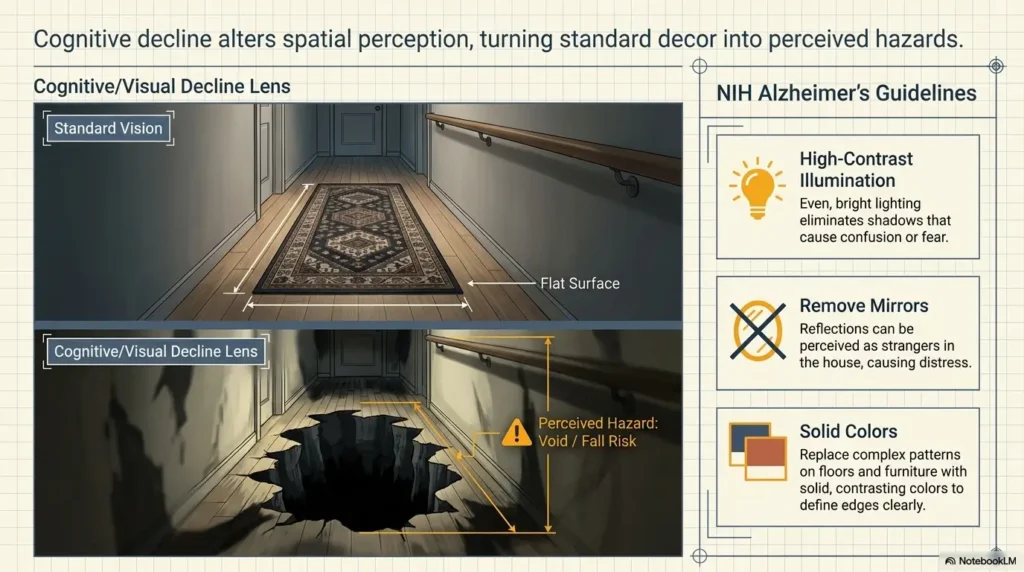
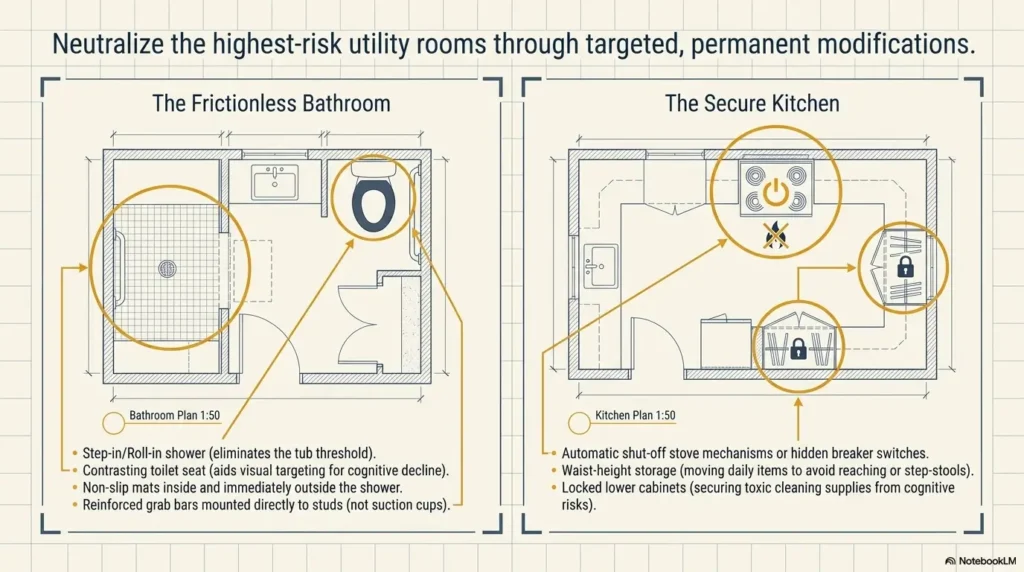
Every stove should have a clear shutdown cue. For knob stoves, mark the “Off” position with high-contrast tape or a raised indicator. If the knob itself has a tiny pointer, make that pointer bigger with a safe, visible mark.
For some households, stove knob covers for seniors may help prevent accidental turning, especially if sleeves, hips, walkers, or grandchildren bump the front controls. But covers can frustrate independent cooks if they make routine cooking harder. Safety that creates resentment often has a short shelf life.
Replace mystery flames with visible cues
Gas flames can be hard to see in bright daylight or through cataract-related glare. Electric burners may stay hot after they stop glowing. Induction cooktops reduce some burn risks because the cookware heats directly, but many induction models use flat touch controls that can be hard to read.
Compare options carefully:
| Stove type | Possible safety benefit | Vision-related caution |
|---|---|---|
| Gas | Immediate heat control and familiar knobs | Flame visibility, gas smell, knob confusion |
| Electric coil | Raised burner location may be easier to feel visually | Hot after shutoff; old controls may be worn |
| Smooth electric | Flat surface is easier to wipe | Hot zones can be visually subtle |
| Induction | Pan detection and cooler surrounding surface | Touch controls may be low contrast or menu-heavy |
Mistake to avoid: trusting memory over visible shutdown checks
Memory is useful. Visible confirmation is safer.
Create a three-step end-of-cooking script:
- Knobs off: Say “all off” while looking at every control.
- Burner clear: Move towels, paper, and utensils away from heat.
- Timer cleared: Stop beeping timers so they do not create confusion later.
This sounds too simple until it prevents the one mistake everyone thought “would never happen here.”
Microwave Safety: Fewer Buttons, Fewer Surprises
The microwave is supposed to be the easy appliance. Then manufacturers hand us a control panel with popcorn, potato, beverage, sensor cook, defrost by weight, clock, timer, power level, and a mysterious button that seems to belong to a spacecraft.
For aging eyes, microwave safety is about reducing choices.
Create a one-touch heating map
Make a large-print card near the microwave with only the common tasks:
- Tea water: mug, 1 minute
- Leftovers: covered plate, 90 seconds, stir, 30 seconds more if needed
- Oatmeal: deep bowl, 2 minutes, watch for overflow
- Frozen meal: follow package, use timer card if print is too small
If reading food packaging is hard, connect the microwave routine with a broader low-vision system for reading expiration dates and food labels. Food safety and appliance safety share the same small-print problem.
Choose controls that don’t whisper
When replacing a microwave, look for:
- Large high-contrast display
- Physical buttons instead of only flat touch controls
- Clearly labeled Start and Cancel
- Audible beeps that can be heard from nearby rooms
- Interior light that actually lets the user see the dish
- Door handle that is easy to locate and pull
If the beep is too quiet, that is not a minor annoyance. A missed beep can mean forgotten food, overheated containers, or a second heating cycle that was not needed. A setup for a microwave beep that is too quiet can help when hearing and vision both need backup cues.
Here’s what no one tells you: the door matters too
The door is a control. If it sticks, blends into the appliance face, swings into a walking path, or sits too high, it creates risk.
Check whether the senior can open the microwave while holding a mug or plate. Check whether the door handle is visible. Check whether the microwave is above shoulder height, which turns hot soup into a balancing act nobody auditioned for.
Money Block: Replace the Microwave or Adapt It?
Adapt it when the appliance works well, the door is easy to use, and the main problem is label visibility.
Replace it when the display is dim, buttons are unreadable, the door is too high or stiff, the beep cannot be heard, or the controls require too many steps.
Neutral action line: Test Start, Cancel, door opening, and display readability before shopping.
Small Appliances, Big Trouble: Kettles, Toasters, Air Fryers, and Coffee Makers
Small appliances feel harmless because they are small. Then a kettle pours boiling water, an air fryer drawer comes out hot, and a toaster sits next to napkins like a tiny dragon with breakfast ambitions.
Hot water is the quiet villain
Kettle safety deserves more respect. Hot water burns are fast, painful, and often preventable.
Improve kettle safety by checking:
- Auto shutoff function
- Easy-to-see water fill line
- Stable base
- Short, controlled cord path
- Clear space for pouring
- Lightweight design when filled
A senior with reduced contrast may overfill a kettle because the water line is invisible. A kettle with a dark handle, clear body, and faint fill mark can look modern while behaving like a riddle. For a deeper kitchen-specific setup, review low vision kettle safety and compare the advice to your current counter layout.
Air fryers need visual landing zones
Air fryers are convenient, but the hot drawer creates a moment of risk. The user pulls out a hot basket, looks for a place to set it, and suddenly the counter becomes a negotiation.
Create a visible landing zone:
- Use a heat-safe mat in a contrasting color.
- Keep the mat beside the appliance, not across the kitchen.
- Add a contrast strip around the drawer handle if needed.
- Keep paper towels, mail, and plastic bags away from the hot zone.
Don’t do this: stacking appliances to save counter space
Stacking a toaster on a microwave or an air fryer on a rolling cart may look efficient. For aging eyes and slower reaction time, it can create tipping, reaching, cord pulling, and burn risk.
Daily-use appliances should be stable, visible, and boringly placed. Boring is underrated. Boring does not spill boiling water on slippers.
Short Story: The Kettle That Needed a Parking Spot
Marian’s daughter thought the problem was the kettle switch. It was small, black, and hidden under the handle. So she added a bright tactile dot, and Marian liked it. But the near-misses continued. One afternoon, while making tea, Marian lifted the kettle, turned toward the sink, hesitated, and set it down half on a folded dish towel.
The real problem was not the switch. It was the missing landing zone. The counter was crowded with vitamins, a bread bag, mail, and a ceramic rooster that had survived three moves and one family argument. They cleared a square beside the kettle, added a dark heat-safe mat, moved mugs nearby, and taped the cord along the back. The switch marker helped. The parking spot solved it. The lesson: appliance safety is often not one object. It is the path around the object.
Lighting That Helps Aging Eyes Read, Pour, and Stop in Time
Kitchen lighting should help with decisions. Not mood. Not showroom sparkle. Decisions.
Can I read the knob? Is the burner on? Is the cup full? Is that chicken cooked? Is the knife edge facing away? That is the lighting job description.
Put task lighting where decisions happen
Place task lighting near:
- Stove knobs and burner area
- Microwave controls
- Coffee and kettle station
- Cutting board
- Sink
- Medication-adjacent kitchen areas
- Fridge shelves and freezer zones
If under-cabinet lighting creates bright reflections on glossy counters, the cure may be repositioning, diffusing, or choosing a different fixture. A detailed glare-free under-cabinet lighting setup can help make the work surface clearer without turning the kitchen into an interrogation room.
Reduce shadows under cabinets
Shadows are not just aesthetic. A hand shadow can hide a measuring line. A cabinet shadow can make a black control panel disappear. A pot can block light right when the user needs to see steam, liquid level, or burner position.
For older adults with central vision loss, reading stations often need thoughtful lamp position. The same principle applies to kitchens: put light where the task happens, not merely where the ceiling electrician found a convenient spot in 1987.
Avoid the shiny-kitchen trap
Glossy surfaces look clean until they become glare machines. Stainless steel, polished stone, white tile, glass backsplashes, and exposed bulbs can all reduce usable vision.
If glare is a major complaint, compare kitchen surfaces with known glare trouble spots such as white tile floor glare and under-cabinet lighting glare on glossy surfaces. The pattern is often the same: too much reflected light, not too little illumination.
Show me the nerdy details
Older eyes often need more illumination than younger eyes, but usable visibility depends on contrast, glare control, viewing angle, font size, and task distance. A bright exposed bulb can reduce performance if it creates veiling glare across a control panel. Diffused task lighting placed in front of the work zone, aimed away from the eyes, usually supports better control recognition than a single overhead fixture behind the user. For appliance labels, test contrast at normal standing distance, not inches away during installation.
The Safer Appliance Visibility Framework
1
LightPut task lighting where decisions happen: knobs, panels, handles, and pouring zones.
2
ContrastMake Off, Stop, Start, and hot zones stand out from the appliance surface.
3
TouchAdd tactile dots or tape only to controls used often or needed in a hurry.
4
RoutineUse short shutdown scripts so safety does not depend on memory alone.
Appliance Placement: The Safer Kitchen Is Usually Lower, Closer, and Boring
Appliance placement is not glamorous. It is also one of the fastest ways to reduce risk.
If a senior must reach high, bend low, carry hot food across the room, or move around a dangling cord, the appliance is not just an appliance. It is a choreography problem.
Keep daily appliances between waist and shoulder height
Daily-use appliances should be easy to reach without stretching, crouching, twisting, or stepping onto anything. A step stool in a low-vision kitchen is often a bad idea wearing rubber feet.
Keep these items in the safe reach zone:
- Microwave-safe plates and bowls
- Mugs near kettle or coffee maker
- Oven mitts near stove and air fryer
- Trivets near hot appliances
- Large-print instruction cards
- Frequently used utensils
Build a “no-crossing” hot-food path
Hot food should travel the shortest possible distance. The path from microwave to table, kettle to mug, stove to trivet, and air fryer to plate should be clear and predictable.
Try this test: hold an empty mug where the kettle normally sits and walk the usual path. Are there rugs, chair legs, pets, cords, cabinet handles, or dim areas? The floor does not care that you were “just making tea.”
If vision and walking are both concerns, connect kitchen changes with broader aging vision fall prevention at home. A safe appliance setup loses power if the route to it is a little obstacle museum.
Let’s be honest: pretty storage can be unsafe storage
Deep cabinets, decorative baskets, hidden appliance garages, and stacked storage look calm in photos. In real life, they can create searching, reaching, lifting, and guessing.
The safest storage is often visible, labeled, and slightly dull. A clear bin labeled “Microwave Bowls” beats a charming basket that requires archaeological courage before breakfast.
Money Block: Five-Tier Kitchen Safety Upgrade Map
- Tier 1: Labels. Add high-contrast and tactile cues to essential controls.
- Tier 2: Lighting. Improve task lighting and reduce glare at decision points.
- Tier 3: Placement. Move daily appliances to safer reach zones.
- Tier 4: Device aids. Add timers, shutoff tools, knob covers, or audible cues when appropriate.
- Tier 5: Professional assessment. Bring in an occupational therapist, electrician, appliance technician, or eye-care professional.
Neutral action line: Start at Tier 1 unless there has been a serious near-miss.
Sound, Voice, and Smart Features: Helpful Assistant or Tiny Chaos Machine?
Smart features can help. They can also add tiny menus, app updates, Wi-Fi drama, and notifications that sound like a robot clearing its throat in another room.
Use technology only when it makes the safe action easier.
Use alerts that confirm, not confuse
Timers, beeps, voice assistants, and spoken reminders can support low vision when they are consistent. They are especially useful when the senior has trouble reading small displays or hearing soft appliance signals.
Helpful examples:
- A loud kitchen timer with large buttons
- A voice assistant reminder: “Check stove in 10 minutes”
- A labeled smart speaker routine for tea or medication-adjacent kitchen tasks
- A talking thermometer for food safety
If multiple devices beep differently, simplify. A kitchen with five competing alerts can feel less like support and more like a casino designed by a smoke detector.
Avoid app-only controls for essential appliances
App-only control can be risky for seniors with low vision. Phone screens are small. Updates change layouts. Wi-Fi fails. Passwords expire. Tiny icons migrate like birds.
For essential appliances, physical controls should remain usable. If the senior cannot operate the appliance without a phone, think carefully before making that appliance central to daily life.
For phone-based help that genuinely supports low vision, tools such as iPhone Magnifier shortcuts or Android Select to Speak for menus can help read labels, but they should not be the only way to stop heat.
Set one backup rule for every smart feature
Every smart feature needs a plain-language backup rule:
- “If the app fails, use the wall switch.”
- “If the timer is unclear, press Cancel.”
- “If the voice reminder does not happen, use the countertop timer.”
- “If the smart plug behaves oddly, unplug the appliance and ask for help.”
Smart tools should be servants, not tiny landlords.
Common Mistakes That Make Appliances Less Safe for Seniors
Most unsafe kitchen upgrades are well-intended. That is the frustrating part. The family wants to help, buys something shiny, and accidentally creates a new problem with better packaging.
Mistake 1: buying sleek black-glass appliances with low-contrast controls
Showrooms lie politely. Bright retail lighting, perfect display height, and unused control panels make sleek appliances look easier than they are.
Before buying, ask:
- Can the senior read the controls from normal distance?
- Are Start, Stop, Cancel, and Off obvious?
- Do the controls work by touch, sight, or both?
- Does the display remain readable in daylight?
- Will the appliance still be usable when the senior is tired?
Mistake 2: adding labels without testing them in real use
A label that looks clear during installation may fail during cooking. Steam, angle, glare, distance, hand position, and fatigue all matter.
Use painter’s tape for a one-week test before applying permanent markers. Ask the senior which labels help and which feel noisy. Keep the winners.
Mistake 3: ignoring cords, rugs, and appliance reach
Appliance safety and fall prevention are married. Not dating. Married.
A safe kettle with a dangerous cord is not safe. A clear microwave button above shoulder height is still risky. A brilliant stove label next to a loose rug is a half-finished sentence.
Review cord routes, anti-slip mats, footwear, walking paths, and countertop clutter together.
Mistake 4: replacing every appliance at once
Too much change creates new mistakes. A kitchen full of unfamiliar controls can undo the benefit of newer appliances.
Replace one zone, test for a week, then move to the next. The best safety work feels boringly successful.
- Test controls in the real kitchen before buying.
- Change one zone at a time.
- Include cords, reach, and glare in every appliance decision.
Apply in 60 seconds: Identify one appliance that looks stylish but is hard to read.
A Caregiver-Friendly Setup Plan: Safer Without Making the Kitchen Feel “Taken Over”
A kitchen is emotional territory. It holds habits, pride, memory, and sometimes the last arena where a parent feels fully competent. Enter gently.
Ask what feels hardest, not what looks unsafe
Start with lived experience:
- “Which appliance annoys you most?”
- “Which button is hardest to see?”
- “When do you feel rushed in the kitchen?”
- “Is there anything you avoid cooking now?”
- “Which change would make mornings easier?”
The answer may surprise you. You may think the stove is the problem. Your parent may say the coffee maker reservoir is impossible to see before breakfast.
Use shared language: “visibility upgrade,” not “senior-proofing”
“Senior-proofing” can sound like bubble wrap for personhood. Try “visibility upgrade,” “kitchen reset,” “safer layout,” or “make this appliance less annoying.”
Language should protect dignity while still naming real risks. Avoid pretending nothing is wrong. Also avoid turning the kitchen into a courtroom.
Photograph the final setup
After labels, lighting, and placement changes, photograph the setup. Keep the photo on the fridge, in a caregiver note, or in a shared family folder.
This helps after cleaning, visiting relatives, home aides, or well-meaning guests move things. A good kitchen system should survive Tuesday.
Money Block: What to Gather Before Hiring Help
Before calling an occupational therapist, electrician, appliance technician, or home-safety specialist, gather:
- Photos of appliance controls from normal standing distance
- A list of recent near-misses, burns, falls, or confusion
- Medication timing if dizziness or fatigue affects cooking
- Appliance model numbers when available
- Notes on lighting problems, glare, and nighttime use
- The senior’s own words about what feels difficult
Neutral action line: Bring one real task to assess, such as making tea or reheating dinner.
When to Seek Help: Signs the Kitchen Needs Professional Eyes
Some signs should not be explained away as clumsiness or age. They are signals.
The kitchen is a practical room, but it is also a diagnostic stage. Vision, balance, cognition, hearing, medication effects, and appliance design all perform there together.
Call a doctor or eye-care professional when vision changes accelerate
Seek eye-care guidance when there are sudden vision changes, new blind spots, worsening glare, double vision, eye pain, sudden floaters, new trouble reading familiar controls, or a rapid drop in confidence.
For broader warning signs, a senior vision changes warning signs checklist can help families decide what deserves prompt attention.
Consider an occupational therapist for repeated near-misses
Occupational therapists can observe real daily tasks and adapt the environment around the person. That matters. A catalog cannot know how your father stands when he pours coffee or how your mother turns toward the sink while carrying soup.
Ask about kitchen task assessment, low-vision adaptations, fall-risk reduction, appliance routines, and caregiver training. A prepared list of questions for a low-vision occupational therapist can make the visit more useful.
Contact a licensed electrician or technician for appliance faults
Stop using an appliance and get help if you notice:
- Smoke
- Sparks
- Burning smell
- Overheating cords
- Repeated tripping breakers
- Gas smell
- Unreliable shutoff
- Damaged plugs or outlets
Do not make electrical troubleshooting a family experiment. The kitchen already has enough chemistry.
FAQ
What kitchen appliance is most dangerous for seniors with poor vision?
The stove usually deserves the most attention because it combines heat, small controls, cookware movement, timing, and fire risk. Start by making the “Off” position obvious on every knob or control. Then check burner visibility, lighting, and whether hot cookware has a clear landing zone.
Are induction cooktops safer for seniors with aging eyes?
Induction cooktops can be safer in some homes because they heat compatible cookware directly and often include pan detection or automatic shutoff features. The caution is control design. Many induction models use flat touch panels with low-contrast icons. Test readability, touch accuracy, and shutdown steps before buying.
What color labels work best on kitchen appliances?
High-contrast combinations work best: black on white, white on dark, yellow on black, or bright tape on a dark appliance surface. The best color depends on the appliance finish and the senior’s vision. Test labels from normal cooking distance and under evening lighting before making them permanent.
Should seniors use smart plugs for appliances?
Smart plugs may help with low-risk appliances, such as lamps or certain small devices, if they follow manufacturer instructions and do not confuse the user. They should not replace safe physical controls for heat-producing appliances. Avoid any setup where app failure makes it harder to turn something off.
How can I make a microwave easier for an older parent to use?
Mark Start, Stop, Cancel, and one or two favorite settings. Add a large-print instruction card nearby. Choose simple heating routines and avoid using rarely needed presets. Make sure the door handle is visible, the beep is audible, and the microwave is not mounted too high.
What should I replace first in an unsafe senior kitchen?
Replace or adapt the appliance linked to the highest risk first. For many homes, that means the stove, kettle, microwave, or any appliance with faulty wiring, poor shutoff, unreadable controls, or dangerous placement. If there has been smoke, sparks, gas smell, or repeated near-misses, get professional help.
Are appliance knob covers good for seniors?
They can help when accidental knob turning is a problem, especially with front-control stoves. But they may frustrate seniors who cook independently or have hand arthritis. Test one cover before installing a full set, and make sure the senior can still turn the stove off quickly.
How do I make the kitchen safer without insulting my parent?
Frame changes as visibility, comfort, and convenience upgrades. Ask what feels hardest before changing anything. Let your parent test labels, lighting, and placement. Keep what helps and remove what feels annoying. Dignity is not decoration; it is part of whether the safety plan will last.
Next Step: Do the “Off Button Test” Today
Remember the quiet danger from the beginning: the black knob, the gray label, the kettle cord, the button that disappears right when stress enters the room.
The solution is not to make the kitchen look medical. It is to make the kitchen readable, reachable, calmer, and more forgiving. High-contrast labels, task lighting, safer placement, tactile cues, and short shutdown routines can protect independence while reducing risk.
Here is the 15-minute next step: stand where the senior normally cooks and identify the Off, Cancel, Stop, and Power controls on every daily-use appliance in under three seconds.
If you hesitate, mark one control today. Not ten. One.
A single clear button can become the small hinge that lets the whole door of safety swing open.
- Start with Off, Stop, Cancel, and Power.
- Test the kitchen at real use times.
- Escalate when near-misses repeat or appliance faults appear.
Apply in 60 seconds: Choose one appliance and make its shutdown control impossible to miss.
Last reviewed: 2026-05.
Tags: senior kitchen safety, low vision appliances, aging in place, caregiver tips, home safety
Meta description: Make kitchen appliances safer for seniors with aging eyes using contrast, lighting, labels, safer reach, and simple routines.