
Precision in the Shadows:
The Art of Low-Vision Labeling
The smallest sticker in a home can carry a surprisingly heavy job: helping someone press the right button, find the right shelf, or avoid the wrong bottle before the day has fully opened its eyes.
Choosing between bump dots and tactile tape isn’t about quality—it’s about utility. Does the hand need an exact landing point or a readable boundary? In kitchens and medication areas, a tired reach shouldn’t turn into a risky guess.
Use Bump Dots For:
Buttons, dials, remotes, and appliance controls.
Use Tactile Tape For:
Shelves, cords, drawers, and storage zones.
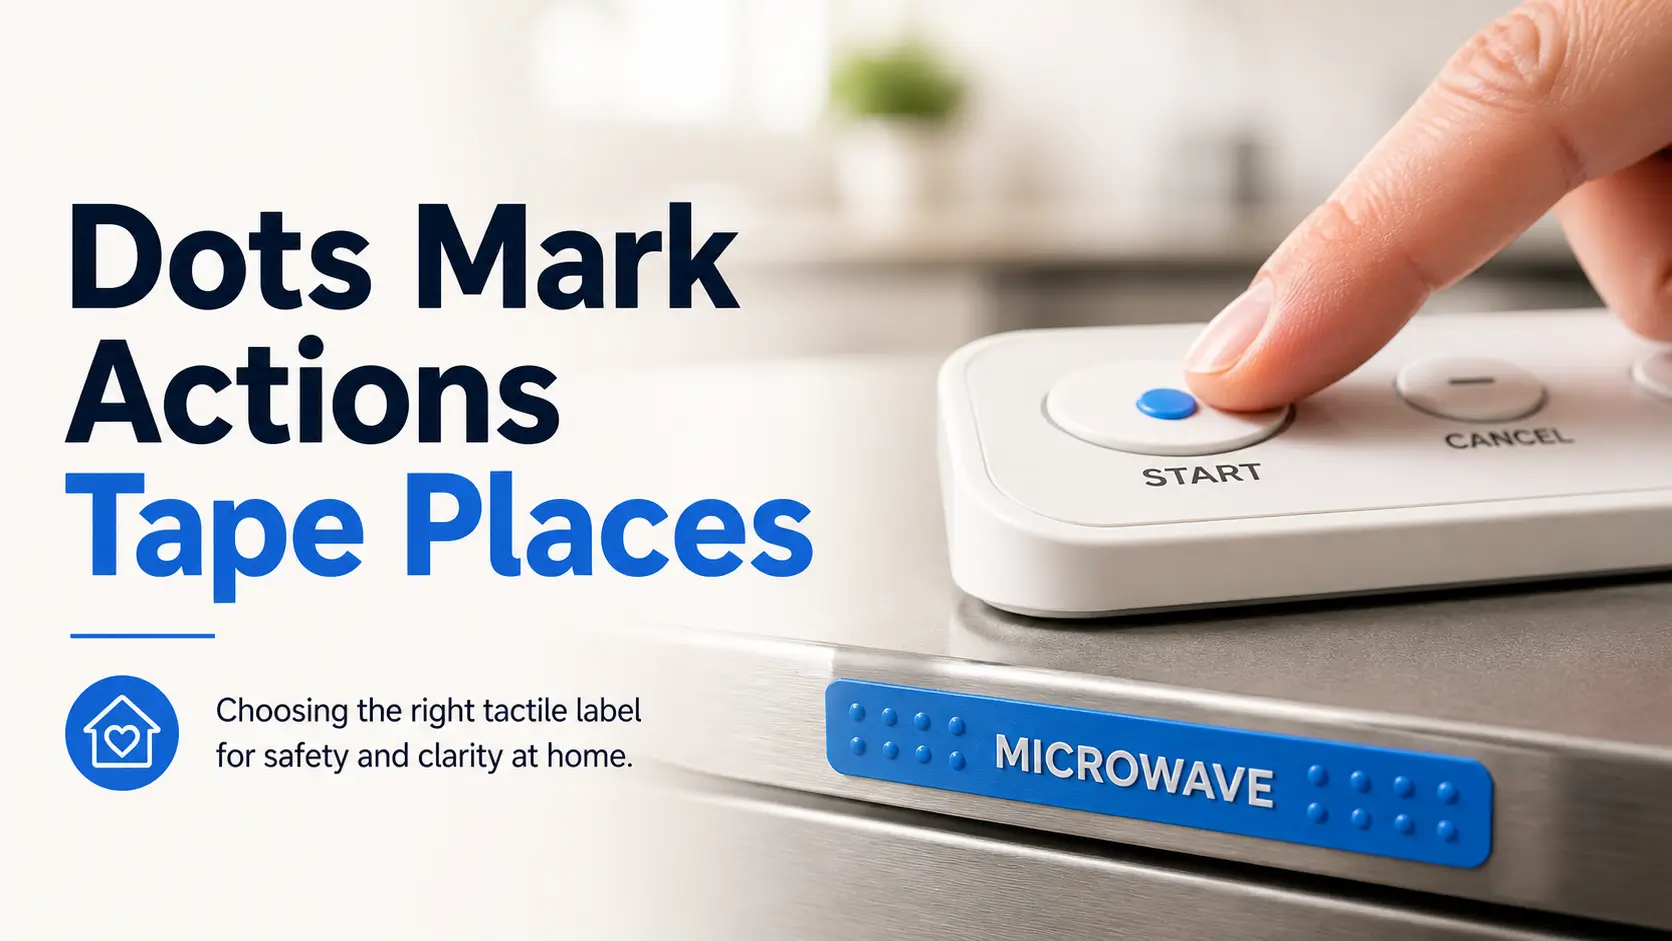
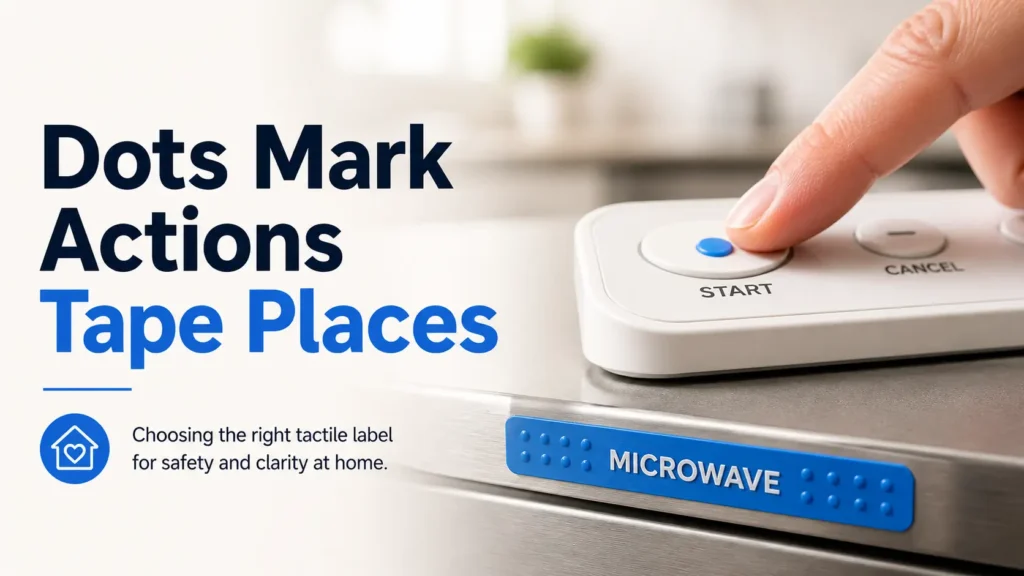
The Rule is Simple: Dots mark actions. Tape marks places. Risky items need confirmation through large print, audio, or professional guidance. Start with one high-friction object today.
Table of Contents
This article is for home organization and accessibility planning only. It does not replace low vision rehabilitation, occupational therapy, orientation and mobility training, pharmacist guidance, appliance manuals, or medical care. Any labeling system used for medication, stove controls, cleaning chemicals, sharp tools, emergency devices, or heat appliances should be tested slowly with a backup confirmation method before anyone relies on it alone.
The Tiny Label Choice That Can Change a Morning
Why “just add a sticker” is not enough
A label is not decoration. For someone with low vision, it is a small agreement between the hand, the memory, and the room. A bump dot on a microwave button may mean “start.” A strip of tactile tape on a pantry shelf may mean “breakfast foods live here.” Same drawer, very different grammar.
I once helped reorganize a kitchen where every important button had the same clear dot. The user could find the dots, yes. But the dots all said the same thing: “good luck.” That is not a system. That is a tiny obstacle course wearing adhesive.
The real question: exact touch point or textured boundary?
Before comparing bump dots vs tactile tape for low vision labeling, ask one question:
Do I need to find one exact control, or do I need to understand an area?
- Exact control: use a bump dot.
- Edge, path, shelf, cord, or zone: use tactile tape.
- Dangerous item: use a backup method too.
- Shared home: write down the rule so everyone follows it.
Bump dots and tactile tape are not rivals, they are different tools
Bump dots are punctuation. They say, “press here,” “turn to here,” or “this is the favorite setting.” Tactile tape is a boundary line. It says, “this row starts here,” “this cord belongs here,” or “do not cross this hot edge.”
That distinction matters because low vision labeling can affect real safety. APH VisionAware describes tactile dots as useful for marking stove and oven dial positions. Perkins School for the Blind has also discussed bump dots as tactile labels for nonvisual identification, including medication-related use. Those ideas are practical, but they are not permission to label risky items casually. The kitchen does not grade on vibes.
- Bump dots are best for exact touch points.
- Tactile tape is best for boundaries and zones.
- High-risk items need backup confirmation.
Apply in 60 seconds: Pick one confusing object and say out loud: “Do I need a point or a boundary?”
Bump Dots Work Best When One Touch Must Say “This Button”
Use bump dots for buttons, knobs, dials, switches, and remote controls
Bump dots shine when the finger needs a landing pad. They work beautifully on a microwave “start” button, a washing machine’s regular cycle, a thermostat up/down control, a TV remote power button, or the top of a frequently used charger block.
Their gift is precision. One raised dot can reduce the little searching motion that eats 5 seconds here and 12 seconds there. That may sound tiny until you watch someone repeat that motion 40 times a day. Independence is often built from very small refunds. It is also one reason small fixes should respect low vision fatigue, because every unnecessary search can quietly spend energy the person needed for something better.
Choose raised, flat-top, clear, or colored dots based on touch and contrast
Not every bump dot feels the same. A tall dome is easy to notice but may catch on cleaning cloths. A flat-top dot may feel calmer under the finger. Clear dots blend visually, which can be nice in shared spaces. Colored dots add contrast for people who still use some vision.
For low vision users who combine touch and sight, color can matter. A black dot on a white appliance, a bright orange dot on a dark remote, or a clear dot on a glossy black surface can each behave differently. There is no universal winner. There is only the dot your fingers and eyes can find quickly.
Where one dot beats five labels
One dot on the microwave’s “add 30 seconds” button may be more useful than labeling every button. One dot on the stove dial’s most-used setting may be safer than a constellation of dots around the entire control panel. A label should reduce decisions, not host a committee meeting.
| Use case | Why dots help | Caution |
|---|---|---|
| Remote control | Marks power, volume, or home button | Avoid marking too many buttons |
| Microwave | Finds start or quick-time control | Confirm heat settings before relying on touch |
| Keyboard | Adds reference points beyond F and J | Do not block key movement |
| Washer dial | Marks the everyday cycle | Recheck after cleaning or vibration |
Neutral next step: Mark only the one control that causes the most daily hesitation, then test it three times.
The open-loop test: can you find it without hunting?
After placing a bump dot, close your eyes or look away. Let your hand approach the item naturally. Do not perform a careful laboratory poke. Use the same tired, distracted reach you use when the kettle is shouting and the dog has entered negotiations.
If your finger lands on the dot within about 2 seconds, it is probably placed well. If your hand searches, circles, or bumps into nearby controls first, move the dot. The test is not whether the dot exists. The test is whether the body understands it.
Tactile Tape Wins When the Label Needs a Line, Edge, or Zone
Use tactile tape for shelves, drawer edges, cords, bins, and containers
Tactile tape is the better choice when information stretches. A shelf edge. A drawer lip. A power cord that must not be confused with another cord. A storage bin that belongs to medical supplies, sewing tools, snacks, pet items, or paperwork.
Think of tape as a rail in a miniature train station. It helps the hand travel, not just land. That makes it useful for organization, especially in rooms where objects move and multiply while no one admits responsibility. I have never seen a cable drawer that did not secretly want to become seaweed.
Why tape helps with “where it starts and ends”
A dot tells you where something is. Tape can tell you how far it goes. That is valuable for pantry shelves, closet sections, drawer dividers, storage bins, and appliance zones. A strip along the left edge of a drawer might mean “daily items.” A strip along the back edge might mean “backup supplies.”
For low vision labeling, this reduces guesswork. Instead of touching each bottle, you can find the zone first, then identify the item with another method: large print, contrast, audio label, Braille, shape coding, or a bump dot.
Texture matters: smooth, ridged, rubbery, or high-contrast
Tactile tape comes in many personalities. Some tape feels rubbery. Some is ridged. Some is gritty enough to announce itself like a gravel road. Some offers high visual contrast. The best texture depends on the surface, the user’s finger sensitivity, and whether the tape will face water, heat, oil, soap, or regular cleaning.
For wet areas, adhesive quality matters. For high-touch areas, edge lifting matters. For shared households, visual contrast may help everyone follow the same system. The label should not become a private language that only one exhausted person can translate.
Here’s what no one tells you: tape can become clutter by touch
Tape can overrun a home faster than enthusiasm at a craft store. A strip here, a strip there, one more strip because it seemed wise at 11:42 p.m. Suddenly every drawer edge has texture, and the fingers stop noticing anything.
Tactile Labeling Decision Map
Use a bump dot for press, start, stop, favorite setting, or orientation.
Use tactile tape for shelf borders, drawer sections, cords, and storage areas.
Pair touch with large print, audio, pharmacist support, or caregiver verification.
Remove labels that do not reduce hesitation within 2 seconds.
Bump Dots vs Tactile Tape: A Room-by-Room Decision Tree
Kitchen: stove, microwave, pantry, fridge, and measuring tools
The kitchen is where tactile labeling earns its keep and also where overconfidence can become risky. Use bump dots for exact controls: microwave start, favorite timer button, dishwasher start, or one common oven setting. Use tactile tape for pantry shelf zones, measuring cup handles, drawer edges, and container rows.
For stoves and ovens, keep the system simple. APH VisionAware describes marking common dial settings with tactile dots, including a common oven temperature. That can be useful, but test it with supervision if the user is new to the setup. For related kitchen safety decisions, compare labels with other supports such as safe stove knob covers for seniors when knobs are easy to bump, twist, or misread. Heat is not the place for improvisational jazz.
Bathroom: toiletries, hot/cold controls, razors, and cleaning products
The bathroom asks for moisture-aware labeling. Bump dots may help distinguish shampoo from conditioner if the bottles stay put and feel different. Tactile tape can mark a shelf zone for daily toiletries. But razors, medicine, and cleaning sprays need stronger separation than touch markers alone.
One practical rule: store cleaning products away from personal care products. A tactile label on the wrong bottle is a mistake. A separate location is a system. If faucet confusion is part of the daily problem, a focused guide to tactile faucet marking can help you think beyond “hot” and “cold” stickers.
Bedroom: chargers, closet sections, drawers, and alarm controls
Bedrooms are ideal for tape zones. Mark the edge of a drawer for socks, the left side of a closet rod for work clothes, or a charging station boundary on a nightstand. Use bump dots on alarm controls or a favorite lamp switch.
I like bedroom systems because they reduce friction before the day has had a chance to become noisy. The first 10 minutes of a morning should not require a treasure map. If the nightstand is the trouble spot, low vision bedside organization can pair beautifully with tactile tape, lighting, and consistent object placement.
Home office: keyboard keys, cables, folders, and device ports
For keyboards, bump dots can add reference points. Many keyboards already have raised marks on F and J, but custom dots may help with shortcut keys, number pads, or assistive software controls. For cables, tactile tape is usually better. Wrap one texture around the laptop charger and another around the phone cable, or mark a cord path along the desk edge.
Laundry area: washer settings, detergent, dryer controls, and fabric care
Laundry machines love tiny icons. Bump dots can mark the everyday cycle, start button, or temperature setting. Tactile tape can mark detergent placement or the edge of a shelf. For detergent and bleach, do not rely on similar bottles with similar tactile marks. Separate them physically and use clear backup labels.
- Kitchen: mark fewer controls and test carefully.
- Bathroom: separate risky products by location.
- Office and laundry: use dots for controls and tape for zones.
Apply in 60 seconds: Choose one room and list the three objects that cause the most hesitation.

Don’t Label Everything: The Mistake That Makes Touch Slower
Too many textures can turn a drawer into static
The fastest way to ruin a tactile system is to make every object equally important. When everything has texture, nothing has meaning. The hand starts receiving noise instead of information.
This happens often with loving caregivers. Someone wants to help, buys a variety pack, and labels the home with the energy of a person organizing a moon landing. The intention is tender. The result can be a drawer full of Morse code with no dictionary.
The three-label rule for one object
For most objects, use no more than three tactile signals. One for orientation, one for the main action, and one for caution if needed. More than that can slow the user down.
- Remote: power, volume up, home button.
- Microwave: start, stop, 30-second button.
- Drawer: front edge, daily zone, backup zone.
- Medication area: location marker, large print, audio or pharmacist label.
Use contrast only where vision still helps
Low vision is not one thing. Some people benefit from high contrast. Some rely mostly on touch. Some need large print, lighting changes, magnification, audio labels, Braille, or training. A bright dot may help one person and be visually irrelevant for another.
Ask what the user actually uses: touch, residual vision, memory, audio, routine, or a combination. A useful label meets the person where they are, not where the packaging copy imagines them to be.
Let’s be honest: the label you forget is the label that failed
A system should be memorable after a normal week. If the user cannot remember what a texture means, simplify it. If a caregiver must explain it every day, simplify it. If the label only makes sense when everyone is rested, fed, and emotionally polished, simplify it twice.
| Question | Yes | No |
|---|---|---|
| Is it used at least weekly? | Consider labeling | Store consistently instead |
| Does confusion create safety risk? | Use backup confirmation | Use a simple marker |
| Can the user identify it in 2 seconds? | Keep the label | Move, change, or remove it |
Neutral next step: Remove one label that no longer earns its keep.
Who This Is For / Not For
Good fit: low vision users who still use touch, memory, and contrast together
This guide is useful when a person can learn and remember tactile patterns, safely test labels, and combine touch with other cues. It works especially well for familiar homes where routines already exist. A label can strengthen a habit that is almost working.
Good fit: caregivers building a safer shared home system
Caregivers often need a practical starting point. Bump dots and tactile tape are inexpensive, easy to test, and reversible on many surfaces. They can help a home feel less like a maze and more like a set of friendly handrails.
But the user should lead the system whenever possible. The person who uses the label is the expert on whether it works. Everyone else is stage crew. For families learning that balance, offering help to someone with low vision is often less about doing more and more about asking better questions.
Good fit: people adapting appliances, remotes, bottles, and storage
Common targets include appliance buttons, remotes, drawers, pantry shelves, bathroom bottles, cable stations, and laundry controls. These are exactly the places where repeated hesitation can drain energy.
Not enough by itself: new vision loss, medication confusion, or unsafe cooking setup
If vision loss is new, changing, or emotionally overwhelming, tactile labels may help but should not be the entire plan. Low vision rehabilitation, occupational therapy, assistive technology training, and professional home safety assessment can prevent avoidable risks.
Not ideal: users who need Braille, audio labels, large-print systems, or professional training first
Some people need Braille labels, talking prescription labels, smartphone-based audio tags, magnification tools, improved lighting, or structured training. Bump dots and tactile tape are useful tools. They are not the whole orchestra.
Show me the nerdy details
Tactile labeling works by reducing search cost. A useful marker must be detectable, distinguishable, memorable, and placed where the hand naturally travels. Detectable means the user can feel it without strain. Distinguishable means it does not feel like every other marker nearby. Memorable means the pattern has a simple rule. Natural placement means the user does not need to perform a special movement to find it. When one of those four elements fails, the label may exist physically but fail functionally.
The Best Label Is the One Your Fingers Understand Fast
Shape coding: dots, strips, squares, rings, and raised lines
Shape coding is the difference between “there is texture” and “this texture has meaning.” A round dot might mean power. A short strip might mean stop. A square might mean caution. A ring around a bottle neck might mean morning use.
Keep the shape vocabulary small. Three or four shapes are plenty for most homes. A system with 12 symbols may feel clever on paper and behave like a tiny bureaucracy in the drawer.
Location coding: top-right, center, left edge, bottom corner
Location coding may be even more important than shape. A dot on the top-right corner can mean one thing across several objects. A strip on the left edge of a shelf can always mean “daily use.” Consistent placement lets the hand learn patterns without re-reading every object from scratch.
Category coding: one texture for food, another for cleaning items
Category coding works well for storage. Use one tactile tape texture for pantry categories and a completely different location for cleaning supplies. Do not simply put “food texture” and “chemical texture” in the same cabinet and hope everyone performs perfectly. Real people sneeze, rush, and answer the phone while holding the wrong bottle.
The two-second rule: find it, confirm it, use it
The two-second rule is simple. The user should be able to find the marker, confirm what it means, and use the item without a long search. If it takes longer, the label may still be useful, but the system needs adjusting.
- Use a small shape vocabulary.
- Place markers consistently.
- Test labels during real routines, not perfect conditions.
Apply in 60 seconds: Choose one meaning for one shape before adding another label.
Common Mistakes That Make Low Vision Labeling Riskier
Mistake 1: putting labels where fingers naturally miss them
The best label in the wrong spot is a very small sculpture. Put tactile markers where the hand already goes. On a remote, that may be the button surface. On a drawer, it may be the front lip. On a bottle, it may be the cap or shoulder.
Mistake 2: using identical dots for opposite settings
If one dot means “hot” and another identical dot means “cold,” the system is asking for trouble. Opposites need different shapes, different locations, or another confirmation method. The hand should not need to solve a riddle over a faucet.
Mistake 3: labeling dangerous items without a backup system
Medication, cleaning chemicals, heat appliances, sharp tools, and emergency devices need more than a tactile shortcut. Pair tactile markers with large print, audio labeling, separated storage, pharmacist support, or caregiver confirmation.
Mistake 4: ignoring heat, water, oil, and cleaning wear
Adhesive is not magic. Heat can soften it. Water can lift it. Oil can loosen it. Cleaning cloths can catch edges. Before trusting a label, check whether it stays put after normal use. A dot that slides from one button to another is not a label. It is a tiny saboteur.
Mistake 5: changing the system without telling everyone at home
Shared homes need shared rules. If one person moves the tactile tape or replaces dots with a different shape, the user may lose trust in the whole system. Put the label legend in one drawer, cabinet, or phone note. Keep it boring. Boring is excellent when safety is involved.
| 1 | List the 5 objects that cause the most hesitation. |
| 2 | Note whether each object needs a point, edge, zone, or warning. |
| 3 | Identify heat, water, oil, chemical, or medication risks. |
| 4 | Decide who must understand the system besides the user. |
Neutral next step: Use this list before comparing bump dots, tactile tape, Braille labels, or audio tags.
Appliance Labels Need Extra Caution, Not Extra Confidence
Stove and oven markings should be simple, tested, and consistent
Stove and oven labels need restraint. Mark common settings only. Test them when the appliance is off. Then test again with a trusted person present if there is any uncertainty. If the user cannot confidently identify off, low, medium, high, and a common oven setting, get professional help before relying on tactile labels.
A common setup is one raised marker on the appliance panel and one on the dial, so the user can align them. That can work, but only when the dial orientation is stable and the marker does not shift after cleaning.
Microwave buttons: mark common controls, not every possible feature
Microwaves are button jungles. Most people use a tiny fraction of the controls. Mark the start button, stop/cancel, and maybe the 30-second shortcut. Leave the potato-fish-defrost-opera settings alone unless they are truly used. The microwave already has enough opinions. If that one button is the daily sticking point, tactile dots for microwave buttons can be a more focused next read.
Washer and dryer settings: label the cycle you actually use
For laundry, mark the usual cycle and start button. If multiple people use different settings, make a household rule. Bump dots on controls plus tactile tape on detergent placement can make the laundry area easier without turning the machine into a textured hedgehog.
When tactile tape near heat is the wrong move
Tactile tape may not belong near hot surfaces, vents, burners, or areas cleaned with strong products. Tape edges can lift, adhesives can soften, and texture can trap grime. Use appliance-safe methods and consult the manual when heat is involved.
The quiet danger: a label that slides after cleaning
A shifted label is worse than no label because it carries false confidence. Check labels after wiping, steam exposure, vibration, or heavy use. Build a weekly inspection into the routine. It takes less than 2 minutes and can prevent a deeply avoidable mistake.
- Mark common settings only.
- Keep tape away from unsafe heat zones.
- Inspect labels after cleaning and vibration.
Apply in 60 seconds: Check one appliance label and confirm it has not shifted.
Medication, Food, and Chemicals Need a Higher Standard
Why bump dots alone may not be safe for pill bottles
Medication labeling is where this conversation becomes serious. A bump dot can help distinguish one bottle from another, but it cannot communicate dose changes, refill dates, warnings, interactions, expiration dates, or timing by itself.
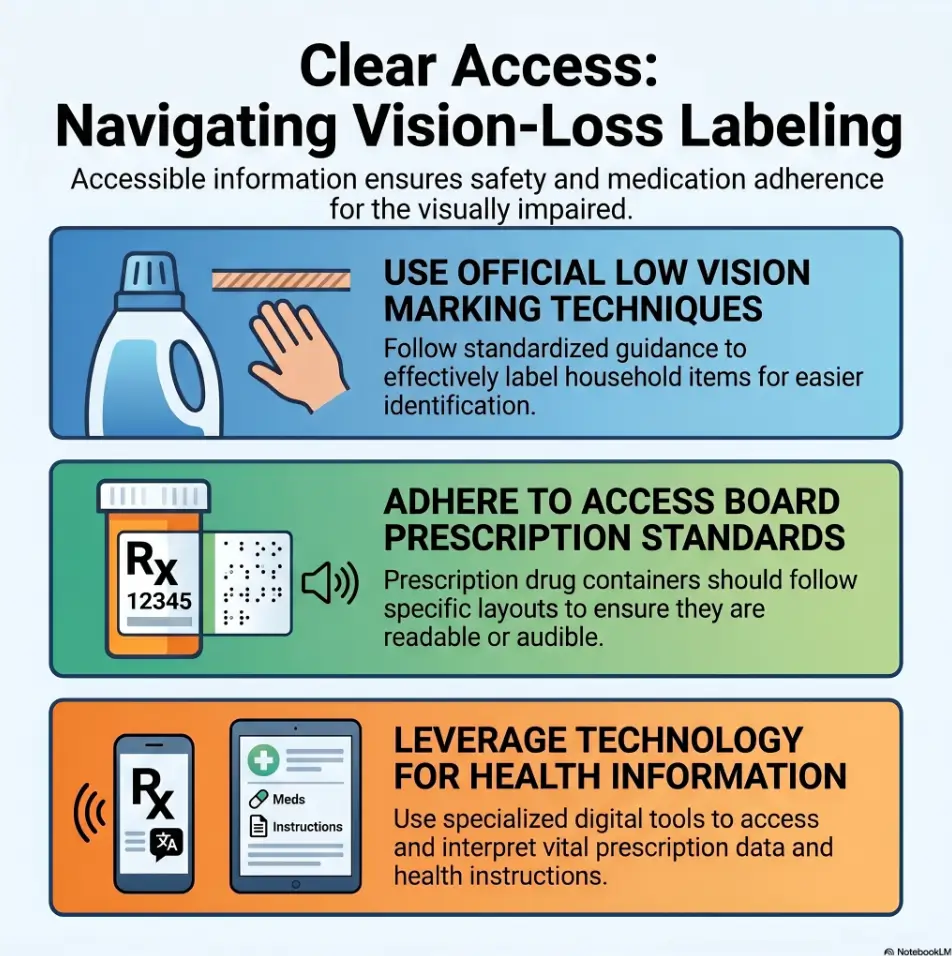
The American Foundation for the Blind has long emphasized that prescription label access matters because printed medication labels can be difficult or impossible for people with vision loss to use safely. The U.S. Access Board has also provided guidance related to accessible prescription drug container labels. In plain kitchen-table language: pill bottles deserve a better system than “one dot means the important one.” For tactile placement specifically, review pill bottle tactile label placement before putting markers on caps, shoulders, or storage bins.
Pair tactile labels with large print, audio, color contrast, or pharmacist support
Ask the pharmacy about accessible options. Depending on the pharmacy and service, options may include large-print labels, talking prescription labels, Braille, smartphone-readable systems, or other accessible prescription information. Not every pharmacy offers every option, so ask directly and document what works. A prepared low vision pharmacy help script can make that conversation easier when the counter is busy and your brain has already opened 19 tabs.
Separate look-alike bottles before labeling them
If two bottles feel alike, separate them before adding tactile markers. Use different storage locations, different containers approved for the purpose, or a medication organizer recommended by a pharmacist or clinician. The label should support a safe layout, not compensate for a confusing one.
Cleaning products need location rules, not just touch markers
Cleaning chemicals should not live beside food, medicine, or personal care items. Tactile tape can mark a cleaning supply zone, but the location is the safety feature. Store hazardous products where they are clearly separated and consistently returned.
| Tier | What changes | Best for |
|---|---|---|
| 1 | Single bump dot or tape marker | Low-risk controls and storage |
| 2 | Touch plus high contrast | Users with helpful residual vision |
| 3 | Touch plus large print or audio | Medication, food, and shared homes |
| 4 | Pharmacist or clinician-supported labeling | Prescription safety concerns |
| 5 | Low vision rehab or OT home setup | New vision loss or unsafe routines |
Neutral next step: Move any medication or chemical labeling task up one tier if a mistake could cause harm.
Build a Hybrid System: Dots for Actions, Tape for Places
Use dots for “press,” “turn,” “start,” “stop,” and “favorite setting”
A strong hybrid system begins with action points. Put bump dots where the finger must do something precise: press start, stop a timer, turn to a favorite setting, locate the power button, or orient a device. Each dot should have a job that can be explained in one short sentence.
Use tape for “edge,” “section,” “danger zone,” and “belongs here”
Use tactile tape for spatial information. Mark the edge of a shelf, the boundary of a drawer section, the cord path behind a desk, or the location where a device returns after charging. Tape is especially useful when the problem is not identification but placement.
Create a household label legend in one drawer or cabinet
A label legend sounds formal, but it can be simple. One index card. One phone note. One inside-cabinet list. Write the rule: “Round dot means start. Short strip means stop. Ridged tape means daily-use shelf.”
This is especially helpful when family, aides, visiting nurses, cleaners, or guests interact with the space. The home should not require oral tradition to operate.
Test the system at night, tired, and in a hurry
Testing in ideal conditions is polite fiction. Test labels when lighting is poor, when the user is tired, and when the routine is realistic. Do not create danger during testing, of course. But do observe whether the system survives ordinary human imperfection.
- Dots answer “what do I press or turn?”
- Tape answers “where does this begin or belong?”
- A legend keeps caregivers from accidentally rewriting the system.
Apply in 60 seconds: Write a three-line legend for the labels already in your home.
Mini Calculator: How much labeling should you add this week?
Use this quick estimate to avoid over-labeling. Enter only low-risk items first. For medication, heat appliances, chemicals, or new vision loss, seek professional guidance.
Start with 3 low-risk items this week. Put high-risk items on a backup-confirmation list, not a casual sticker list.
Neutral next step: Label fewer items than your enthusiasm wants, then test before expanding.
When to Seek Help Before Relying on Labels
Vision changes are new, sudden, or worsening
New or worsening vision changes deserve professional attention. A labeling system can make a home easier to navigate, but it should not delay care. If vision changes suddenly, contact a medical professional promptly. For a broader safety lens, review senior vision changes warning signs before assuming the home setup is the only problem.
Medication errors, missed doses, or bottle confusion have happened
If there has already been a medication error, missed dose, duplicate dose, expired medication issue, or bottle confusion, treat that as a sign to upgrade the system. Ask a pharmacist about accessible prescription information and medication organization options.
Cooking, bathing, or stairs feel unsafe
Labels can help with cooking and bathing routines, but they cannot fix every safety issue. If heat, water, balance, mobility, or stairs feel unsafe, occupational therapy or low vision rehabilitation may provide practical training and home modifications. For bathroom surfaces where labels meet slipping risk, anti-slip shower strips placement may be a better first fix than adding more tactile cues.
A caregiver and the user disagree about the labeling system
Disagreement matters. If a caregiver thinks the setup is clear but the user feels confused, the system is not clear. The user’s experience should carry the most weight. Labels are not installed for the cabinet. They are installed for the person.
You need training from a low vision clinic, occupational therapist, or orientation and mobility specialist
Professional support can help match labels with lighting, contrast, magnification, audio tools, mobility needs, and daily routines. This is not failure. It is craftsmanship. A good home system is built with the user’s real life in mind.

FAQ
Are bump dots better than tactile tape for low vision?
Bump dots are better for exact touch points, such as buttons, dials, switches, and remote controls. Tactile tape is better for edges, shelves, cords, containers, and zones. Many homes need both because dots and tape answer different questions.
Can bump dots be used on stove knobs?
Yes, bump dots can be used to mark stove or oven controls, but extra caution is needed. Mark only common settings, test the setup when the appliance is off, and confirm that labels do not shift after cleaning. If cooking feels unsafe, seek low vision rehabilitation or occupational therapy support.
Is tactile tape safe near heat or water?
Not always. Heat, steam, water, oil, and cleaning products can loosen adhesive or change texture. Avoid placing tactile tape near burners, vents, hot surfaces, or wet areas unless the material is appropriate for that environment and checked regularly.
What is the best way to label medication for low vision?
Medication should not rely on bump dots alone. Pair tactile markers with pharmacist-supported accessible labels, large print, audio labels, Braille when appropriate, separated storage, or caregiver confirmation. Ask the pharmacy what accessible prescription options are available. If reading the printed insert is also difficult, use a separate strategy for reading medicine leaflets with low vision so warnings and side effects are not hidden in tiny paper fog.
Should I use clear or colored bump dots?
Use clear dots when you want a discreet tactile marker and visual contrast is not important. Use colored dots when residual vision helps the user find controls faster. The best choice depends on the person’s vision, lighting, surface color, and touch sensitivity.
How do I stop tactile labels from falling off?
Clean and dry the surface before applying labels, avoid oily or textured surfaces when possible, press firmly, and inspect labels after cleaning or heavy use. For high-risk items, do not rely on adhesive alone. Use backup confirmation.
Can tactile tape help organize pantry shelves?
Yes. Tactile tape works well for pantry shelf edges, category zones, and container rows. For example, one textured strip can mark breakfast items and another can mark baking supplies. Keep categories simple so the pantry does not become cluttered by touch. If food dates are also hard to verify, build a companion routine for how to read expiration dates with low vision.
What should caregivers avoid when labeling a home?
Caregivers should avoid labeling everything, changing labels without telling the user, using identical markers for opposite meanings, and labeling dangerous items without backup systems. The person with low vision should test and approve the system whenever possible.
Next Step: Label One High-Friction Object Today
Pick the item you touch daily and hesitate over
Return to the tiny label that opened this guide. It was never really about the sticker. It was about the moment before action: the pause, the search, the slight tightening in the shoulders. That is where a good tactile label gives time back.
Choose one daily object. Not ten. One. A remote. A microwave button. A drawer edge. A charger. A pantry shelf. The best first label is the one that removes a repeated hesitation without adding new risk.
Decide: exact control equals bump dot, boundary equals tactile tape
If the item needs one exact touch point, use a bump dot. If it needs an edge, section, route, or storage zone, use tactile tape. If the item involves medication, heat, chemicals, sharp tools, or emergency use, add backup confirmation and consider professional guidance.
Test it three times before adding more labels
Test the label immediately, then later in the day, then during the real routine. The label should work when the user is not concentrating hard. If it fails, move it. If it succeeds, write down the rule.
Write down the rule so future labels stay consistent
A safe system grows slowly. Dots for actions. Tape for places. Backup for risk. That little rule can turn a confusing home into a readable one, one honest label at a time.
Your 15-minute next step: label one low-risk object today, test it three times, and stop there. Let the system prove itself before it expands.
Last reviewed: 2026-05.
Tags: low vision labeling, bump dots, tactile tape, home accessibility, caregiver safety
Meta description: Bump dots vs tactile tape for low vision labeling: learn when to use each, avoid safety mistakes, and build a clearer home system.